
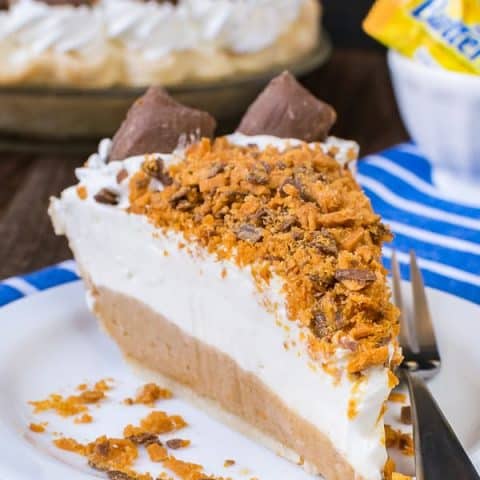
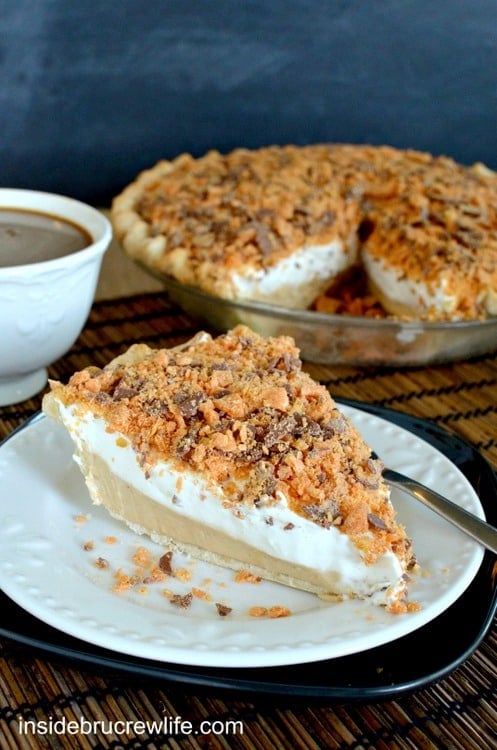
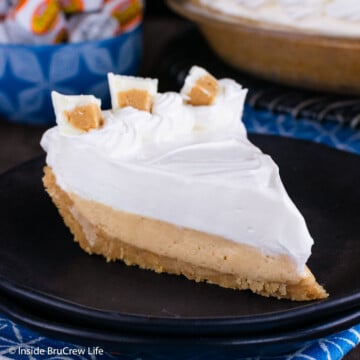
The creamy and crunchy layers in this Peanut Butter Butterfinger Pie will have you going back for more. It is a decadent and easy dessert to make for the holidays.

I still can't believe that the year is almost over. Although the heat and humidity here make it feel like it should still be the middle of summer.
With all the school, church, and work activities, it definitely doesn't feel like the lazy days of summer though. Some days it is more difficult to balance homework, soccer practice, church activities, and dinner, but we are managing just fine.
Thankfully our kids are now old enough to help with house work and dinner prep. Planning ahead and knowing just what we are going to have each night of the week helps too. My husband is good at coming up with our meal list and letting me know what is for dinner.
I am so glad he loves to cook dinner more than I do. Although recently I have been making more of our lean and green meals around here. Maybe the tide has changed...

Of course, most days I still sit and dream up these crazy desserts you see me posting here. My list is getting rather long. I hope your sweet tooth is ready for all these crazy ideas because I have quite a few treats to share with you.
I like to keep crescent rolls or pie crust in our refrigerator just waiting to be used in something like these Cheesecake Nutella Twists or these Nutella Pop Tarts.

The other night I got the urge to make a delicious dessert to end the night with. I don't have many pie recipes on the blog, so I decided to put together a dreamy layer pie starting with a extra refrigerated pie crust we had.
This Peanut Butter Butterfinger Pie didn't last the night because of all the creamy layers. The kids devoured it before I had a chance to even take pictures. Not that I regretted the chance to make it again.
In fact, the huge smiles on all the kids faces when they came home from school and saw it again in the refrigerator was totally worth it.

Tips for making a Peanut Butter Butterfinger Pie:
Bake a refrigerated pie crust ahead of time. Let it cool while you prep the filling. Feel free to use a no bake cookie crust, if you prefer that instead.
Beat the cream cheese until creamy. Add the sour cream and sweetened condensed milk and beat until completely mixed in. Reserve 2 cups.
Add the peanut butter to the filling in the bowl and mix completely. Pour into the bottom of the cooled pie crust.
Fold Cool Whip to the reserved mixture and spread on top of the peanut butter layer. Chill the pie for a few hours.
Swirl the remaining Cool Whip around the edge of the pie. Fill the center with crushed Butterfingers and Butterfinger Bites to the top of the pie right before serving.
One bite of this pie and you will be in dessert heaven. Go right ahead and finish it first, I won't tell anyone that you started with dessert.

More fun ways to bake with Butterfingers candy bars:
- Butterfinger Mousse Cheesecakes
- Butterfinger Cookie Dough Truffles
- Banana Butterfinger Bundt Cake
- Pumpkin Butterfinger Cake
- Butterfinger Reese's Fudge
Recipe
Peanut Butter Butterfinger Pie
The creamy and crunchy layers in this Peanut Butter Butterfinger Pie will have you going back for more. It is a decadent and easy dessert to make for the holidays.
Ingredients
- 1 refrigerated Pillsbury pie crust
- 1 - 8 ounce package cream cheese, softened
- 1 - 14 ounce can sweetened condensed milk
- ¾ cup sour cream
- ¾ cup peanut butter
- 1 - 16 ounce container Cool Whip, thawed & divided
- 1 cup crushed Butterfinger bars
- 12 Butterfinger bites
Instructions
- Preheat the oven to 450°.
- Remove the pie crust from the refrigerator and let sit for 15 minutes on the counter. Gently unroll the pie crust and place in a 9 inch pie plate. Press firmly into the bottom.
- Fold the edges under and crimp. Use a fork to prick the bottom of the crust very well. Bake for 10 minutes. Cool completely.
- In a mixing bowl, beat the cream cheese. Add the sweetened condensed milk and sour cream and beat until creamy. Remove 2 cups of batter and set aside.
- Add the peanut butter to the remaining mixture and beat again. Spoon into the bottom of the cool pie crust.
- Fold 2 cups of Cool Whip into the reserved cream cheese mixture gently. Spoon on top of the peanut butter layer. Refrigerate at least 2 hours to set.
- Use a piping bag and icing tip 1M to pipe Cool Whip swirls around the edge of the pie. Top each swirl with a Butterfinger bite.
- Cover the middle of the pie with the crushed Butterfinger bars right before serving.
Nutrition Information:
Yield: 12 Serving Size: 1Amount Per Serving: Calories: 642Total Fat: 40gSaturated Fat: 21gTrans Fat: 0gUnsaturated Fat: 14gCholesterol: 43mgSodium: 329mgCarbohydrates: 65gFiber: 2gSugar: 48gProtein: 11g
Nutrition facts are an estimate and are not guaranteed to be accurate. If you need special diet advice, please see a registered dietician.

(original photo from August 2013)
* The post and recipe for Peanut Butter Butterfinger Pie was originally published on August 19, 2013. The pictures and post have been updated and republished on November 13, 2018.

Leave a Reply