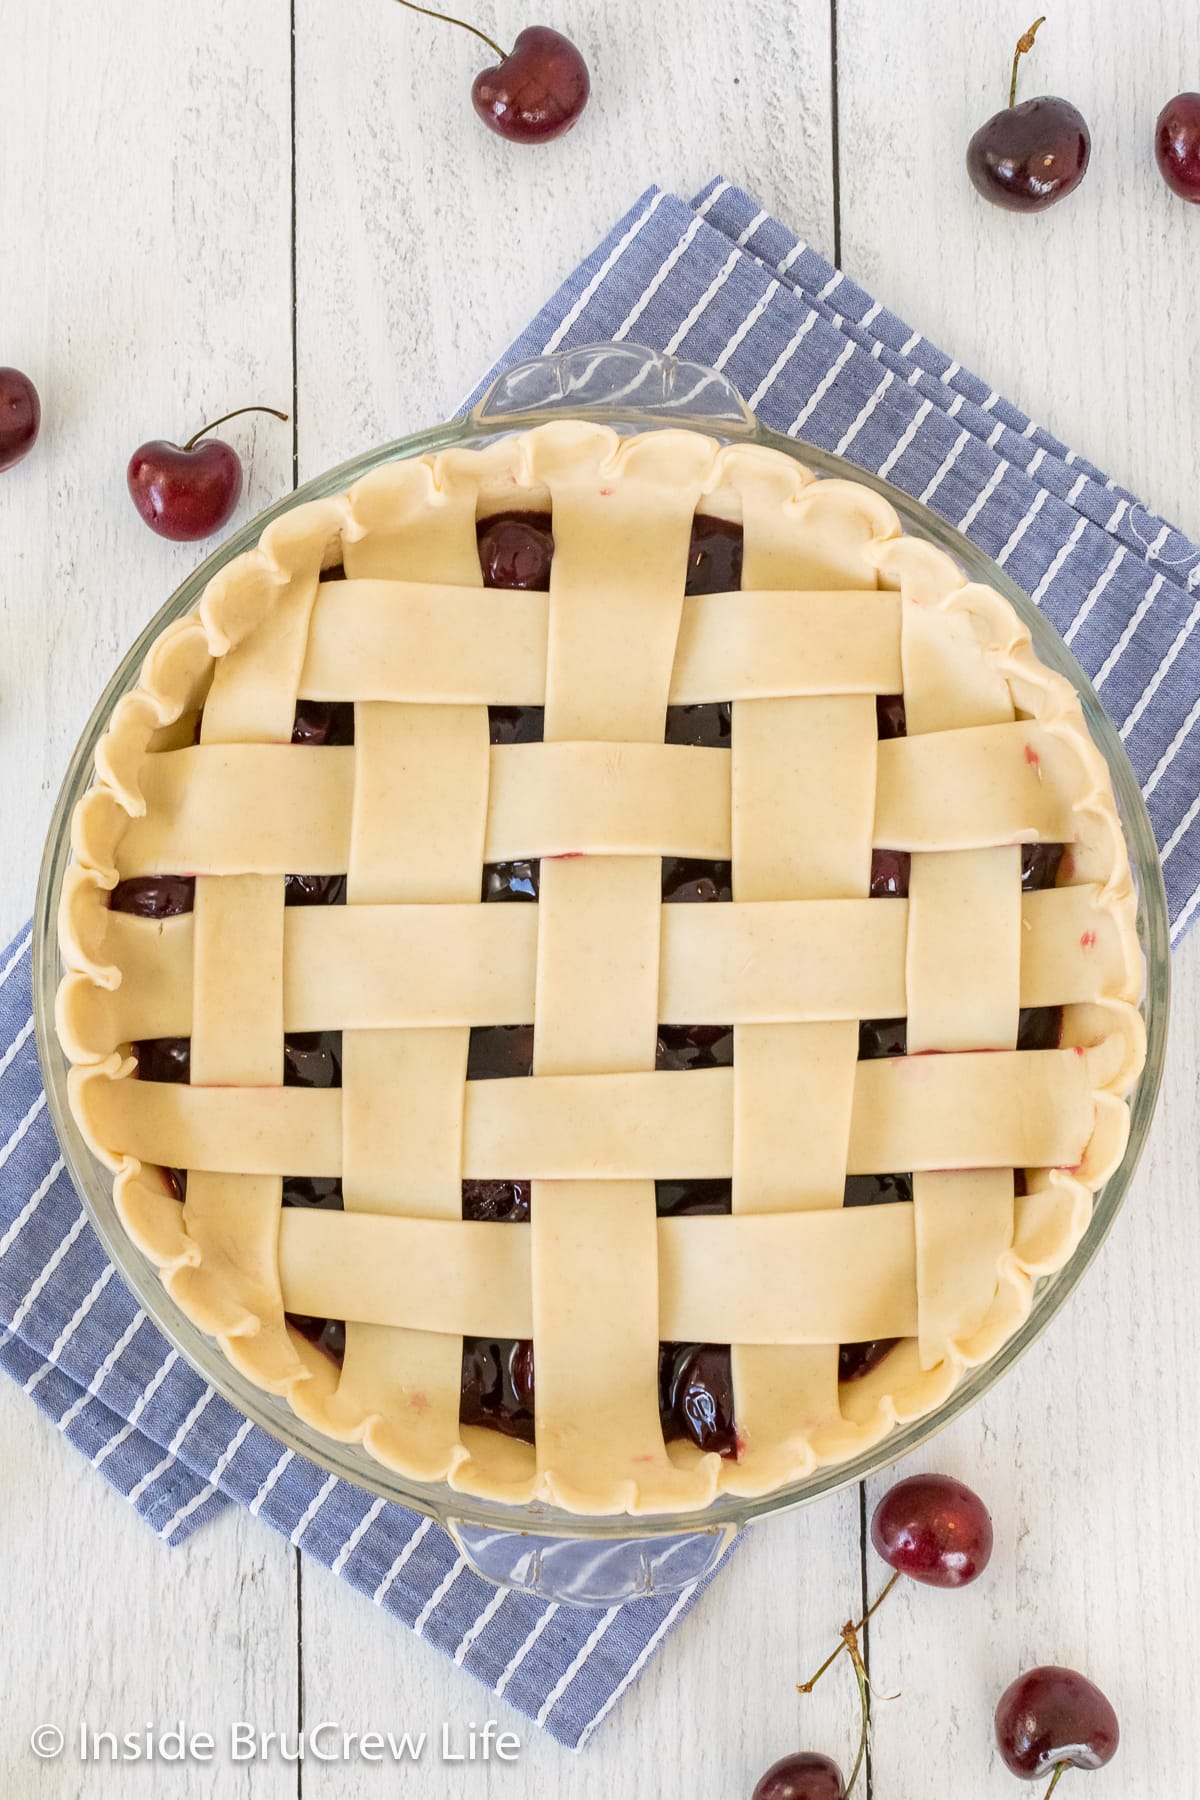
Follow our easy tutorial to learn how to make a lattice pie crust. It's sure to wow guests at your next dinner party. This lattice pattern is surprisingly easy to do and will take your desserts to a whole new level.
Jump to:
Why Make a Lattice Pie
Lattice crusts are one of my favorite ways to make a pie look extra special. Not only does it make desserts look fancy, but it's the secret to making everyone think you're a pro baker.
Creating this beautiful criss cross pattern may seem hard and confusing, but I've got great news! You can do it, no matter what your baking skills are.
Our simple step-by-step instructions are easy to follow and guaranteed to make your dessert the talk of the table.
This type of lattice pie crust is often used on apple pie and cherry pie. Although, it can bring a stunning look to any kind of pie or filling.
Another benefit to adding this type of crust is that it allows steam to escape through the lattice crust vents. This way the filling bakes evenly, and the crust doesn't get soggy.
What You Need
Making a lattice top pie is easier than you think. All you need are a few simple tools that are probably in your kitchen right now.
- Pie Plate - You can use a 9 inch or 9 ½ inch deep dish.
- Pizza Cutter - A sharp knife or pastry wheel also works.
- Rolling Pin - Used to roll out the crust that will be cut into strips.
- Ruler - Use it to create the same size strips and also cut straight lines.
- Pastry Brush - This makes it easy to brush egg whites onto a crust.
- Pie Dough - Feel free to use homemade pie crust or a box of store-bought crusts.
How to Lattice a Pie
Step 1: Prepare the Dough
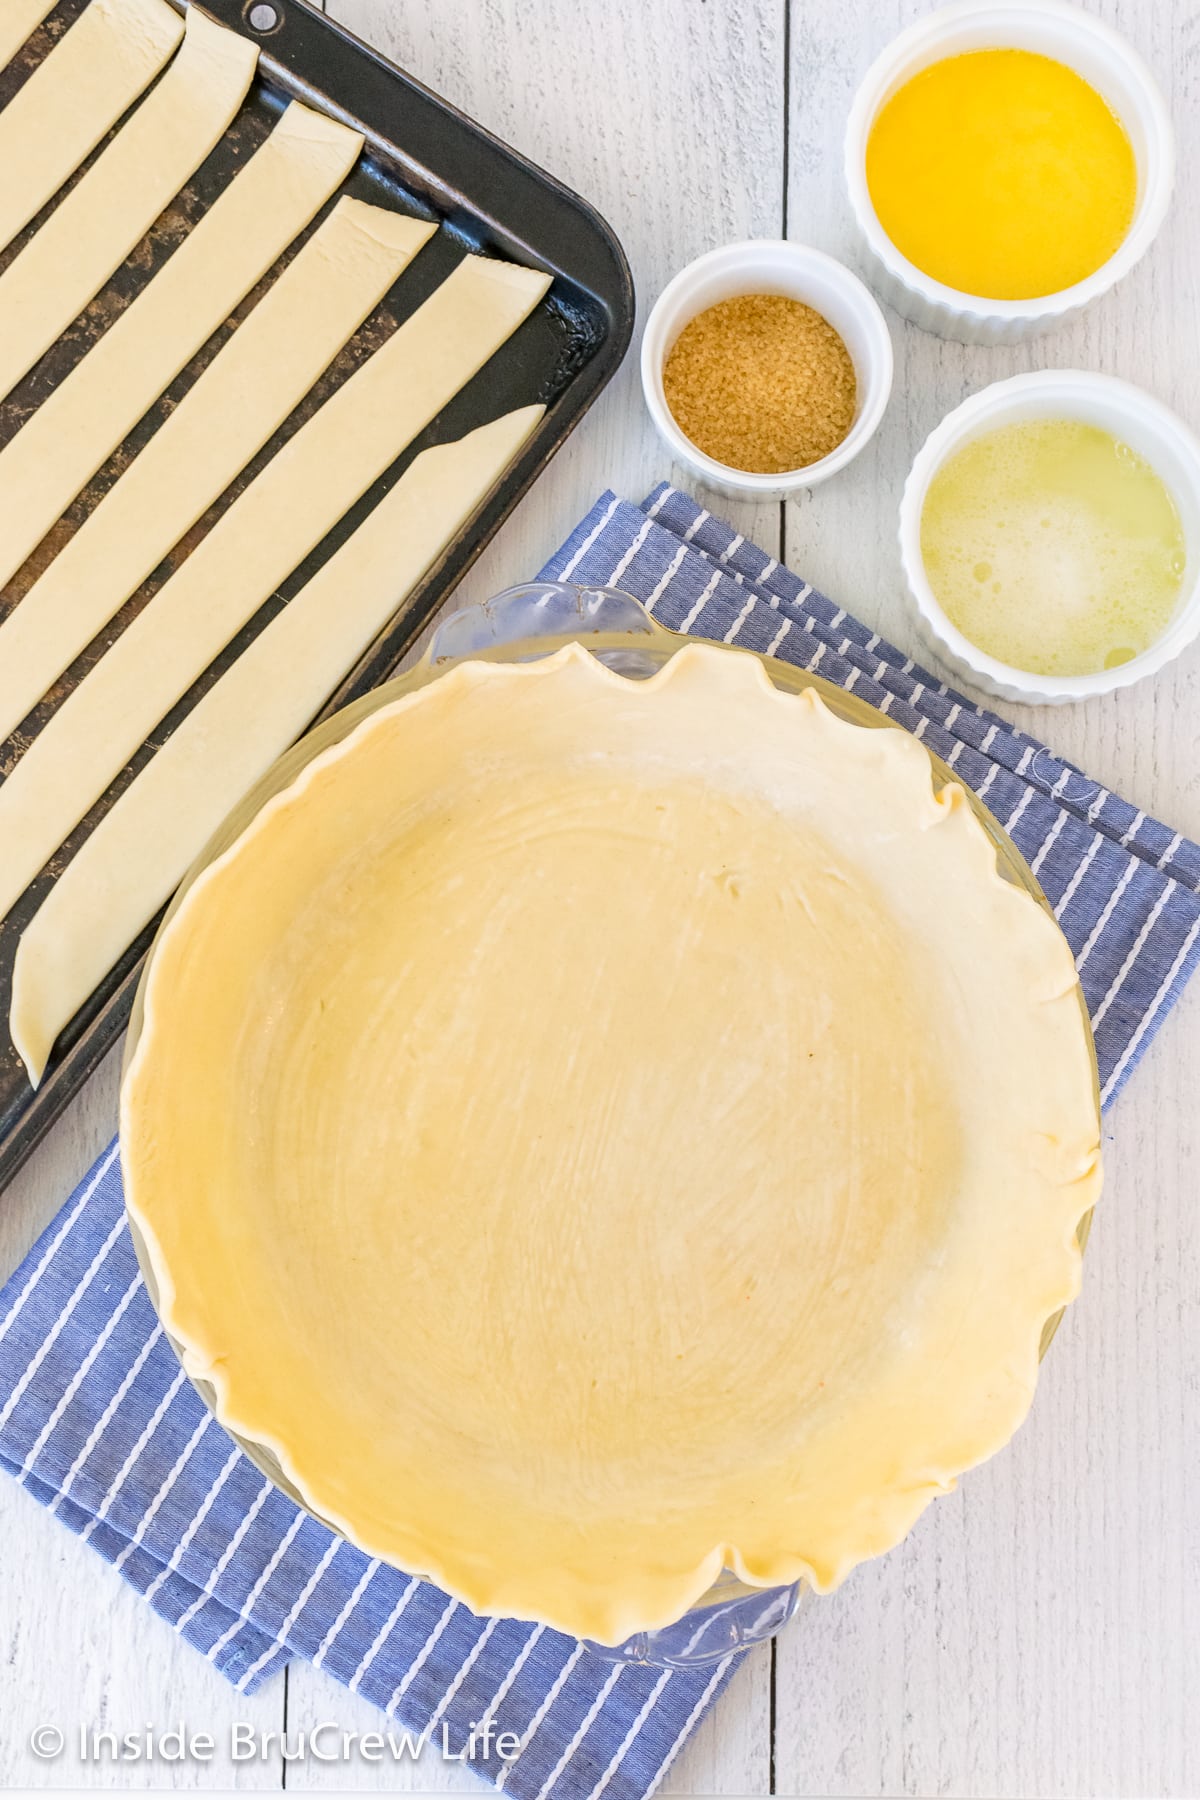
Unroll one pie crust on a lightly floured surface. Use a rolling pin to gently roll it out, so it is larger than your pie plate.
Use a pizza cutter or knife to cut even strips that are 1 inch wide. Place the strips on a pan and place it in the refrigerator, so they stay cold.
Step 2: Fill the Pie Pan
Roll out the other pie crust and place in a pie pan. Do not trim any of the excess crust that may overhang the pan edge.
In a small bowl, whisk an egg white until foamy and brush it over the crust in the pie pan. Refrigerate it for 15 minutes, then spoon your choice of cooled pie filling into the crust.
Step 3: Lay the Strips
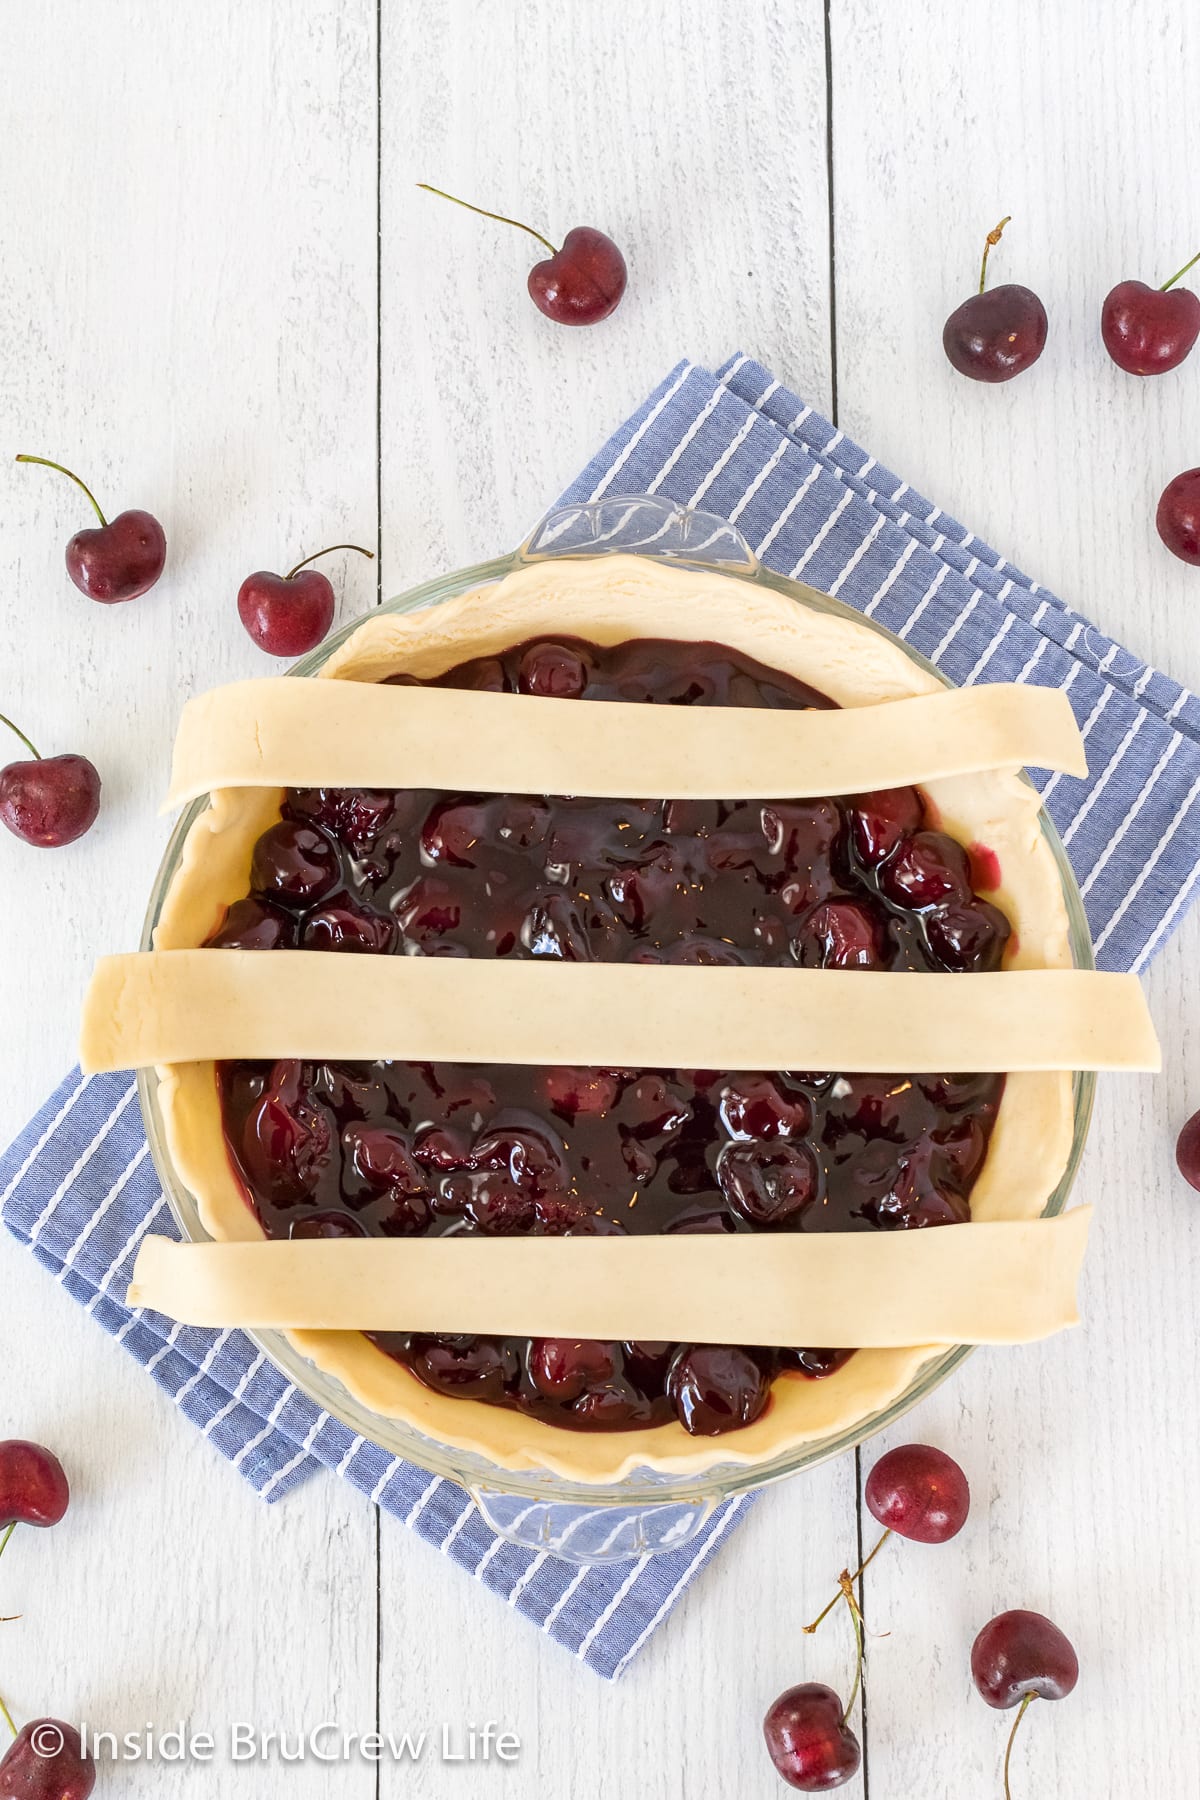
Place three dough strips across the pie plate, leaving space in between for more strips.
Fold two strips in half and place in between the strips already on the pie. Place another long strip of dough vertically down the center of the pie. Unfold the two folded strips, so they lay flat over the vertical line of dough.
BruCrew Tip: Use longer strips for the center of the pie and save the shorter ones for the outside edges.
Step 4: Weave the Dough
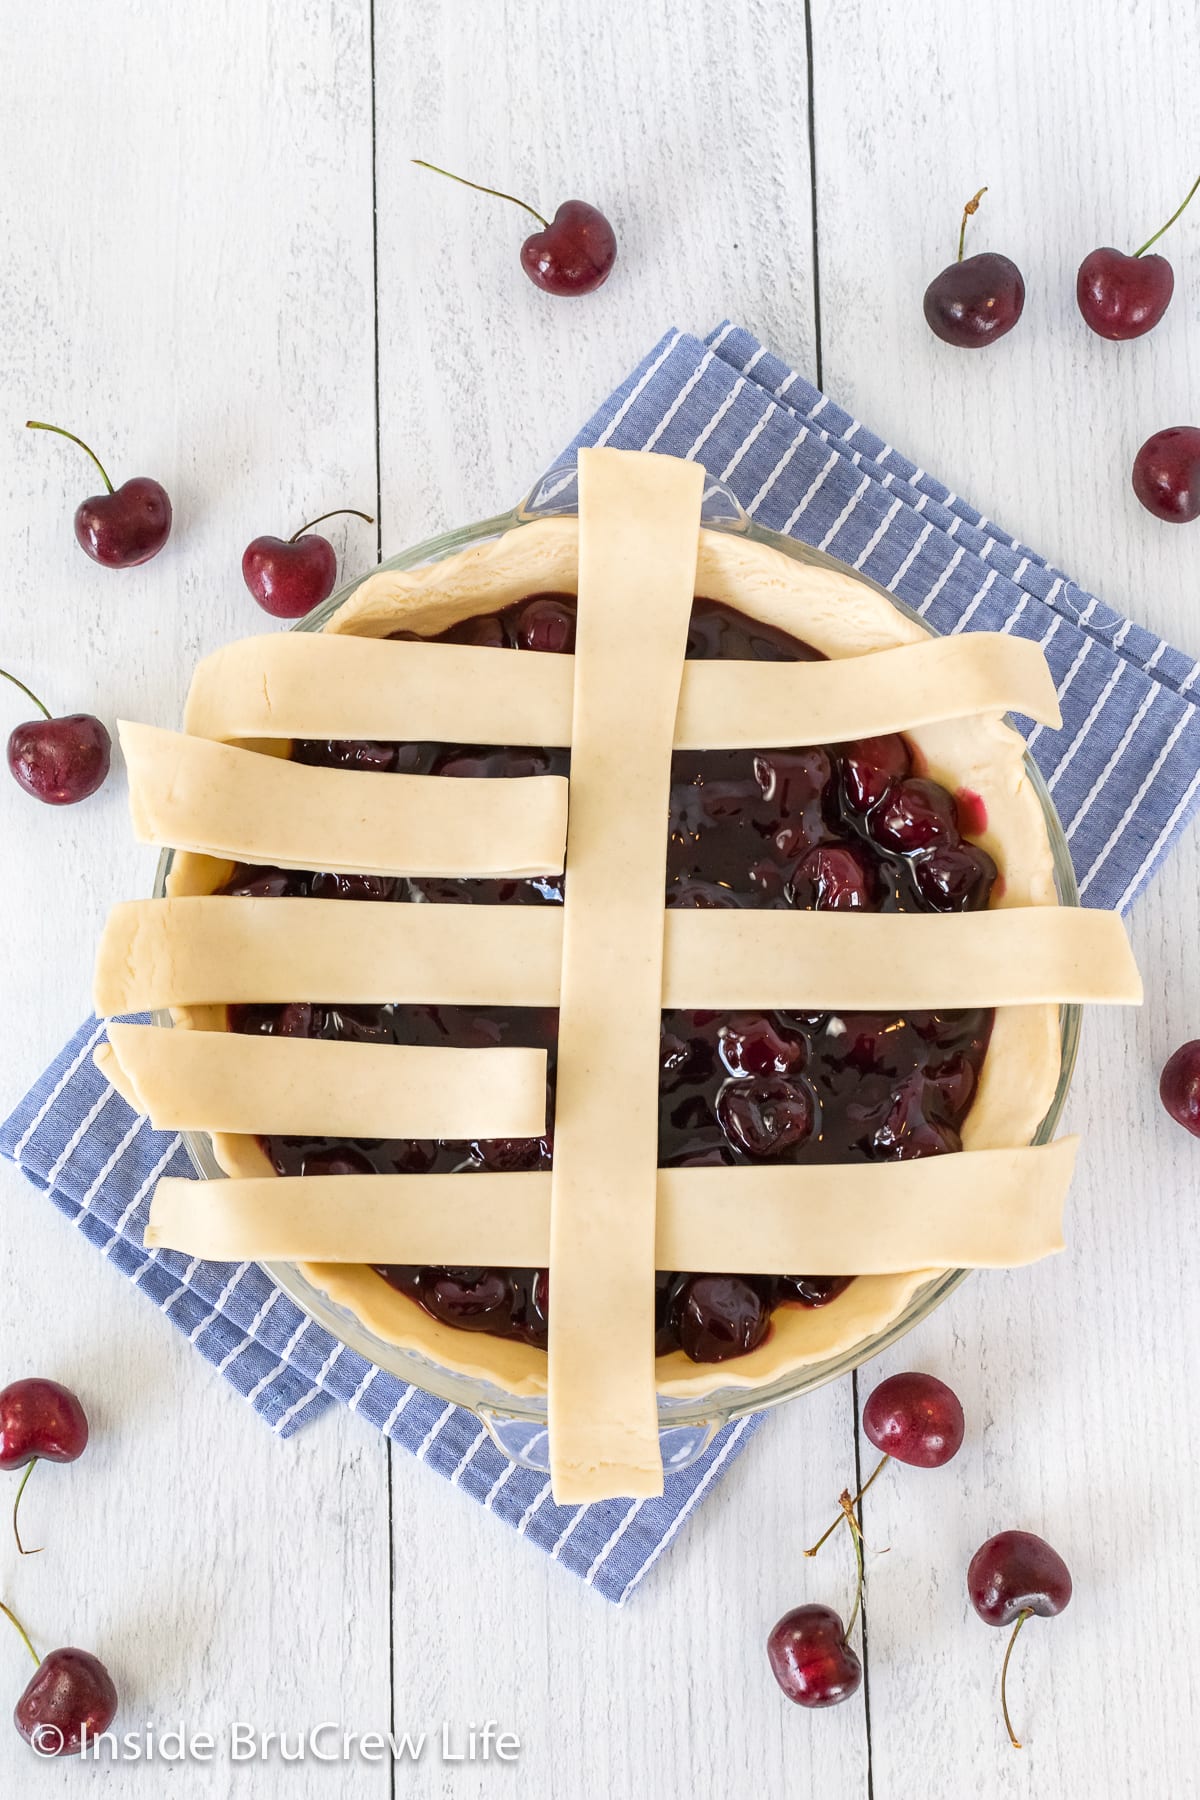
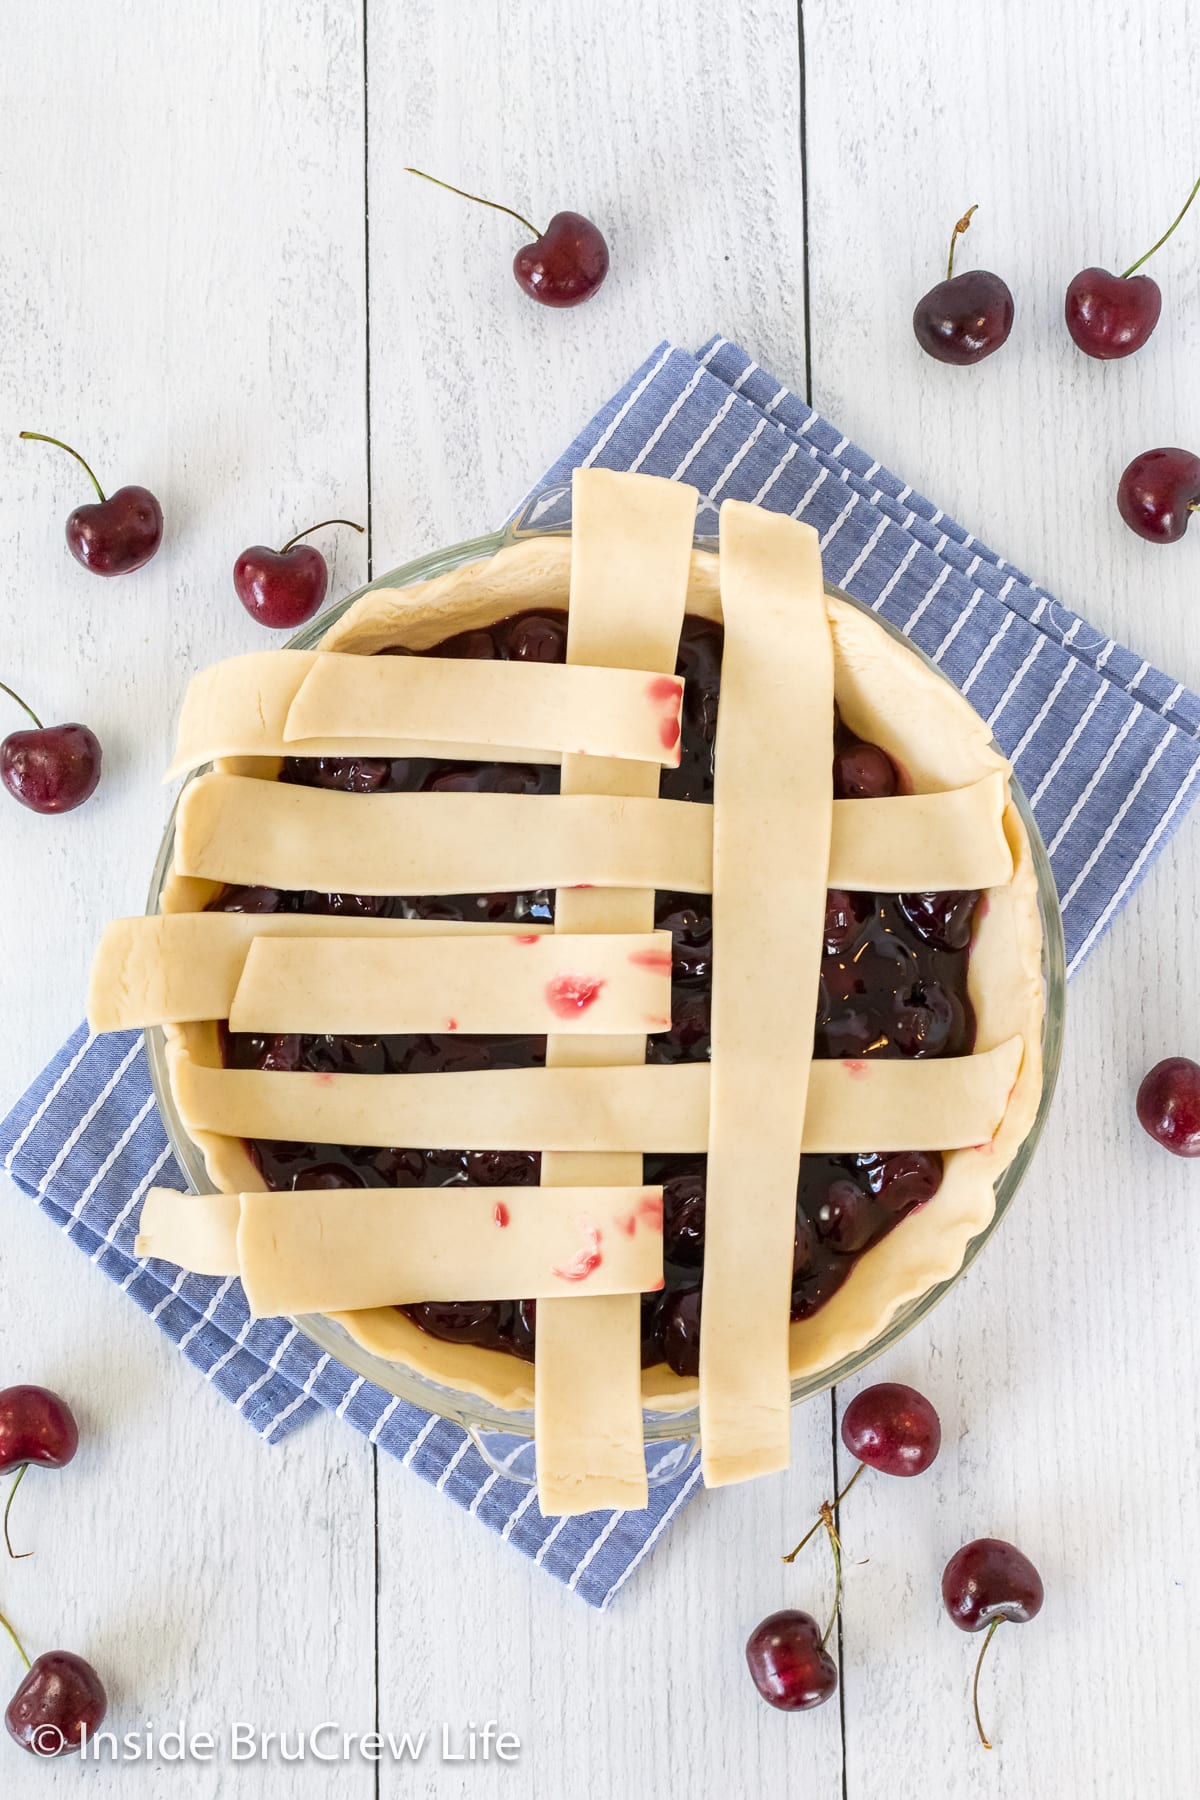
Fold back every other strip (top, middle, and bottom). Place another vertical dough strip to the right of the center strip.
Return the folded strips to their original position, so they are now covering the vertical strip.
Step 5: Alternate Strips
Fold the alternate horizontal strips back over themselves. Place another strip of dough going vertical on the right side. Unfold the strips, so they lay flat on top of the vertical dough strip.
Step 6: Continue Weaving
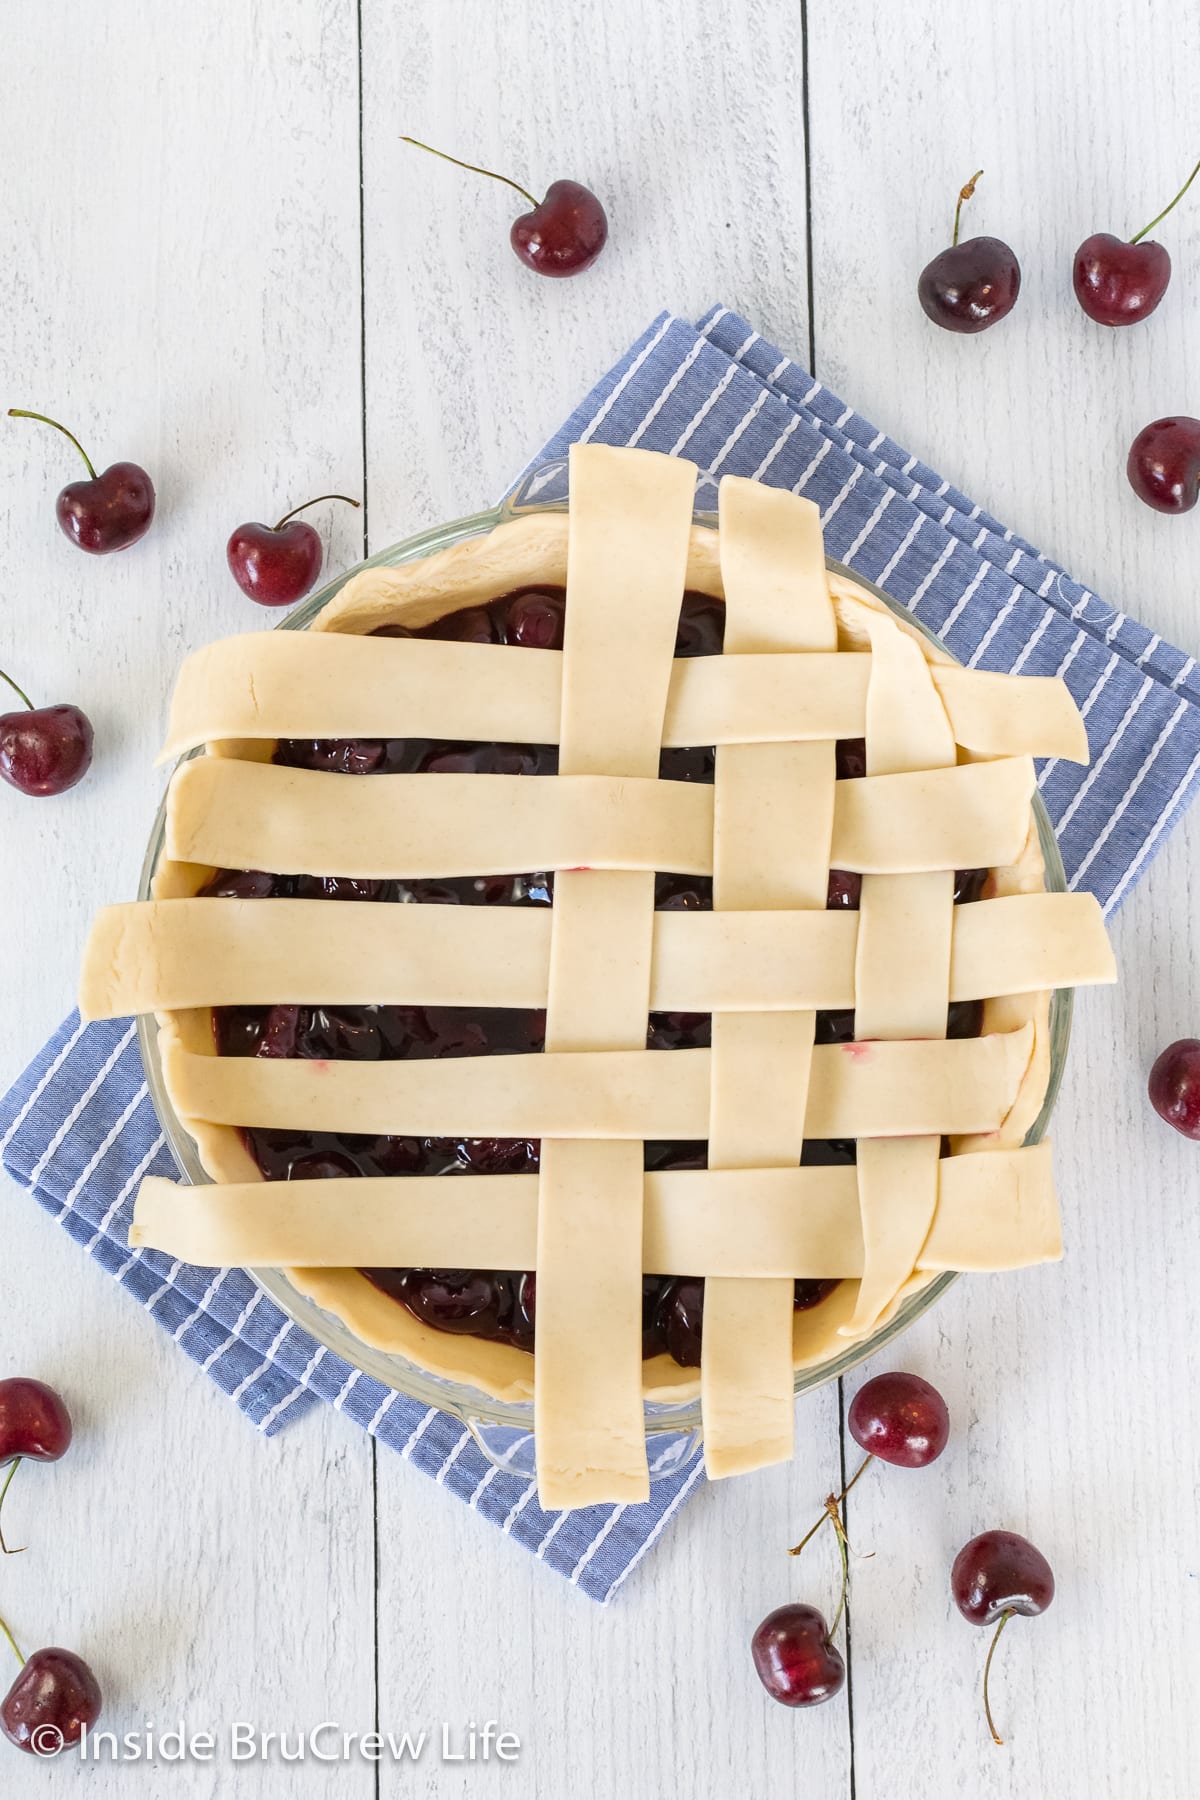
Keep folding back the alternating strips and placing vertical dough strips. Continue until the lattice work is complete on the right half of the pie.
Step 7: Lattice the Other Side
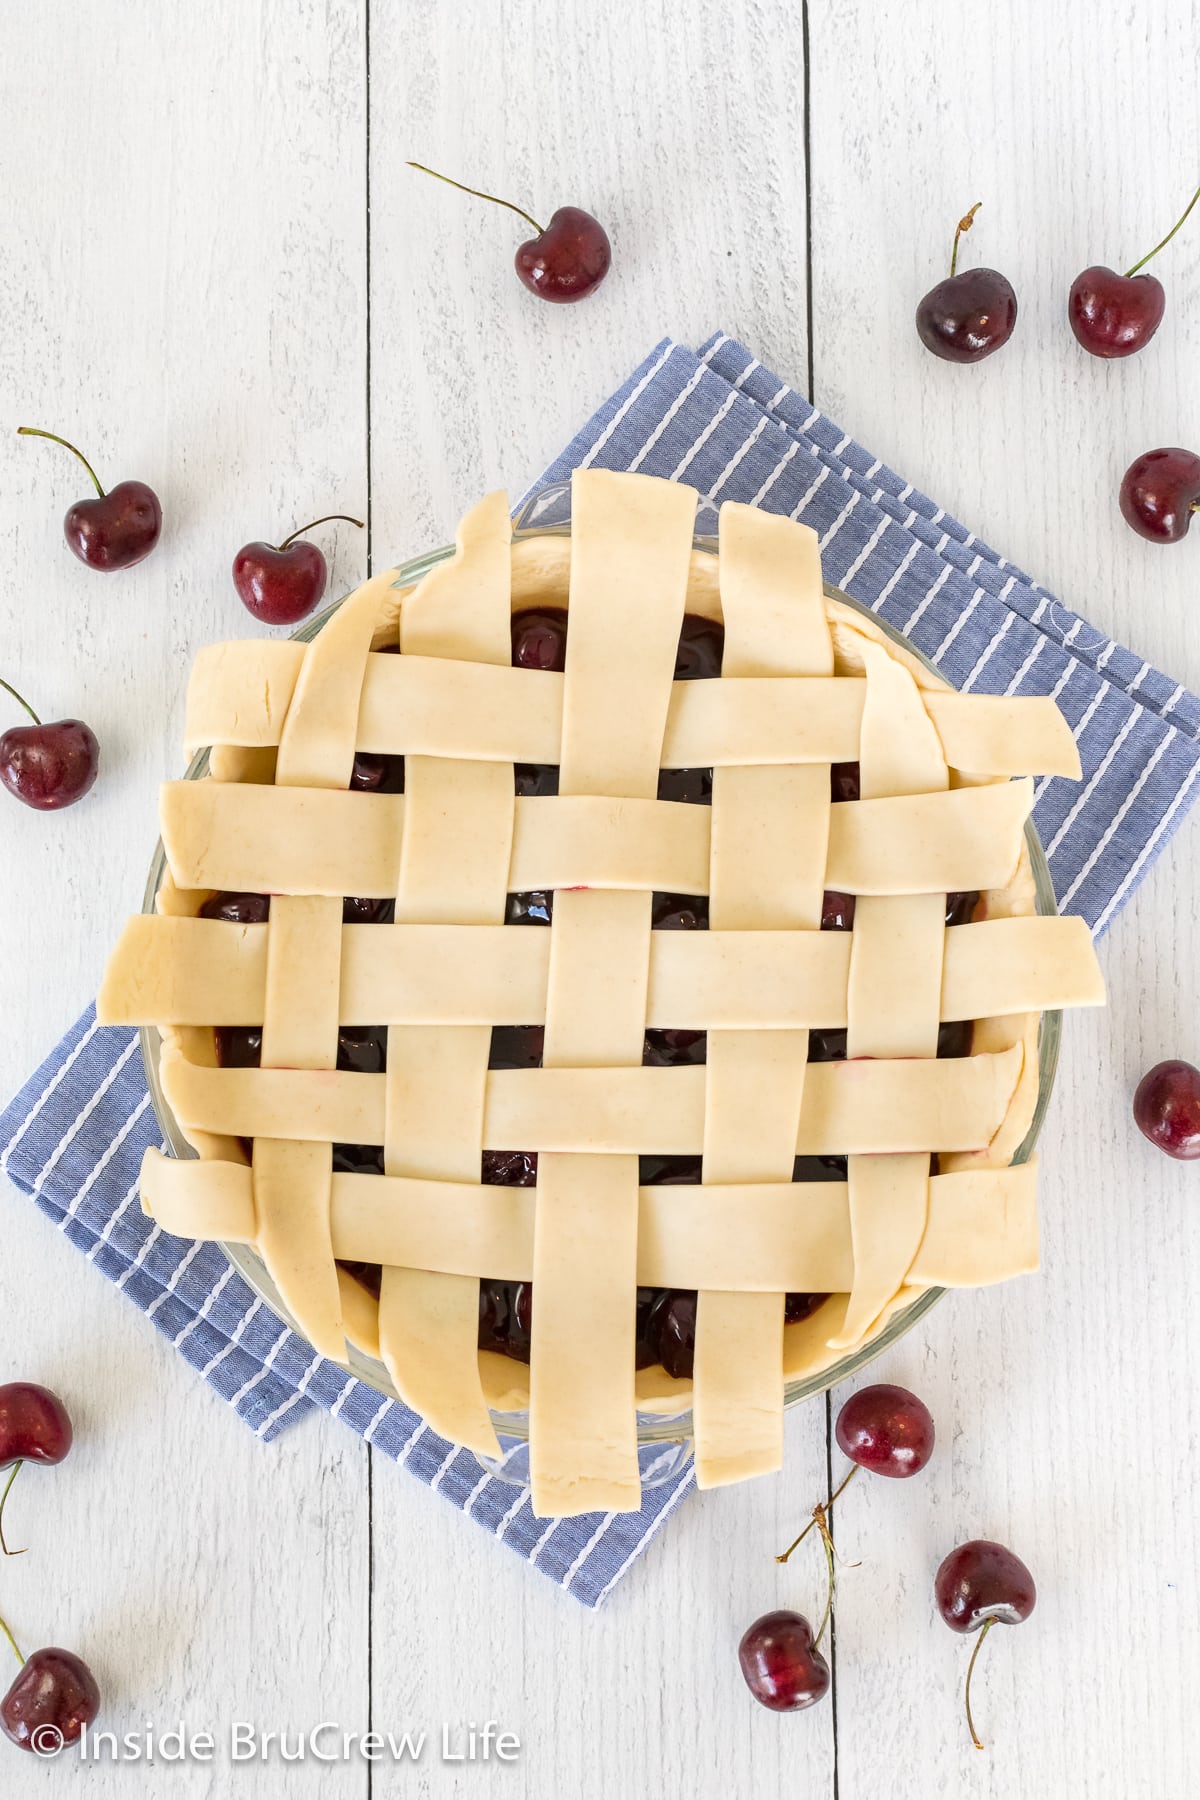
Repeat the process on the left side of the pie with the rest of the dough strips. Fold and overlap the pieces until the entire pie has been covered with a lattice top.
Step 8: Trim and Crimp Edges
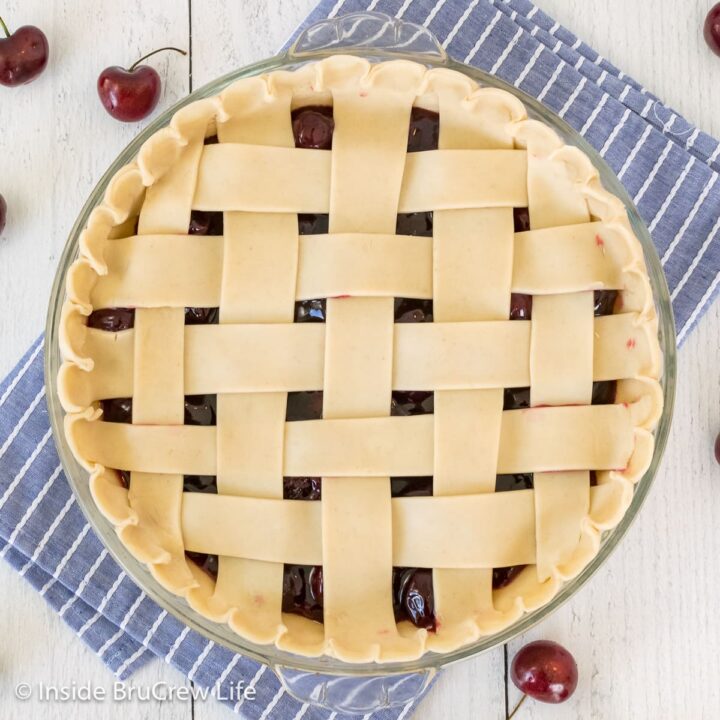
Cut the dough strips, so they match the edge of the bottom crust. Fold the bottom crust over the strips, creating a thicker edge on the lip of the plate. Crimp the edges of the pie as desired.
Step 9: Chill before Baking
Place the pie in the fridge for at least 30 minutes before baking.
Brush the top of the cold dough with the remaining egg white. Sprinkle with raw sugar and place in a hot oven. Bake as directed in your recipe.
Tips and Tricks
- Keep the dough cold. As you work on the lattice, make sure the dough is cold. If you feel like it is getting warm while you work, place everything in the refrigerator for 15 minutes before continuing.
- Use cool filling. Make sure the filling is either room temperature or chilled before adding it to the pie crust. Plan ahead and chill the filling in the refrigerator for best results.
- Watch your strip placement. Use the longer dough strips over the center of the pie and short strips for the sides.
- Create a tighter lattice. This will keep the filling from bubbling out too much. Place the strips tighter together as you weave them.
- Fix torn dough. If the dough tears while working with it, dip your finger in water and press the pieces back together.
- Have fun. Experiment with the design of your lattice top. Use different sized strips to create a unique pattern. Try braiding thin strips for a fun visual line.
- Keep practicing. Learning this pie crust basket weave takes time, but it is worth it.
FAQs
A lattice pie crust is a decorative crust. It is made by weaving strips of dough together in a criss cross pattern on top of a pie. Instead of having a solid crust covering the filling, a lattice crust exposes the filling in a visually appealing way.
Baking a pie that has a lattice weave on top is no different than baking a pie with a double crust. Place the chilled pie in a hot oven to set the crust. Reduce the heat and finish baking as directed in the recipe.
Yes, just make sure to thaw the crust ahead of time before you start doing the weaving process.
Ways to Use a Lattice Pie Top
Pies made with fruit are the best ones to add a decorative crust topping on.
Love a recipe you tried from Inside BruCrew Life?
Please leave a 5 star ⭐️ rating and/or a review in the comments section further below.
Recipe
Lattice Pie Crust
Get ready to wow the guests at your next dinner party with our simple tutorial on how to make a lattice pie crust. This impressive lattice pie crust is easier to do than it looks and will take your desserts to a whole new level.
Ingredients
- 2 pie crusts, store bought or homemade
- 1 egg, separated
- 2 tablespoons raw sugar
Instructions
- Place one crust in the bottom of a deep dish pie plate.
- Whisk together the egg white and a little bit of water until foamy.
- Brush the pie crust in the pan with the beaten egg white and refrigerate at least 15 minutes before filling.
- Roll out the other pie crust and use a pizza cutter and ruler to cut even strips of dough about 1" wide.
- Spoon your choice of fruit filling into the prepared crust. Place three dough strips across the pie plate horizontally leaving space for 2 more strips. Fold two strips in half and place in between the other strips.
- Place one strip of dough down the center vertically, then unfold the folded strips so they lay flat over the new line of dough.
- Fold back the first three strips halfway. (top, middle, bottom) Add another vertical strip to the right of the center vertical strip. Unfold the three strips so they lay flat across the new vertical strip.
- Continue to fold back the alternating strips until the lattice is finished on the right half of the pie. Turn the pie around and repeat the over/under with the dough strips until the entire pie has the lattice.
- Trim the strips of dough to meet the edge of the pie crust. Roll the bottom crust up and over those edges and crimp as desired. Bake as directed.
Notes
- Keep the dough cold as you work on the lattice. If you feel like it is getting warm while you work, place everything in the refrigerator for 15 minutes before continuing.
- Make sure any filling that you put into the pie crust has cooled to room temperature or has been chilled in the fridge ahead of time. This will keep the dough you put on top cold as you work with it.
- Use the longer dough strips over the center of the pie and short strips for the sides.
- Create a tighter lattice, so the filling doesn't bubble out. Place the strips tighter together as you weave them.
- If the dough tears while working with it, dip your finger in water and press the pieces back together.
- Have fun with the design of your lattice top. Use different sized strips to create a unique pattern. Try braiding thin strips for a fun visual line.
- Keep practicing. Learning this pie crust basket weave takes time, but it is worth it.
Nutrition Information:
Yield: 9 Serving Size: 1Amount Per Serving: Calories: 191Total Fat: 10gSaturated Fat: 3gTrans Fat: 0gUnsaturated Fat: 6gCholesterol: 21mgSodium: 168mgCarbohydrates: 22gFiber: 1gSugar: 4gProtein: 3g
Nutrition facts are an estimate and are not guaranteed to be accurate. If you need special diet advice, please see a registered dietician.






Leave a Reply