


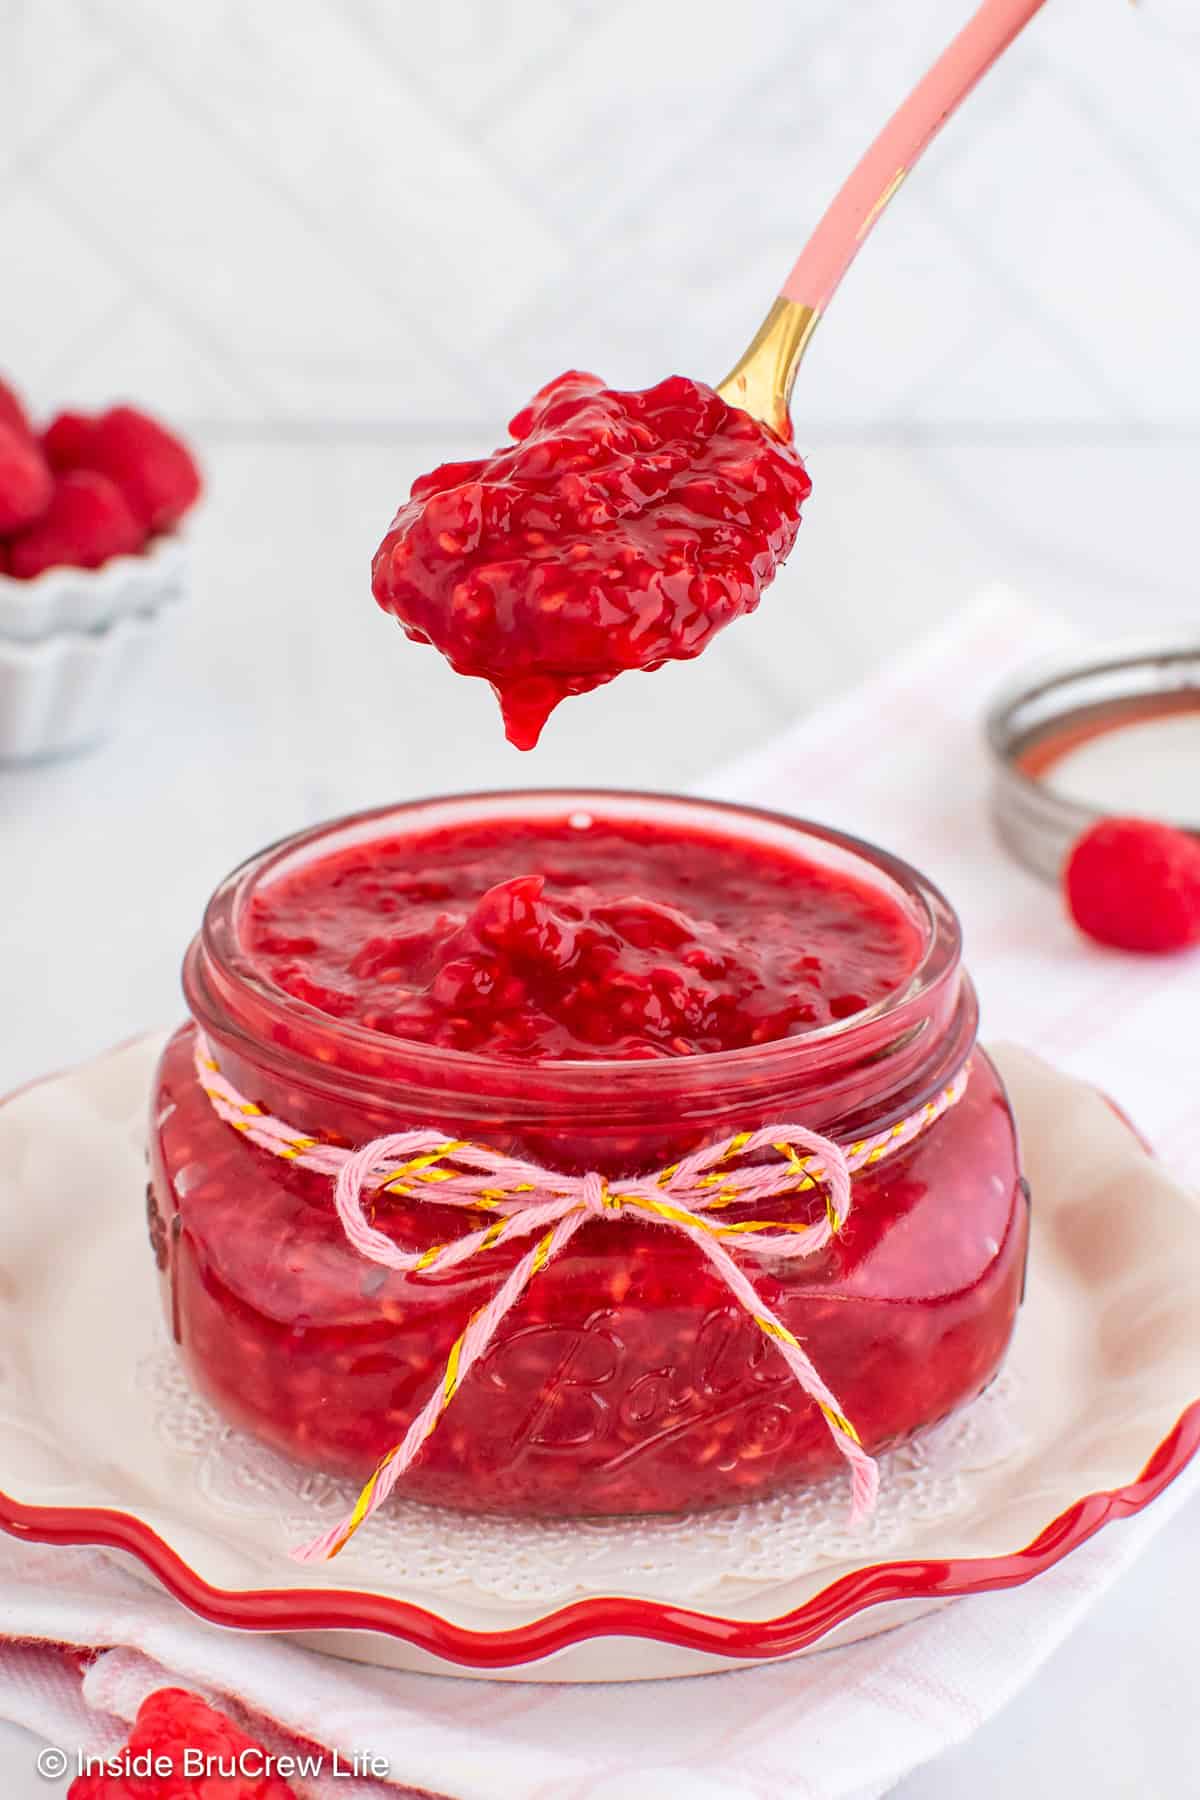
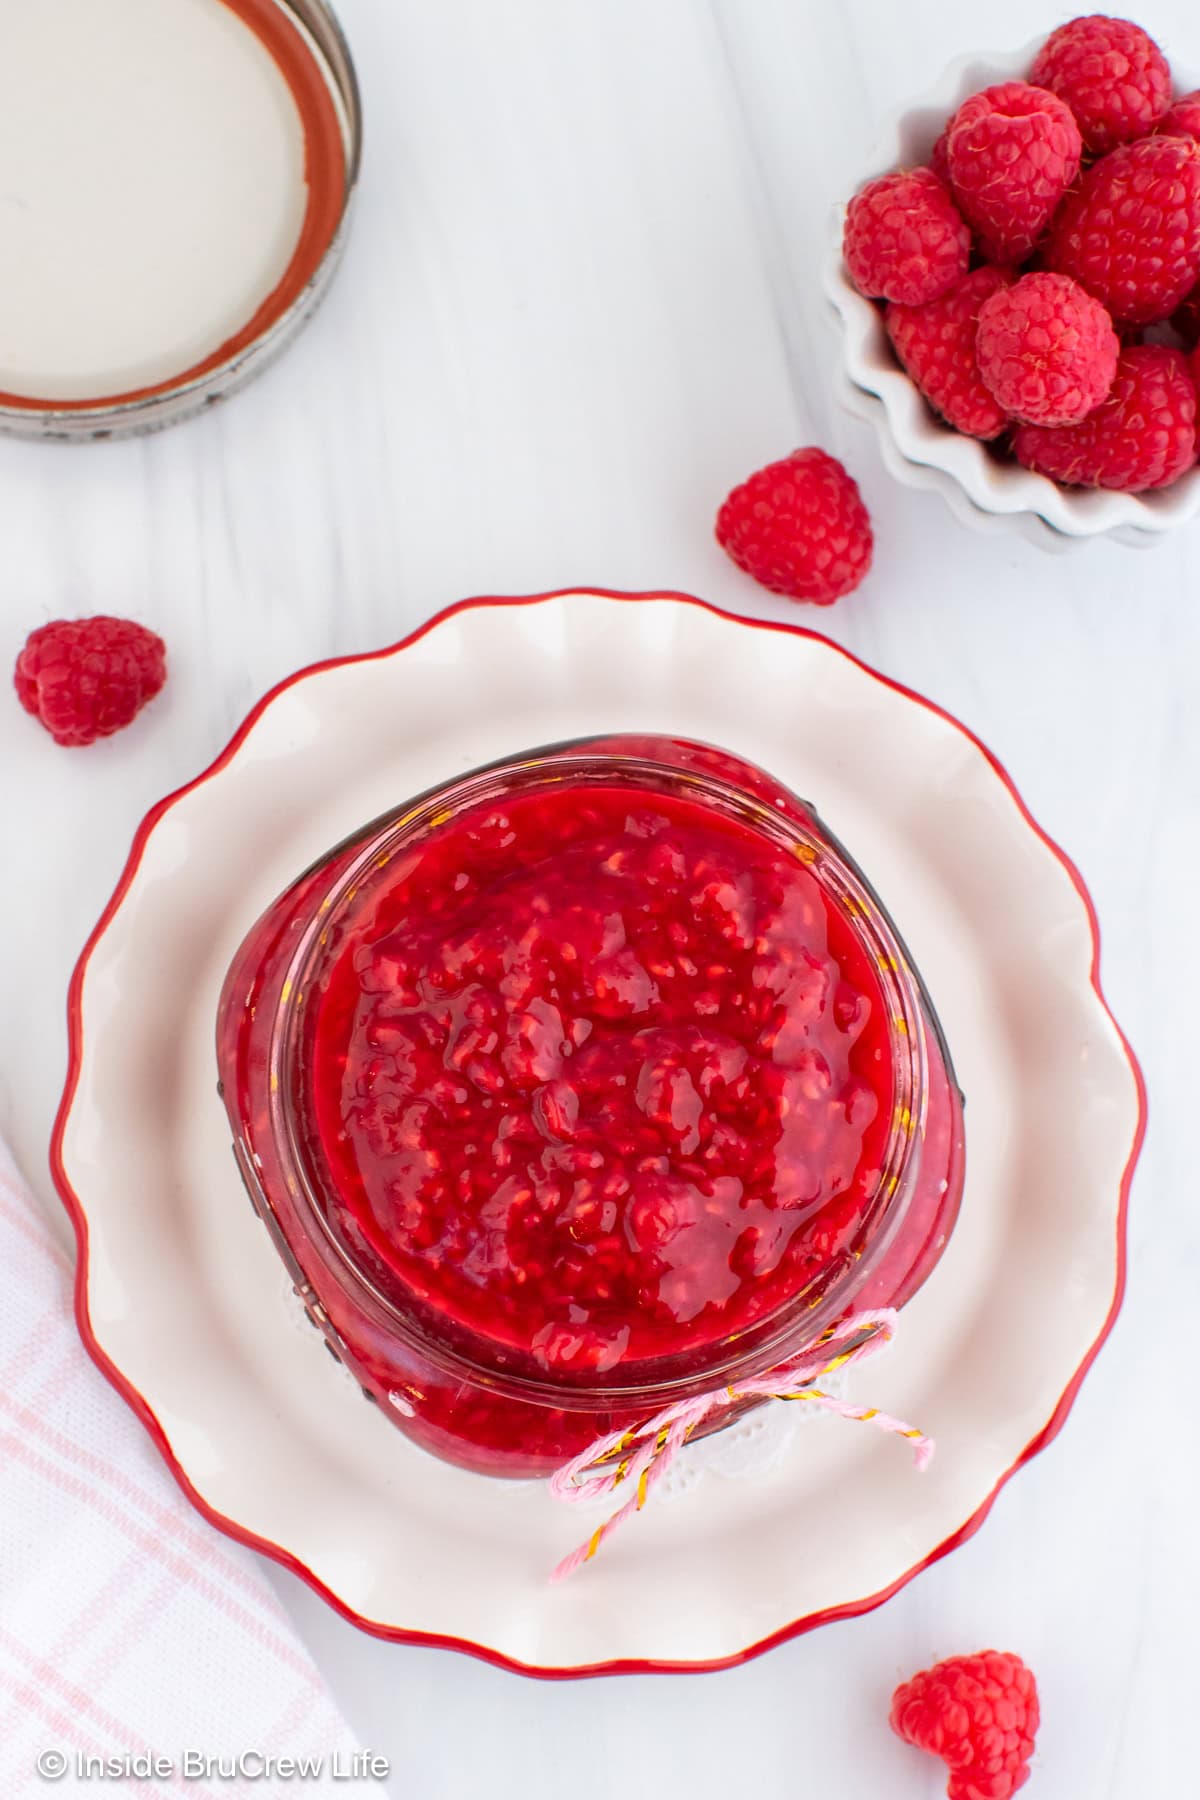
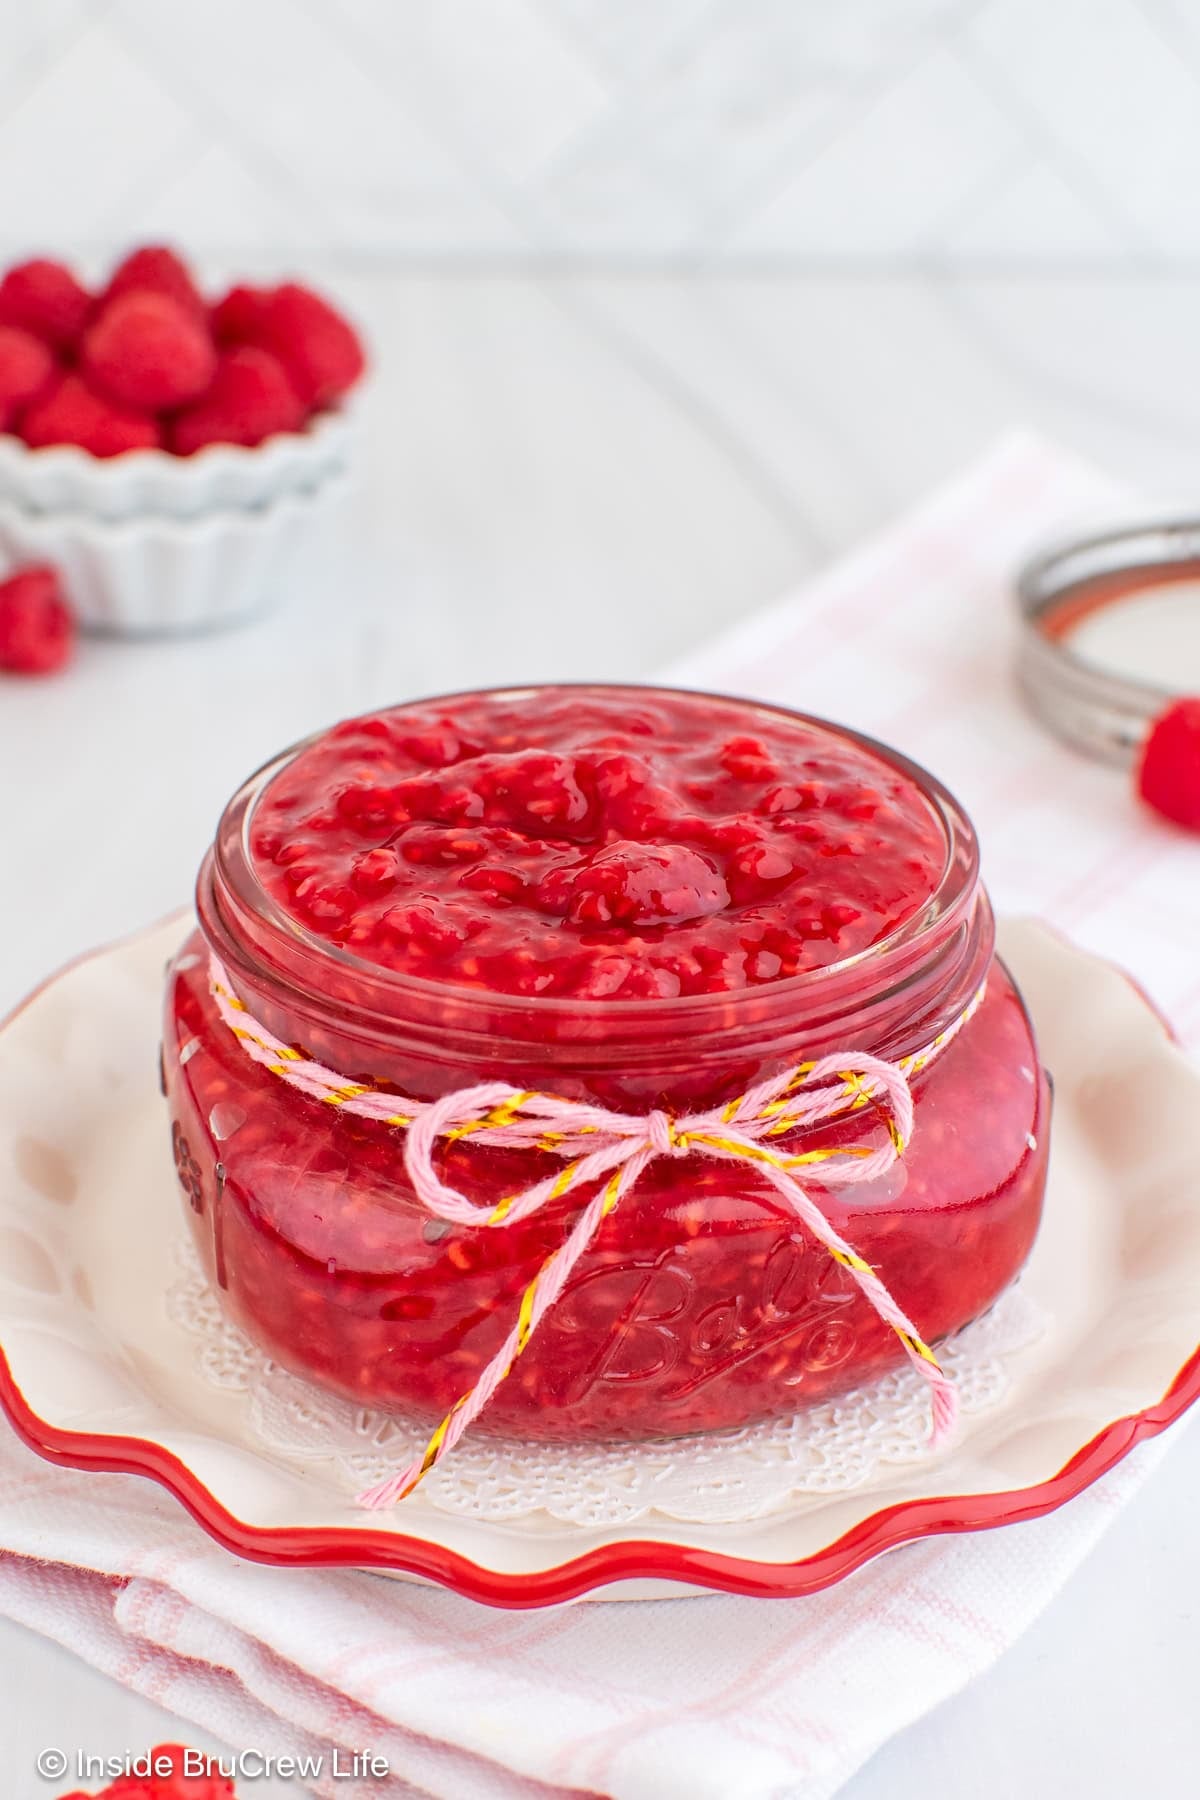
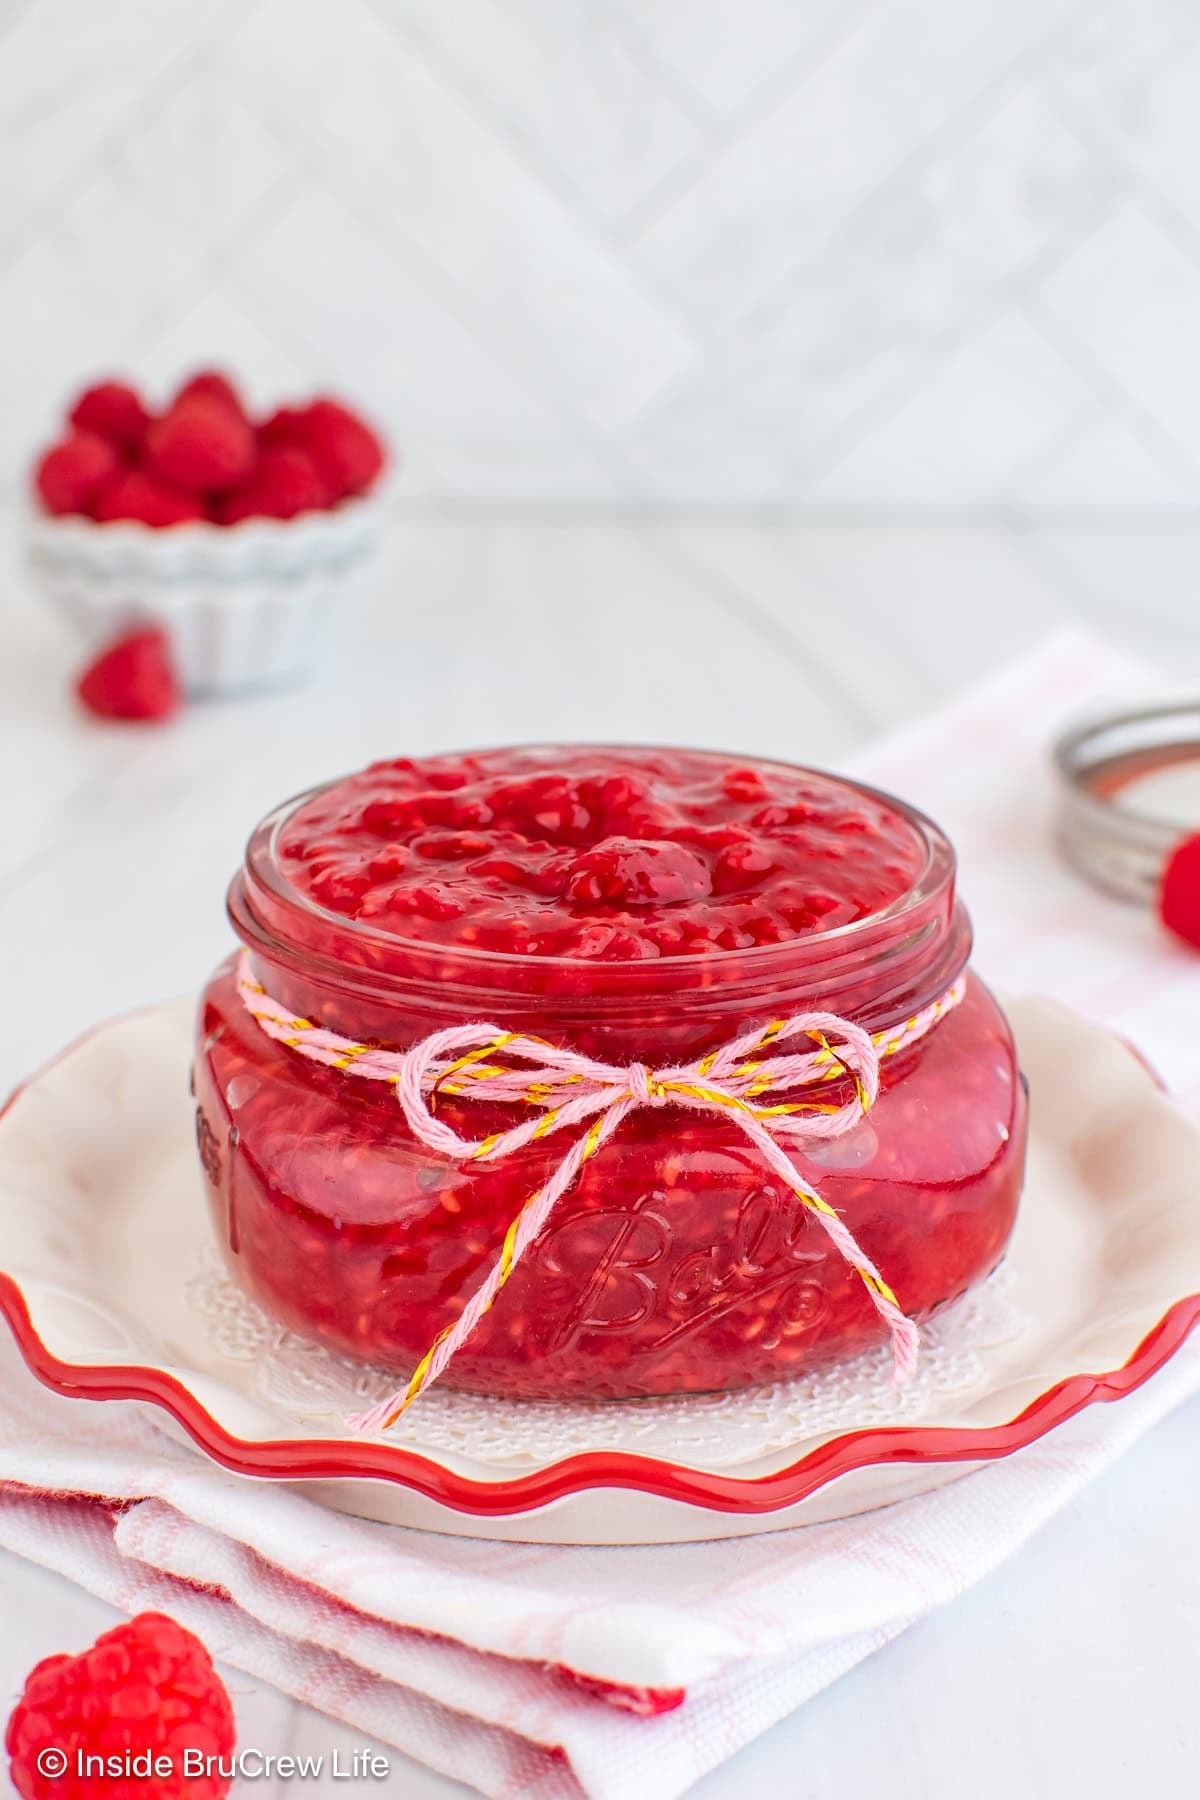
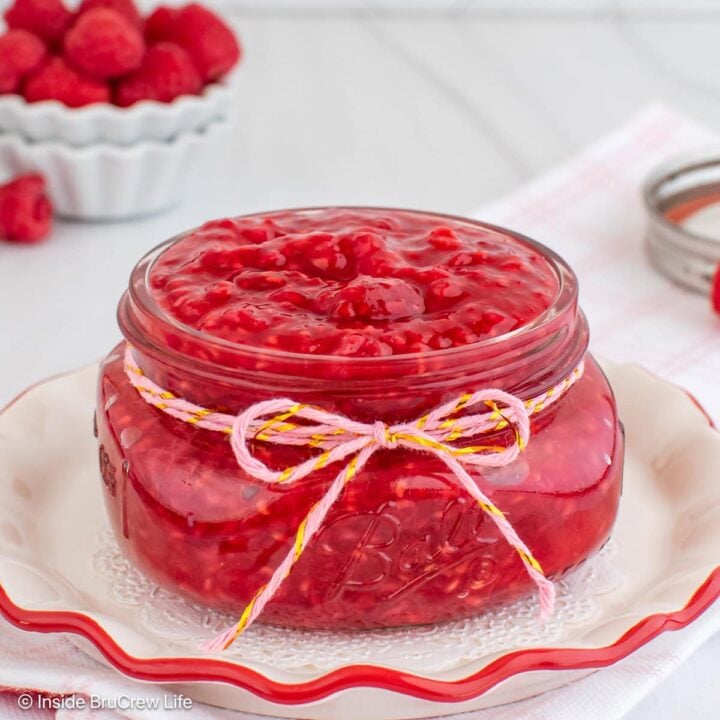
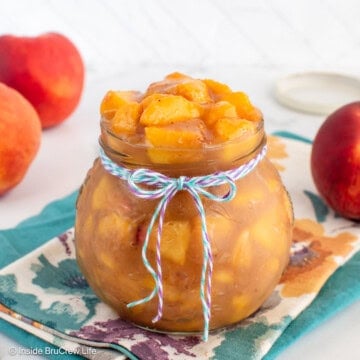
This raspberry pie filling is easy to make on the stovetop and bursting with fresh berry flavor. You can use it in any dessert that calls for pie filling. And once you make it from scratch, it is hard to go back to the canned version.
Jump to:
I feel like I say this every time I make a new fruit filling, but homemade really is so much better. Once you realize how easy it is to make pie filling on the stovetop, those canned ones just don't compare anymore.
Since I have already made blueberry, cherry, peach, and blackberry pie filling, it was time to add a raspberry version to the list. It's not one I see in stores very often, and I love the sweet, slightly tart flavor and the bright pop of color that raspberry pie filling adds to desserts.
Of course, it took a little testing to get it just right. My first batch was too runny and did not set up the way I wanted. Raspberries release more juice as they cook, and they are more delicate than blackberries, so I needed to make a few adjustments.
I reduced the water and lemon juice, which made a big difference in the texture. It thickened perfectly, while staying soft and spoonable, just how I like it.
This glossy raspberry filling is great for swirling into cheesecake and making a dump cake or berry crisp. My favorite is to spoon it over a scoop of vanilla ice cream when I'm craving something sweet.
Why You'll Love This Raspberry Pie Filling Recipe
- Quick and easy. This homemade filling can be prepared in 15 minutes with minimal effort.
- Simple ingredients. All you need are fresh raspberries and a few basics you probably already have in your kitchen.
- Better than canned. You control the sweetness, and there are no preservatives or corn syrup in this thick, glossy mixture.
- So versatile. Use it in pies, cakes, cheesecakes, parfaits, or any recipe that calls for pie filling.
Ingredients Needed
You only need a few simple ingredients to make this raspberry pie filling recipe. Scroll down to the printable recipe card for the exact amounts and full instructions.
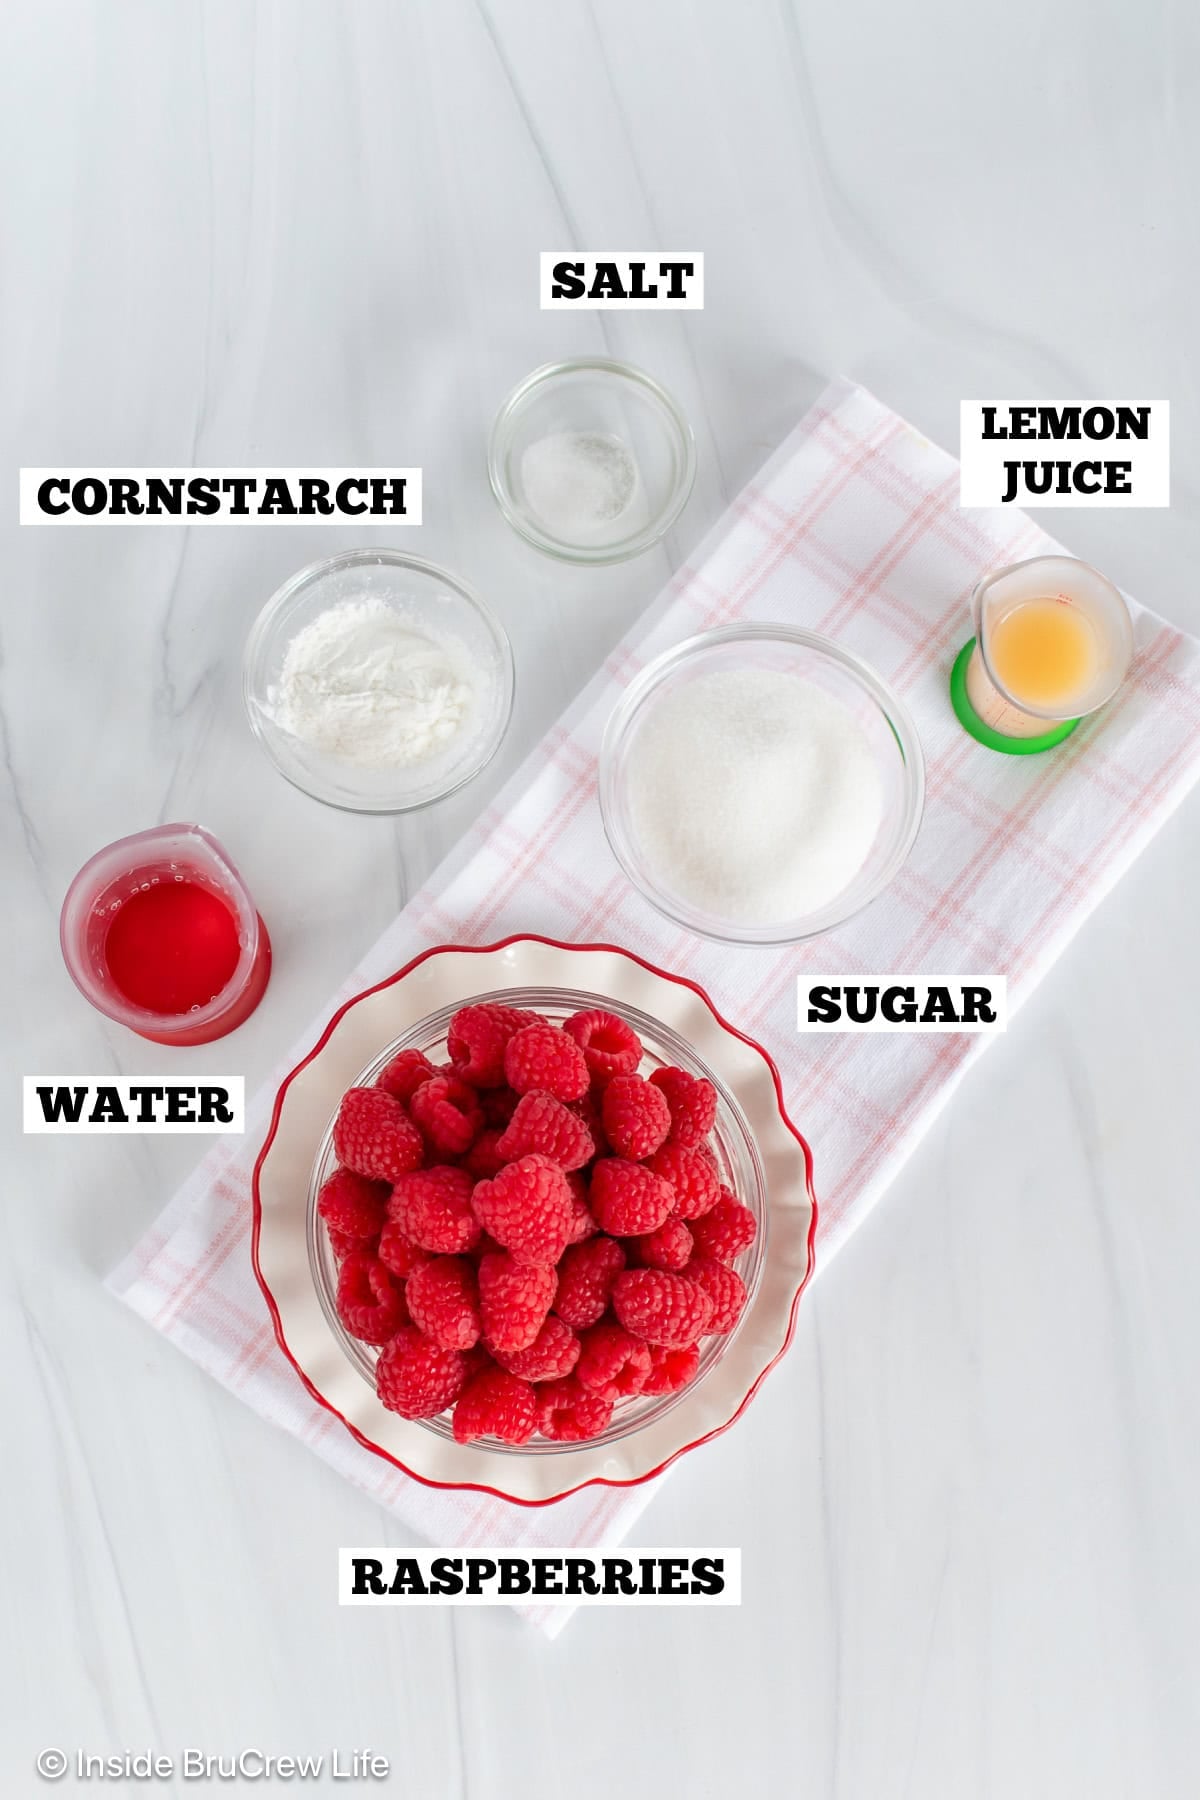
- Juicy Raspberries: You will need 12 ounces of fresh or frozen berries.
- Granulated Sugar: Sweetens the filling.
- Salt: Balances out the sweet and tart flavors in the filling.
- Lemon Juice: Brightens the flavor of the fruit.
- Cornstarch: This thickening agent is one of the most common for thickening liquids.
Fun Variations
- Add vanilla or almond extract to the finished pie filling to enhance the flavor.
- Lemon zest can be added to give it a stronger lemon taste.
- Use Clear Jel instead of cornstarch if you plan to can the filling.
How To Make Raspberry Pie Filling
This pie filling recipe comes together in minutes in one saucepan. Make sure you allow enough time for it to cool completely and thicken.
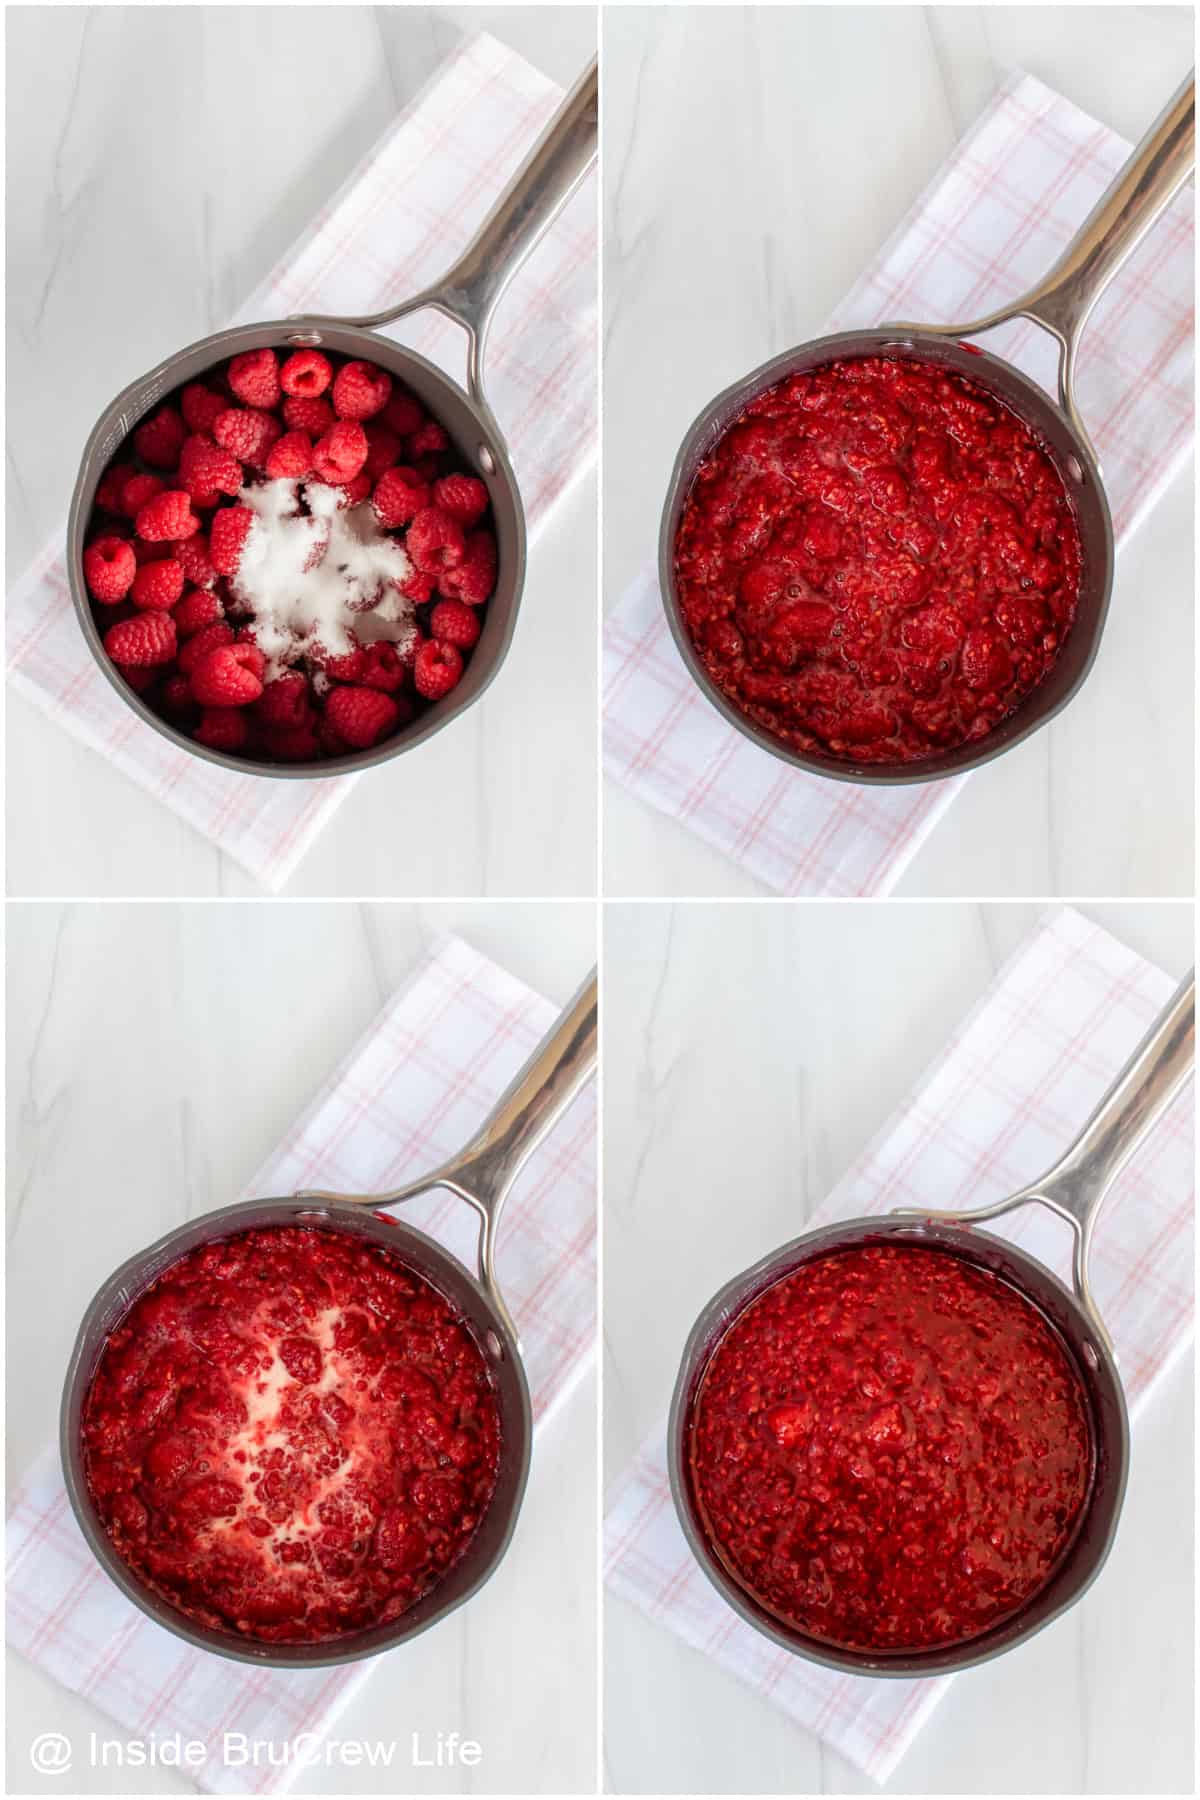
- Cook the berries. Add the raspberries, sugar, and cold water to a pan. Heat over medium heat until the berries break down and release their juices.
- Make a cornstarch slurry. Whisk the lemon juice and cornstarch in a small bowl until dissolved.
- Thicken the filling. Stir the lemon mixture into the berries. Then simmer, stirring, over low heat until the filling thickens and looks glossy.
- Cool and refrigerate. Remove the pan from the heat and pour the fruit filling into a glass bowl. Let it cool for 15 minutes, then press a piece of plastic wrap directly onto the surface to keep a skin from forming. Once it comes to room temperature, refrigerate for at least 4 hours.
Make a Seedless Pie Filling
Mash the fruit mixture after the raspberries pop and release their juices. Use the back of a spoon to press the cooked berries through a fine mesh sieve.
Place the juice mixture back in the pan, then thicken it with the slurry. Keep in mind that removing the pulp and seeds will result in less filling.
Storing and Freezing
In the Refrigerator: Store the pie filling in a tightly sealed container for up to one week. It can be used in any recipe that calls for raspberry pie filling.
In the Freezer: Spoon the filling into a freezer-safe bag or container and freeze for 2-3 months. Thaw overnight in the fridge, then pour off any excess liquid before using.
BruCrew Tips
- If fresh berries are out of season or expensive, use frozen raspberries. Thaw the fruit completely, then drain all the liquid thoroughly. Use two tablespoons of cornstarch to thicken the thawed berries.
- Adjust the amount of sugar in the recipe if your berries are sweet or tart. You want the fruit flavor to shine through.
- Stir constantly as you add the cornstarch to avoid lumps. Also, make sure you cook it long enough to prevent having a runny pie filling.
- The pie filling will only be slightly thick when you remove it from the stovetop. It will thicken more after it cools.
- Let the mixture cool completely before using, so it thickens properly. I recommend refrigerating for at least 4 hours or overnight.
Ways To Use Homemade Raspberry Pie Filling
- Serve these mini puff pancakes with filling and whipped cream.
- Layer it with no bake cheesecake in white chocolate raspberry parfaits.
- Bake spoonfuls into these raspberry filled cookies.
- Use it as a topping for waffles, pancakes, or French toast.
- Hide the filling in the center of these raspberry filled chocolate cupcakes.
- Spread it on biscuits, toast, or English muffins.
- Bake a delicious raspberry pie. Toss 2 cups of fresh berries with 1 tablespoon cornstarch, then gently stir them into the cooled filling. Bake in a double pie crust at 425° for 20 minutes, then lower the temperature to 375° and bake another 35 minutes.
Do you love a recipe you tried from Inside BruCrew Life?
Please leave a 5-star ⭐️ rating and a review in the comments section below.
Recipe
Raspberry Pie Filling
This raspberry pie filling is easy to make and bursting with fresh berry flavor. You can use it in any dessert that calls for pie filling. And once you make it from scratch, it is hard to go back to the canned version.
Ingredients
- 12 ounces fresh raspberries
- 1 tablespoon water
- ¼ cup granulated sugar
- ¼ teaspoon table salt
- 1 tablespoon cornstarch*
- 1 tablespoon lemon juice
Instructions
- Add the berries, water, sugar, and salt to a small saucepan. Heat over medium heat for 6-7 minutes or until the berries pop and release all their juices.
- Whisk the lemon juice and cornstarch in a small bowl until dissolved. Stir it into the berry mixture.
- Continue cooking and stirring for another 3-5 minutes until it thickens slightly.
- Remove and pour into a glass bowl. After 15 minutes, press a piece of plastic wrap directly on the surface to keep skin from forming.
- Once the bowl is room temperature, place it in the fridge to chill and thicken.
Notes
- Use 1 tablespoon of cornstarch for a looser set pie filling. Use 2 tablespoons of cornstarch for a thicker filling.
- If fresh berries are out of season or expensive, use frozen raspberries. Thaw the fruit completely, then drain all the liquid thoroughly. Use two tablespoons of cornstarch to thicken the thawed berries.
- Adjust the amount of sugar in the recipe if your berries are sweet or tart. You want the fruit flavor to shine through.
- Stir constantly as you add the cornstarch to avoid lumps. Also, make sure you cook it long enough to prevent having a runny pie filling.
- The pie filling will only be slightly thick when you remove it from the stovetop. It will thicken more after it cools.
- Let the mixture cool completely before using, so it thickens properly. I recommend refrigerating for at least 4 hours or overnight.
Nutrition Information:
Yield: 12 Serving Size: 2 tablespoonsAmount Per Serving: Calories: 80Total Fat: 0gUnsaturated Fat: 0gSodium: 92mgCarbohydrates: 19gFiber: 4gSugar: 13gProtein: 1g
Nutrition facts are an estimate and are not guaranteed to be accurate. If you need special diet advice, please see a registered dietician.

Leave a Reply