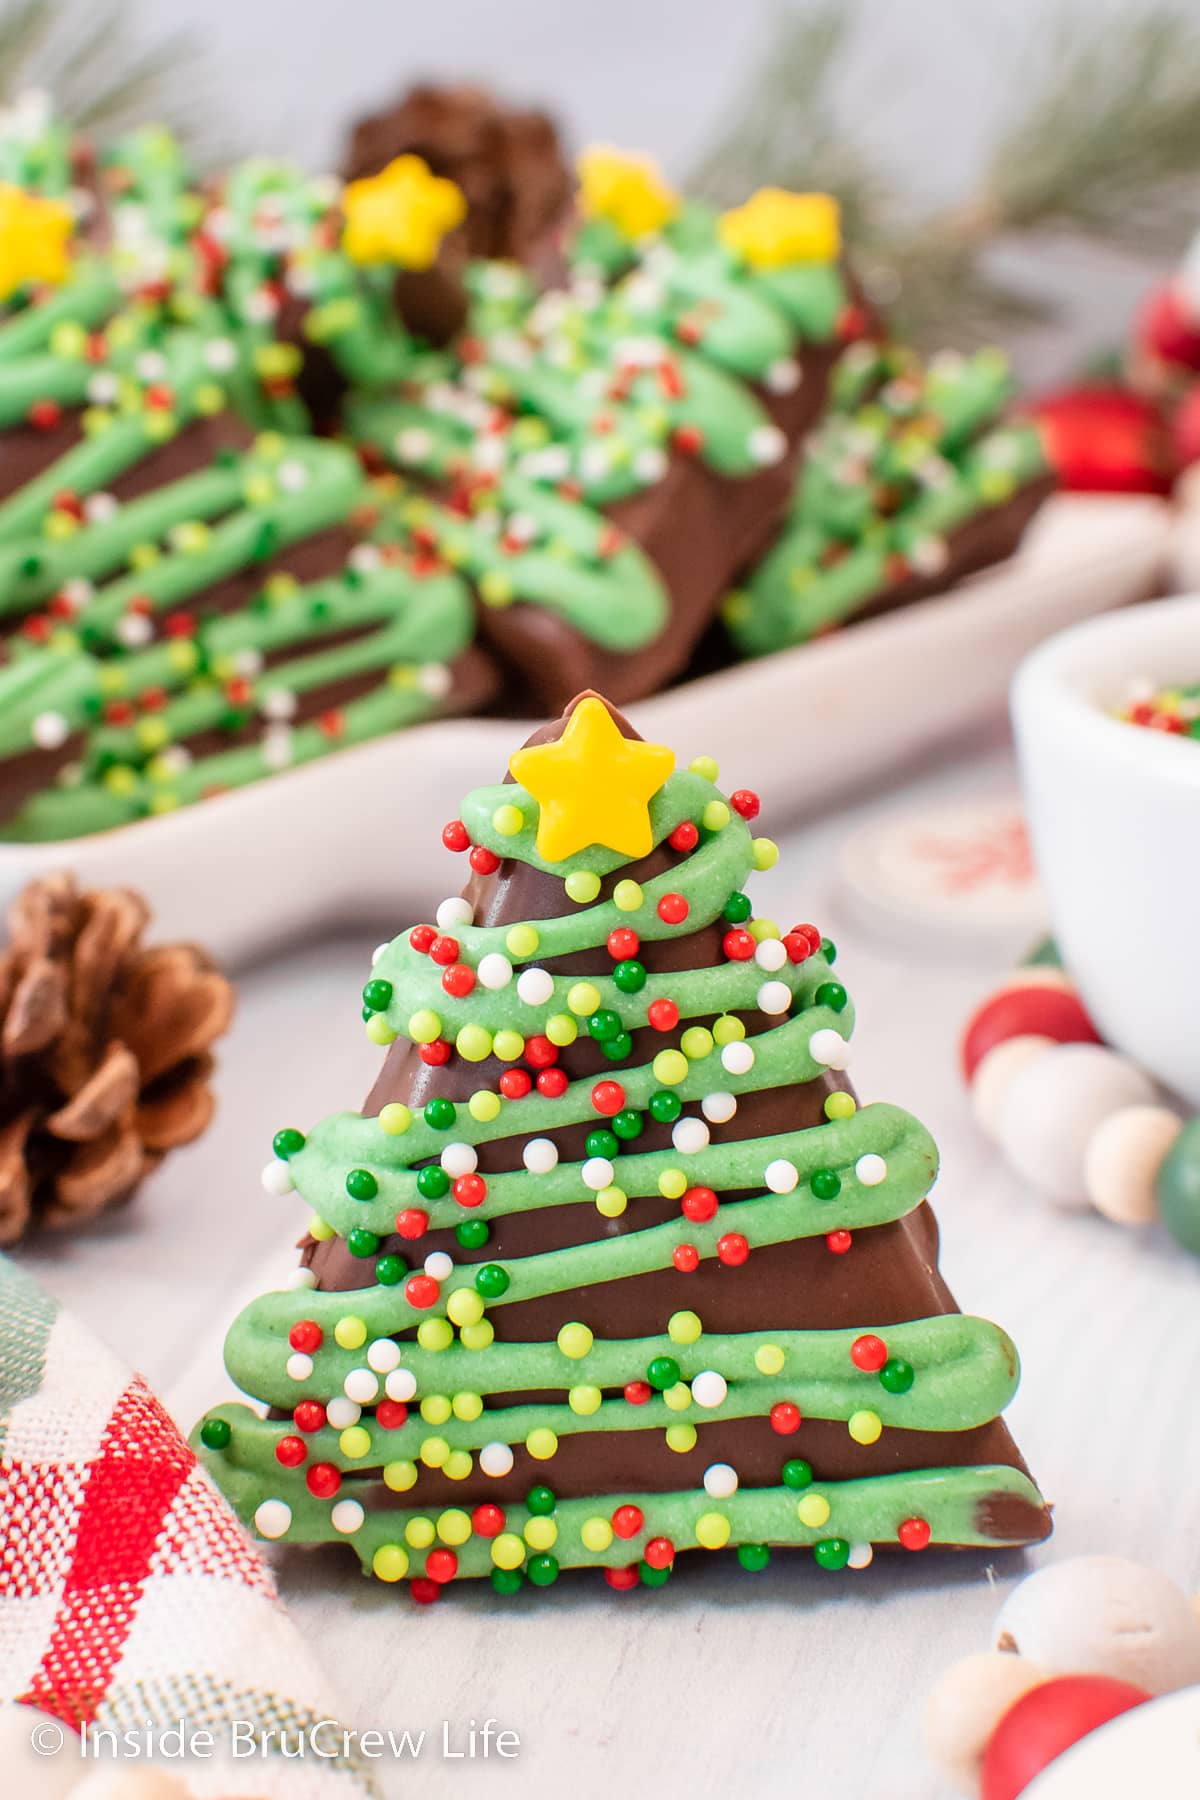
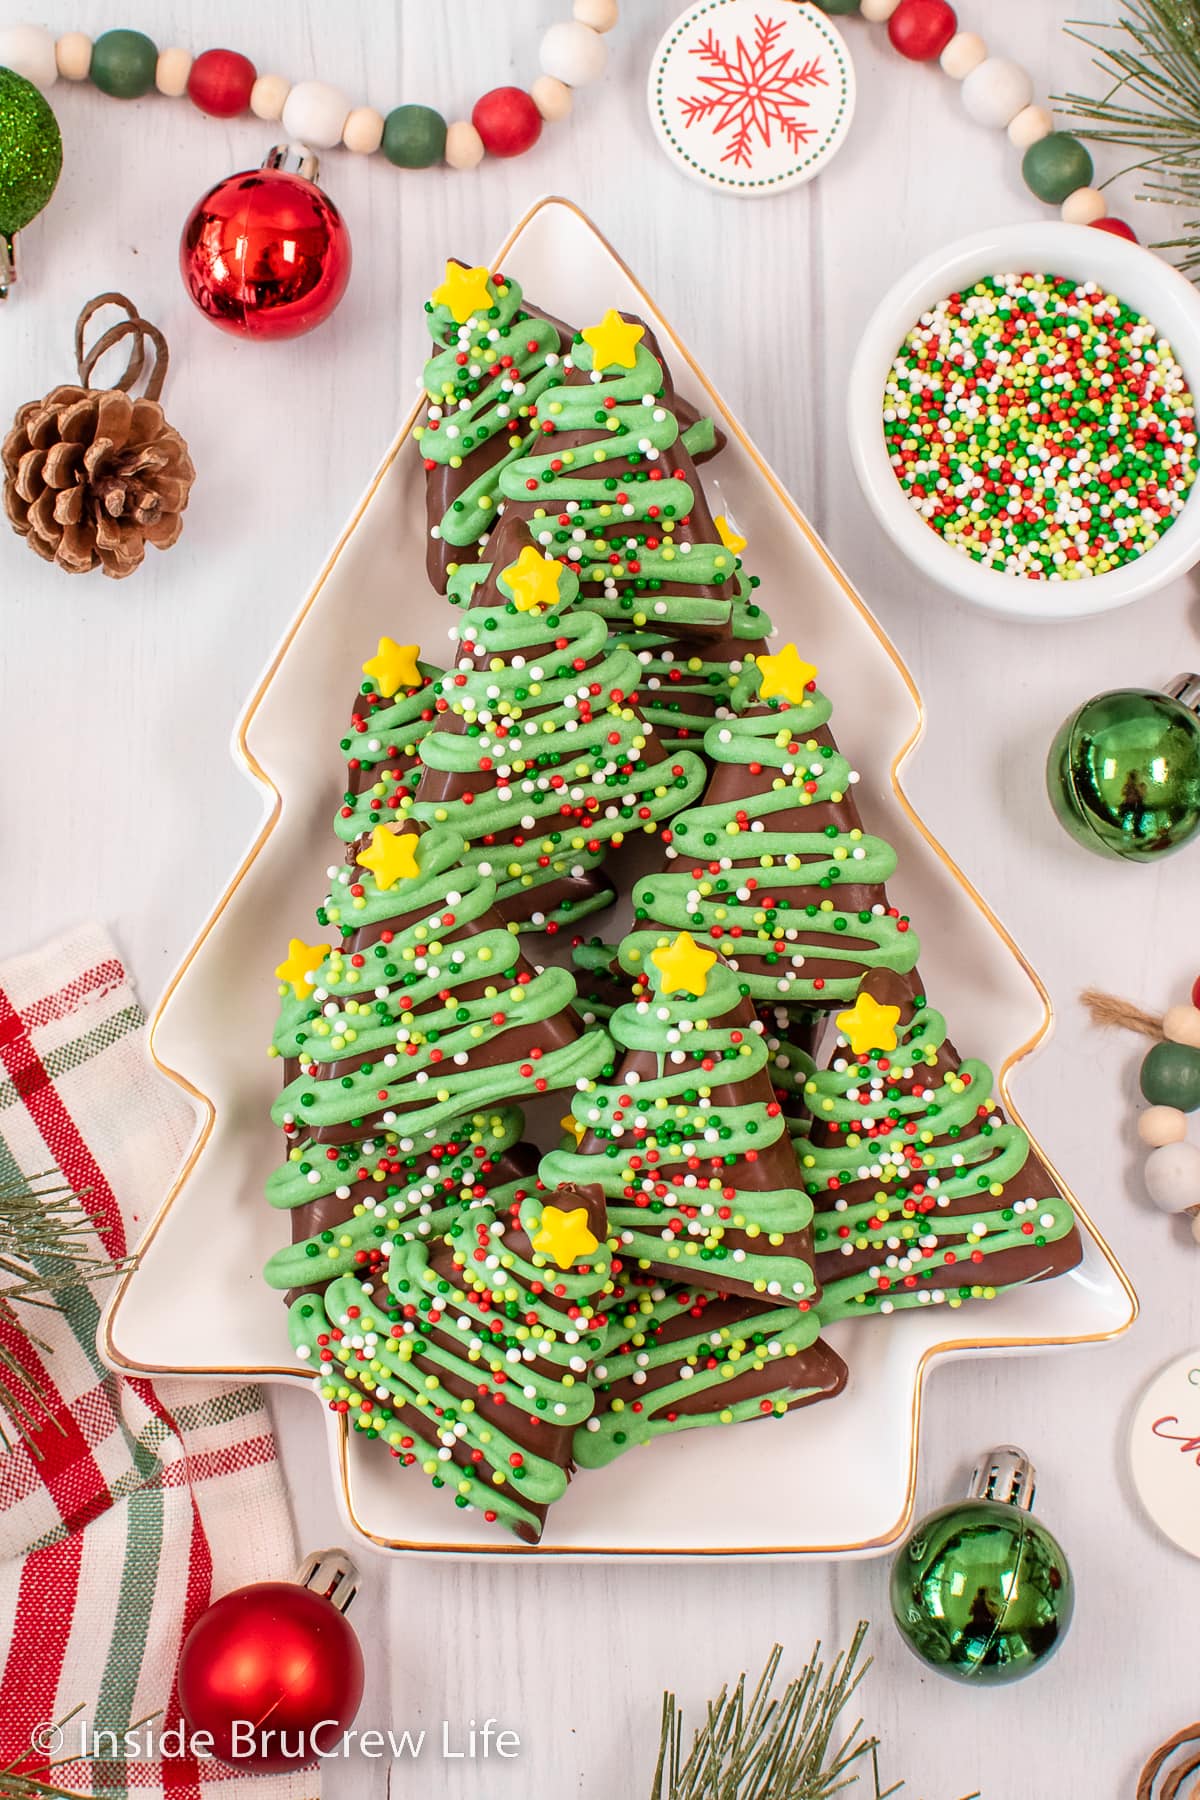
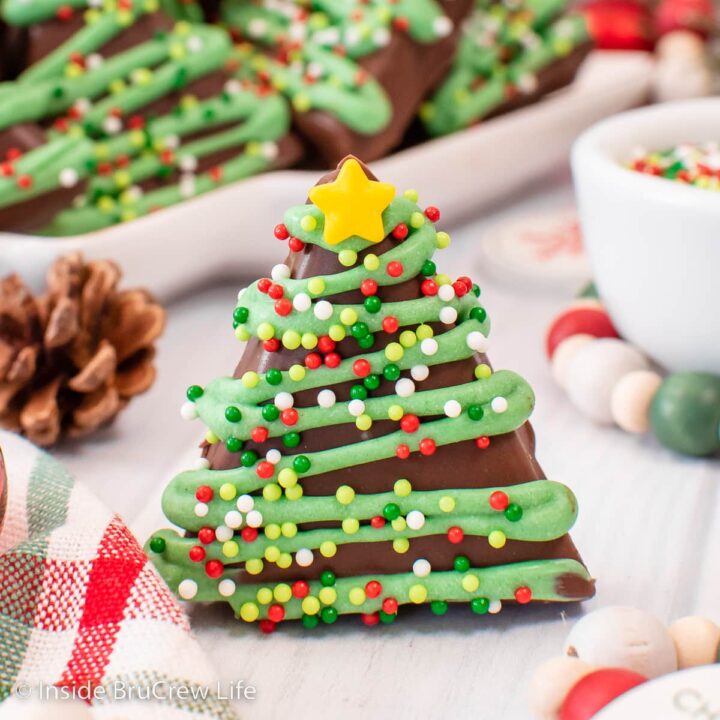
Make the holidays sweeter with homemade Reese's Christmas Trees. Filled with peanut butter, covered in chocolate, and decorated with sprinkles, these candy trees are perfect for sharing.
Jump to:
Since Christmas is in a few weeks, I decided to give our peanut butter balls a fun holiday make over! A few years ago we turned them into cute little peanut butter reindeer. Buckeye balls that look like Rudolph are simply adorable.
This year we decided to turn them into peanut butter trees! Once you try it, you may want to turn your favorite peanut butter ball recipe into these adorable decorated trees too.
Why You Will Love This Christmas Treat
- Easy to make with no baking required.
- Fun to decorate and tastes amazing!
- Great gift for the peanut butter and chocolate lover.
- Prettier than a bag of store bought Reese's trees.
These Reese's peanut butter trees will be a great addition to your holiday dessert trays along side of these peppermint Oreo cookies and this chocolate mint Oreo fudge.
You can also wrap them up in small cellophane bags tied with ribbon and give them as gifts or stocking stuffers like these rice Krispie pin wheels.
Ingredients Needed
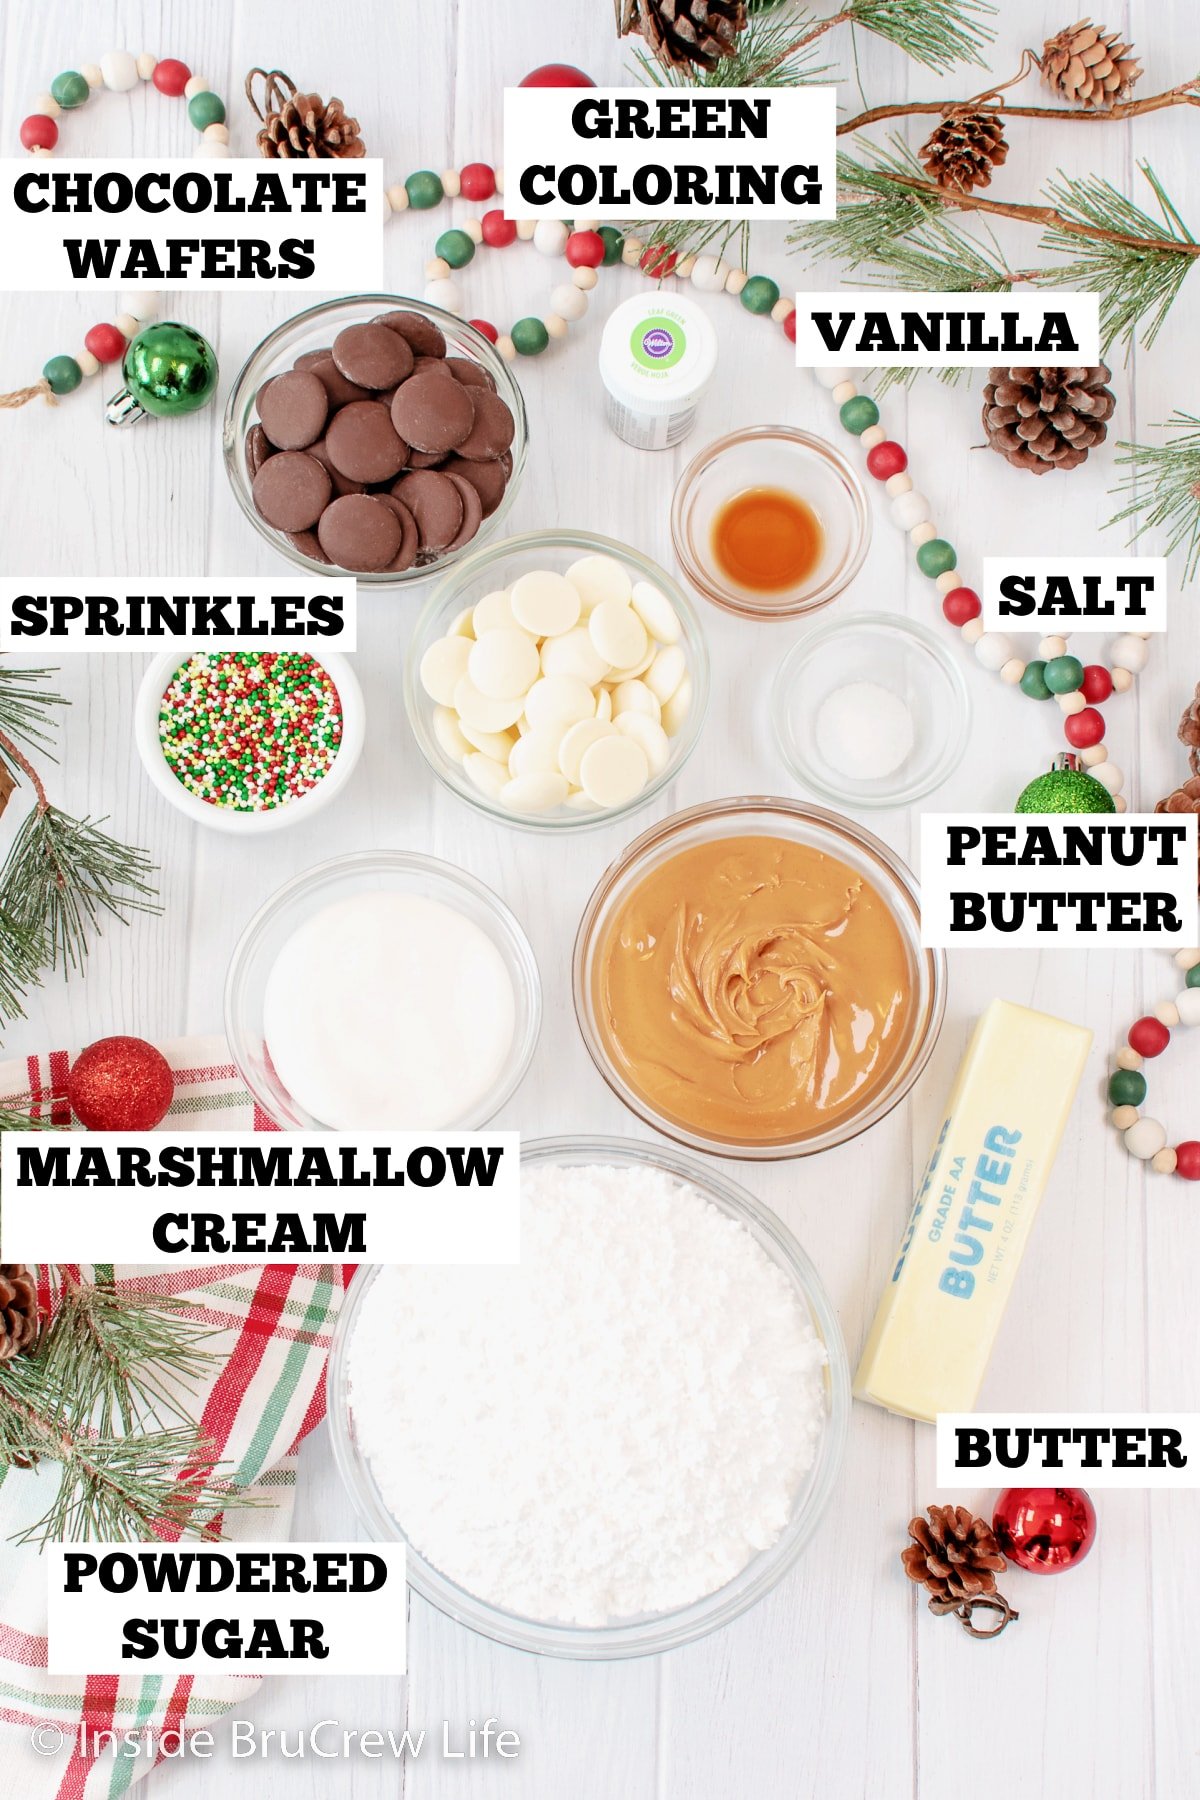
Besides your favorite sprinkles, you only need a few ingredients to make these pretty peanut butter Christmas trees.
- Peanut Butter - Creamy peanut butter is best, but crunchy could be used as well.
- Butter - Set it out ahead of time, so it has time to soften.
- Marshmallow Fluff - This is the secret ingredient to the fluffy texture.
- Vanilla Extract & Salt - Adds a great flavor.
- Chocolate - Ghirardelli wafers are our favorite. They melt smooth and taste delicious. You will need a bag of milk chocolate (or dark chocolate) and a bag of white chocolate.
How to Make Reese's Christmas Trees
These peanut butter trees are similar to Reese's peanut butter Christmas trees that are available in stores during the holidays. But ours are homemade and decorated, so they taste and look so much better.
Make the Peanut Butter Dough
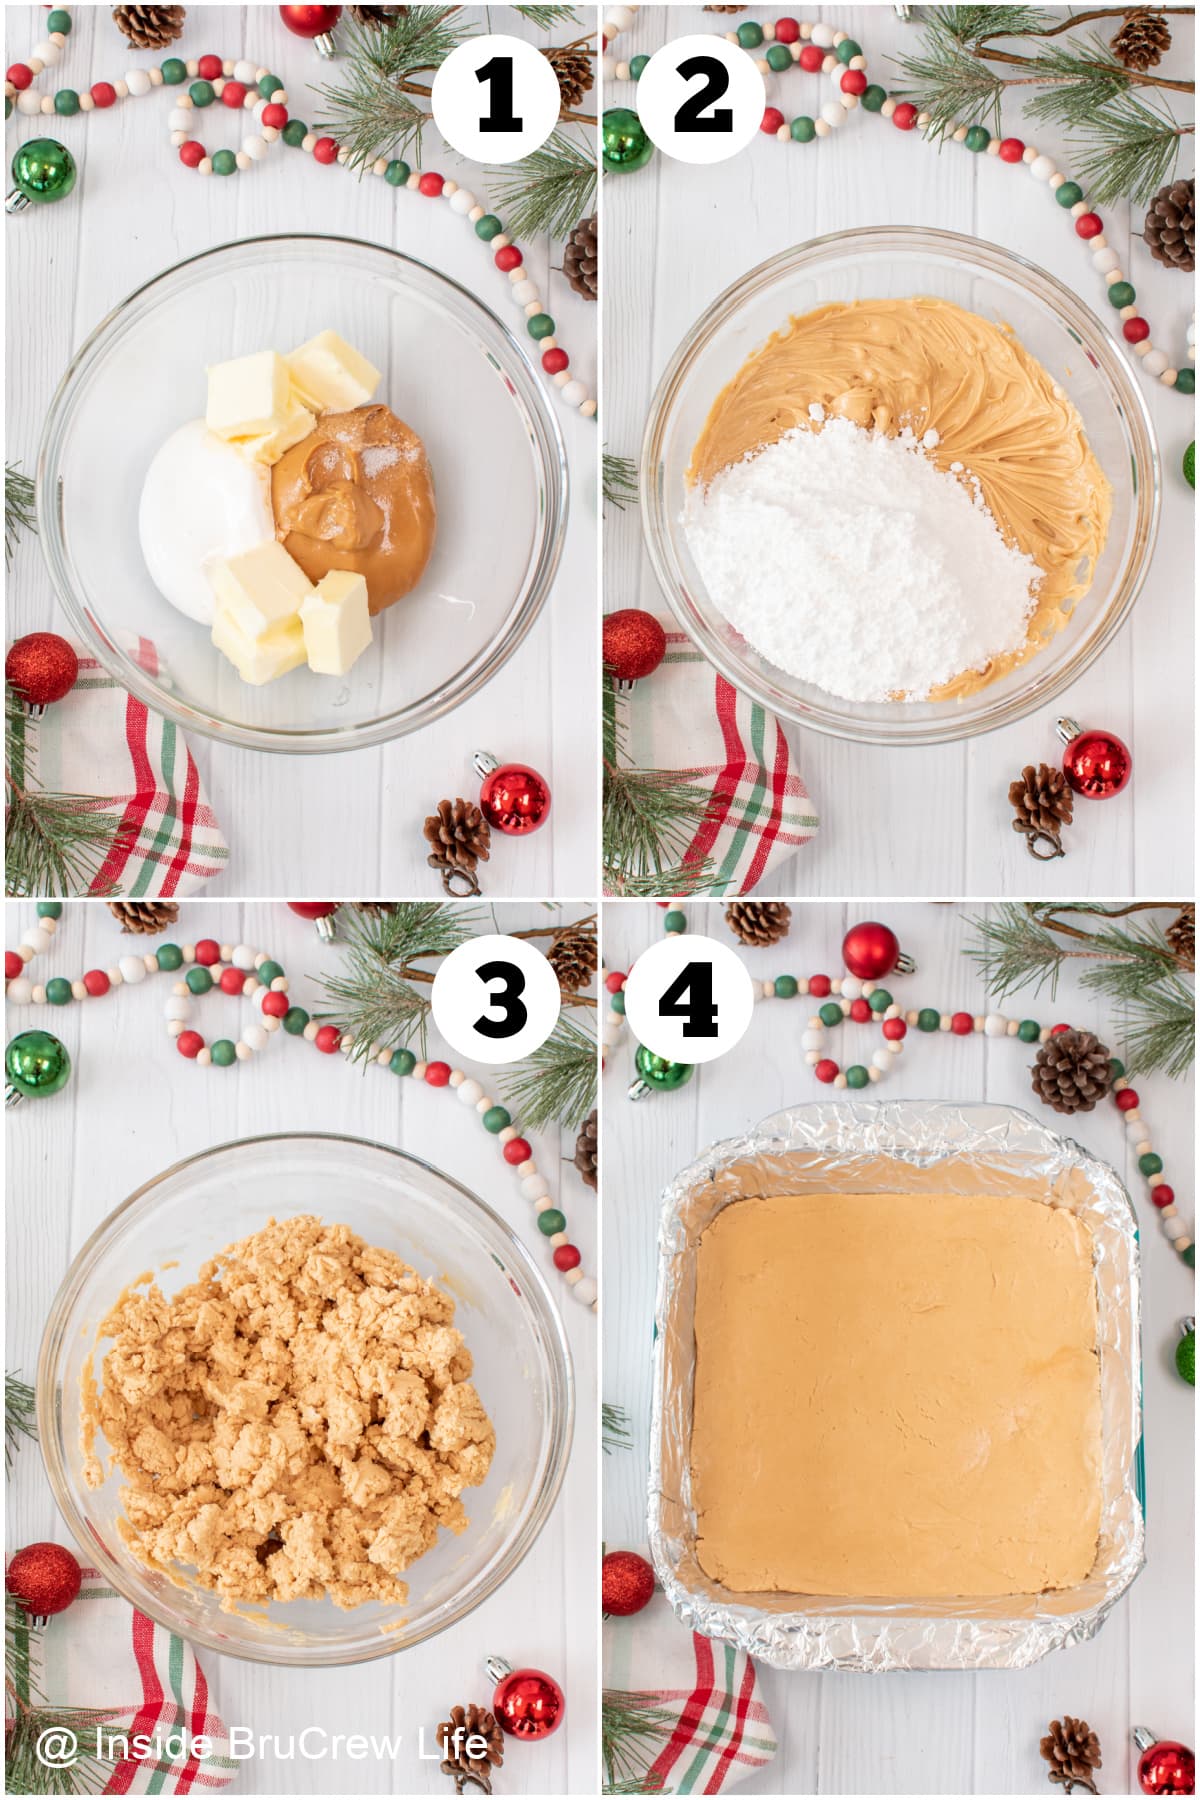
Add the softened butter, smooth peanut butter, salt, vanilla, and marshmallow to a bowl and mix until creamy.
Slowly add the powdered sugar and mix until a soft pliable dough forms. Use a spatula to scrape the sides of the bowl often.
Press the mixture into the bottom of a lined 8x8 pan. Use a piece of parchment paper or wax paper to press it down firmly and evenly. Freeze for 1 hour.
Cut Into Trees
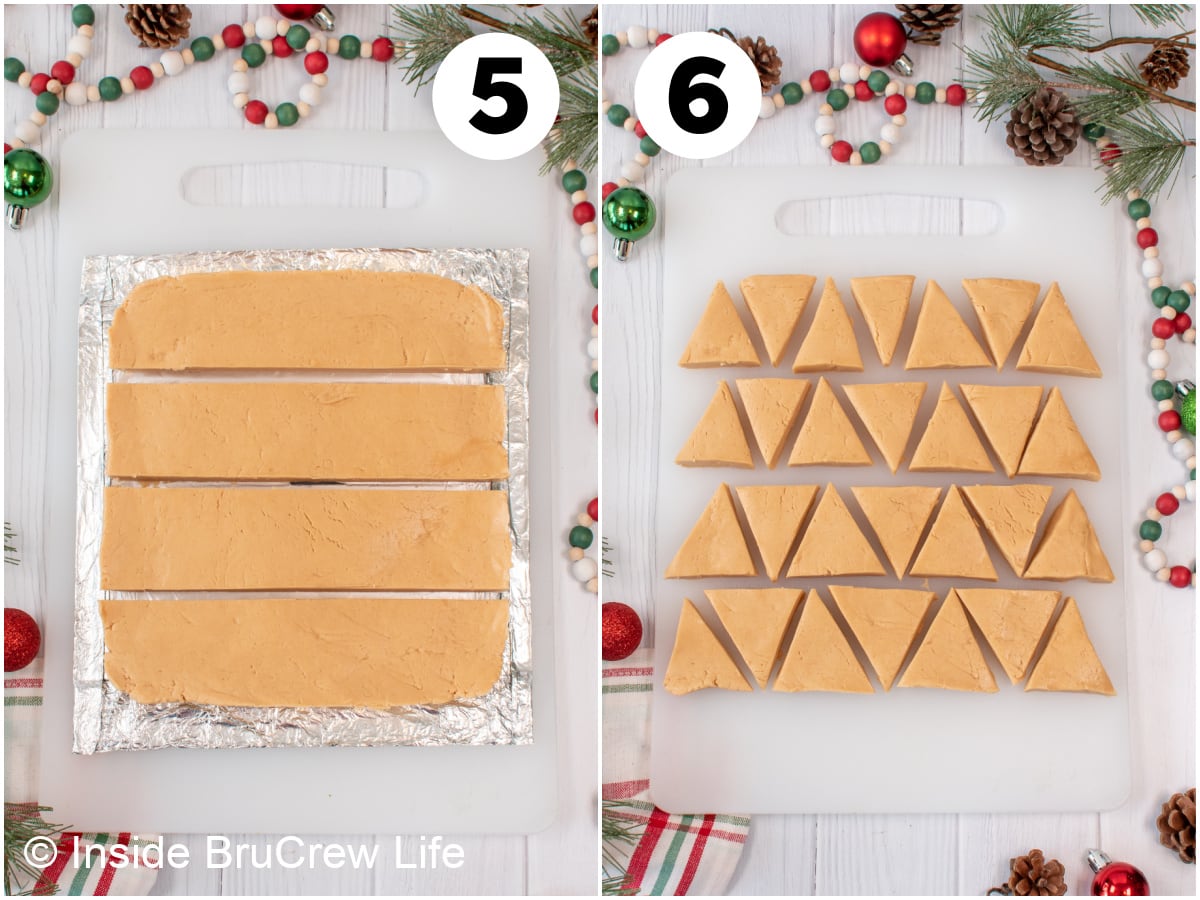
Lift the paper or foil out of the pan. Use a knife to cut the chilled square dough into four even lines.
Cut each line diagonally into 7-8 triangles. Place on a tray and refrigerate while you get the chocolate ready.
Dip in Chocolate
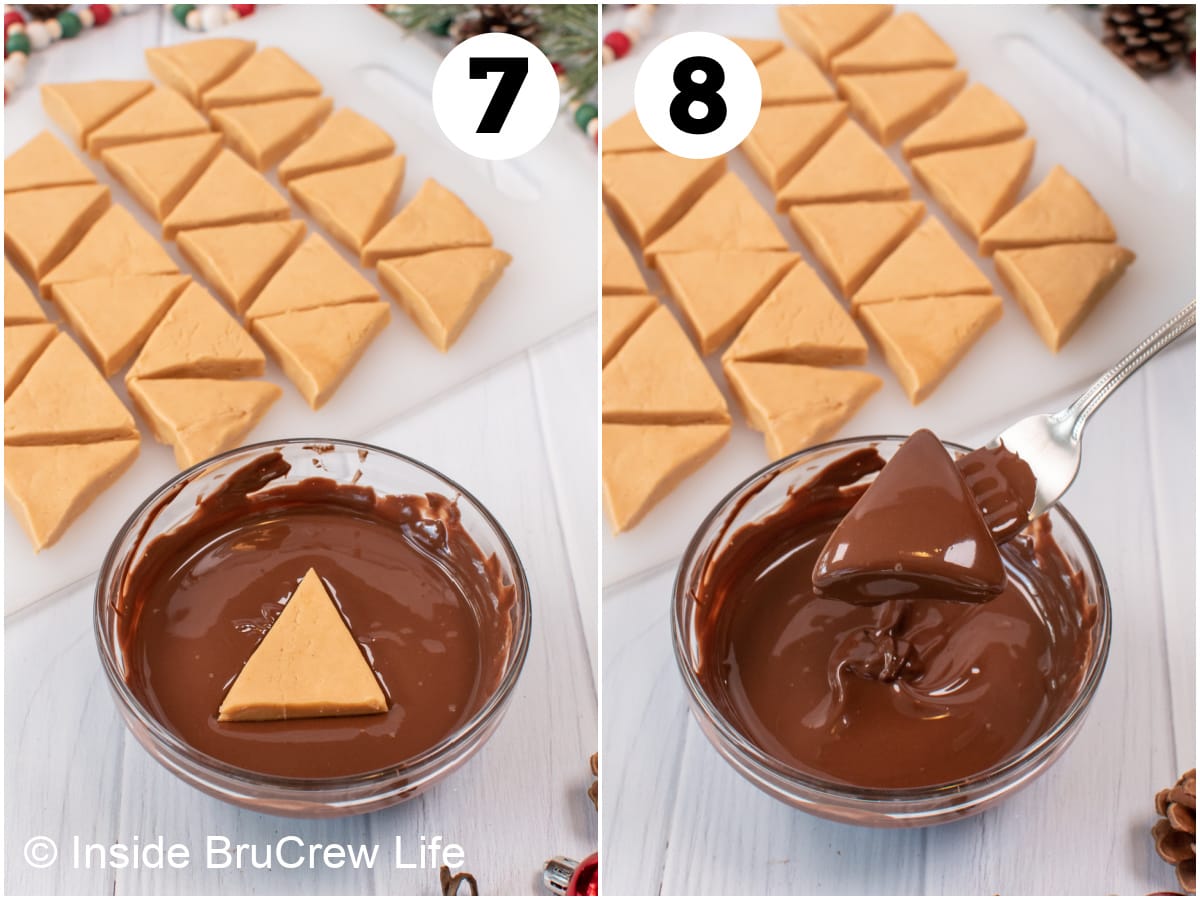
Place the chocolate wafers in a bowl and heat in the microwave at 50% power for 45 seconds. Stir and repeat until the chocolate is melted.
Drop one chilled peanut butter tree in the bowl of chocolate at a time. Use a spoon to cover it completely, then lift out using a fork. Tap the edge of the bowl lightly to remove any excess chocolate.
Place the chocolate covered trees on a parchment lined tray to set. Once the chocolate is set, use a knife to gently cut the excess chocolate away from the edges. Do not get too close to the centers though.
BruCrew Tip: Change up the look of the trees by dipping them in white chocolate first, then adding green drizzles and sprinkles.
Add Decorations
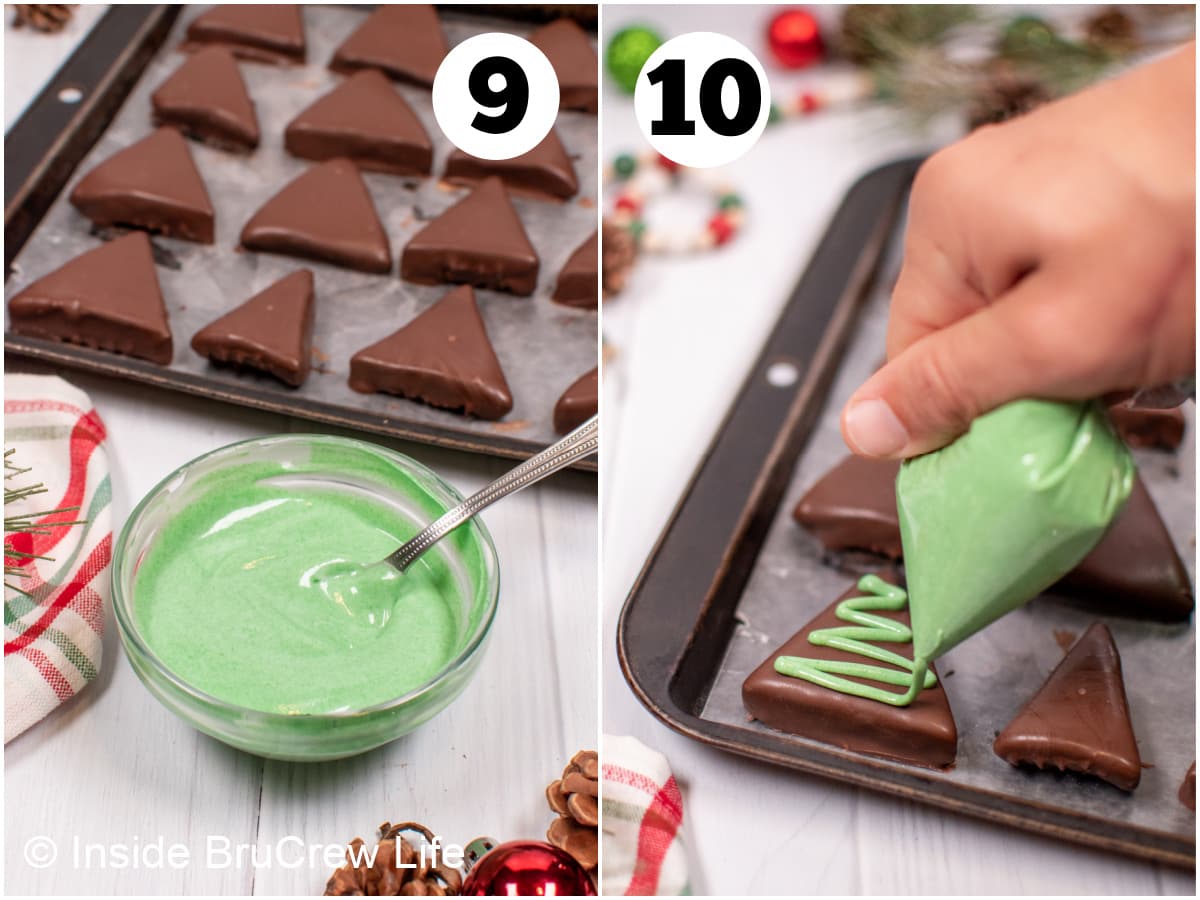
Heat the white chocolate wafers in a microwave safe bowl at 50% power for 30 seconds. Stir and repeat until melted and creamy.
Add a little bit of green gel food coloring and stir until you get the color you like.
Spoon the green chocolate into a ziplock baggie and cut one tip off. Drizzle it over the set trees.
Add red, white, and green sprinkles to the chocolate drizzles before it sets up.
Storage
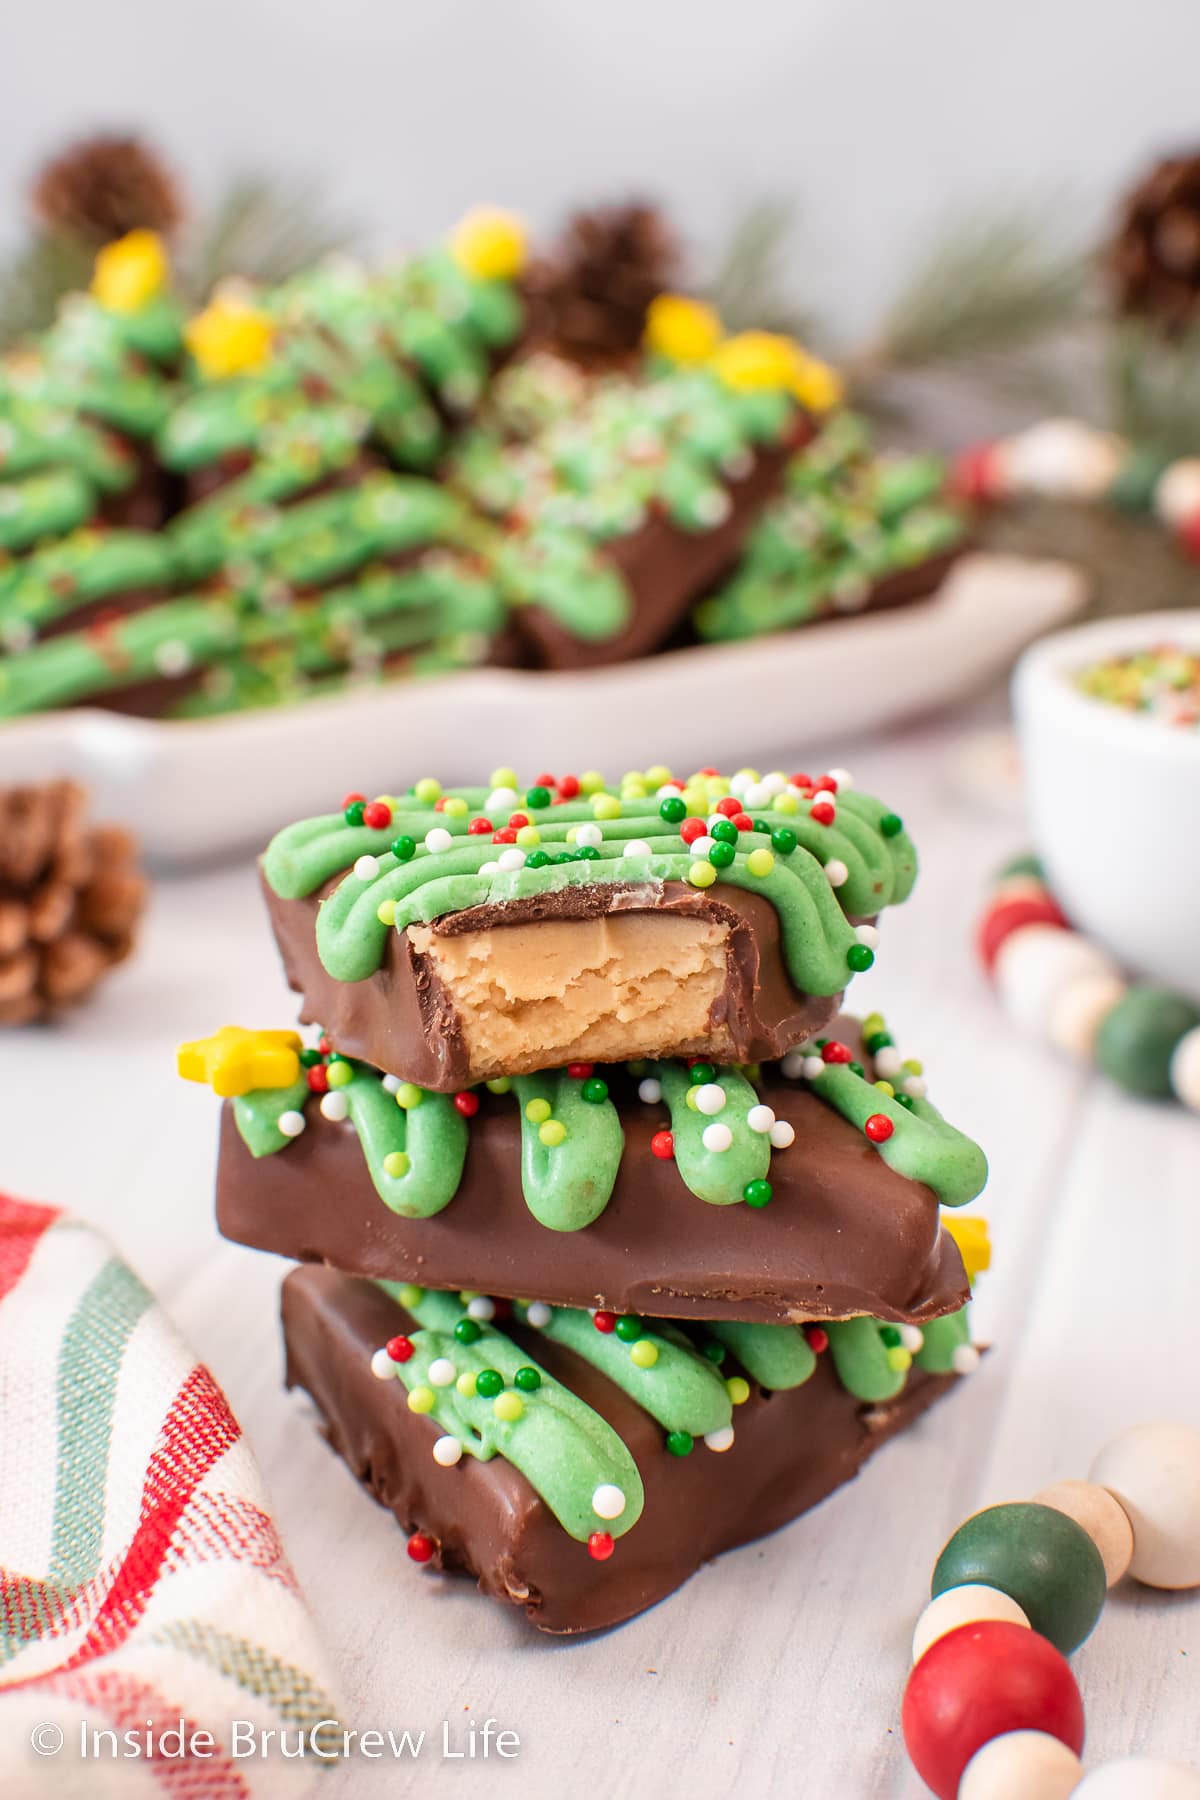
On the Counter - Keep the chocolate peanut butter trees in an airtight container with parchment paper AND paper towels for 2-3 days (if they don't get eaten before that!)
In the Refrigerator - You can store these in the refrigerator in an airtight container for 5-7 days.
In the Freezer - Individually wrap the chocolate peanut butter treats in plastic wrap and place them in a freezer bag for 1-2 months. Keep in mind, chocolate tends to discolor when frozen, so your trees may not look as pretty when they thaw out.
Tips and Tricks
Here are some additional tips for making the best chocolate peanut butter trees.
- Use a good quality chocolate for the best flavor.
- Heat the chocolate at 50% microwave power to keep it from overheating and scorching.
- Allow time for the treats to chill before dipping them in chocolate and decorating with sprinkles.
- Cut the chilled peanut butter layer into any shape you prefer. Stars, gingerbread men, or bells are all good Christmas shapes.
- Use a cookie cutter, if you want a more defined tree shape like the Reese's trees.
- Gently tap the fork holding the dipped tree on the edge of a bowl to remove the excess chocolate. This will prevent puddles from forming around each one as they cool.
- To keep the Reese's peanut butter trees from getting too soft while dipping, only take a few out of the refrigerator at a time. They dip best when cold.
BruCrew Tip: Don't want to dip candies? Use a candy mold. Paint with melted chocolate, fill with peanut butter mixture, & top with more chocolate. Let set, then remove & decorate.
Recipe FAQs
Natural peanut butter has a tendency to separate over time, so I would not recommend it.
Once you have coated all the peanut butter trees, use any leftover chocolate to cover pretzels, strawberries, nuts, or Oreos. Decorate as you would like.
If you are short on time, you can make the peanut butter mixture ahead of time and cut into shapes. Place them in an airtight container in the freezer with wax paper between layers. Thaw in the refrigerator the night before you want to dip them.
Other Easy Christmas Treats
Do you love a recipe you tried from Inside BruCrew Life?
Please leave a 5-star ⭐️ rating and a review in the comments section below.
Recipe
Reese's Christmas Trees
Make the holidays sweeter with homemade Reese's Christmas Trees. Filled with peanut butter, covered in chocolate, and decorated with sprinkles, these candy trees are perfect for sharing.
Ingredients
- 6 tablespoons unsalted butter, softened
- ½ cup creamy peanut butter
- ¼ cup marshmallow cream
- ½ teaspoon vanilla extract
- pinch of salt
- 2 cups powdered sugar
- 1 - 10 ounce bag chocolate melting wafers
- ½ cup white chocolate wafers
- green gel color
- sprinkles
Instructions
- Mix together the butter, peanut butter, marshmallow, vanilla, and salt until smooth and creamy.
- Slowly add in the powdered sugar and mix until a soft dough forms.
- Press the mixture into the bottom of a lined 8x8 pan. Use parchment paper to press it down evenly. Freeze the dough for 1 hour.
- Remove and cut the square into 4 lines. Cut each line diagonally into 7-8 triangles. Place the trees on a parchment lined tray and refrigerate.
- Place the chocolate wafers in a microwave safe bowl. Heat at 50% power for 45 seconds. Stir and repeat until the chocolate is melted and creamy.
- Drop the trees one at a time in the melted chocolate. Use a spoon to cover the tops completely. Use a fork to lift the trees out. Tap the fork gently on the side of the bowl to remove excess chocolate. Place on a parchment lined tray.
- Once the trees have completely set, use a sharp knife to trim any extra chocolate puddles that may have formed. Do not get too close to the centers.
- Melt the white chocolate wafers in a microwave safe bowl. Heat at 50% power for 30 seconds. Stir and repeat until melted. Add a little bit of green gel color with a toothpick. Stir until you get the green color you want.
- Spoon the green chocolate into a ziplock baggie and cut one tip off. Drizzle over the set trees and add sprinkles and a star.
Notes
- Use a good quality chocolate for the best flavor.
- Heat the chocolate at 50% microwave power to keep it from overheating and scorching.
- Allow time for the treats to chill before dipping them in chocolate and decorating with sprinkles.
- Cut the chilled peanut butter layer into any shape you prefer. Stars, gingerbread men, or bells are all good Christmas shapes.
- Use a cookie cutter if you want a more defined tree shape.
- Gently tap the fork holding the dipped tree on the edge of a bowl to remove the excess chocolate. This will prevent puddles from forming around each one as they cool.
- To keep the peanut butter trees from getting too soft while dipping, only take a few out of the refrigerator at a time. They dip best when cold.
Nutrition Information:
Yield: 28 Serving Size: 1Amount Per Serving: Calories: 151Total Fat: 8gSaturated Fat: 4gTrans Fat: 0gUnsaturated Fat: 3gCholesterol: 9mgSodium: 52mgCarbohydrates: 18gFiber: 1gSugar: 15gProtein: 2g
Nutrition facts are an estimate and are not guaranteed to be accurate. If you need special diet advice, please see a registered dietician.







Robin says
Just wanted to let you know that in the main recipe it says to melt the chocolate for 45 minutes but in the recipe to be printed it is correct stating 45 seconds. I know better but some people may not. Just a typo. Merry Christmas.
Jocelyn says
Yikes! Oh, my goodness thank you so much for pointing that out. I appreciate you letting me know and will get it fixed right away! Merry Christmas!