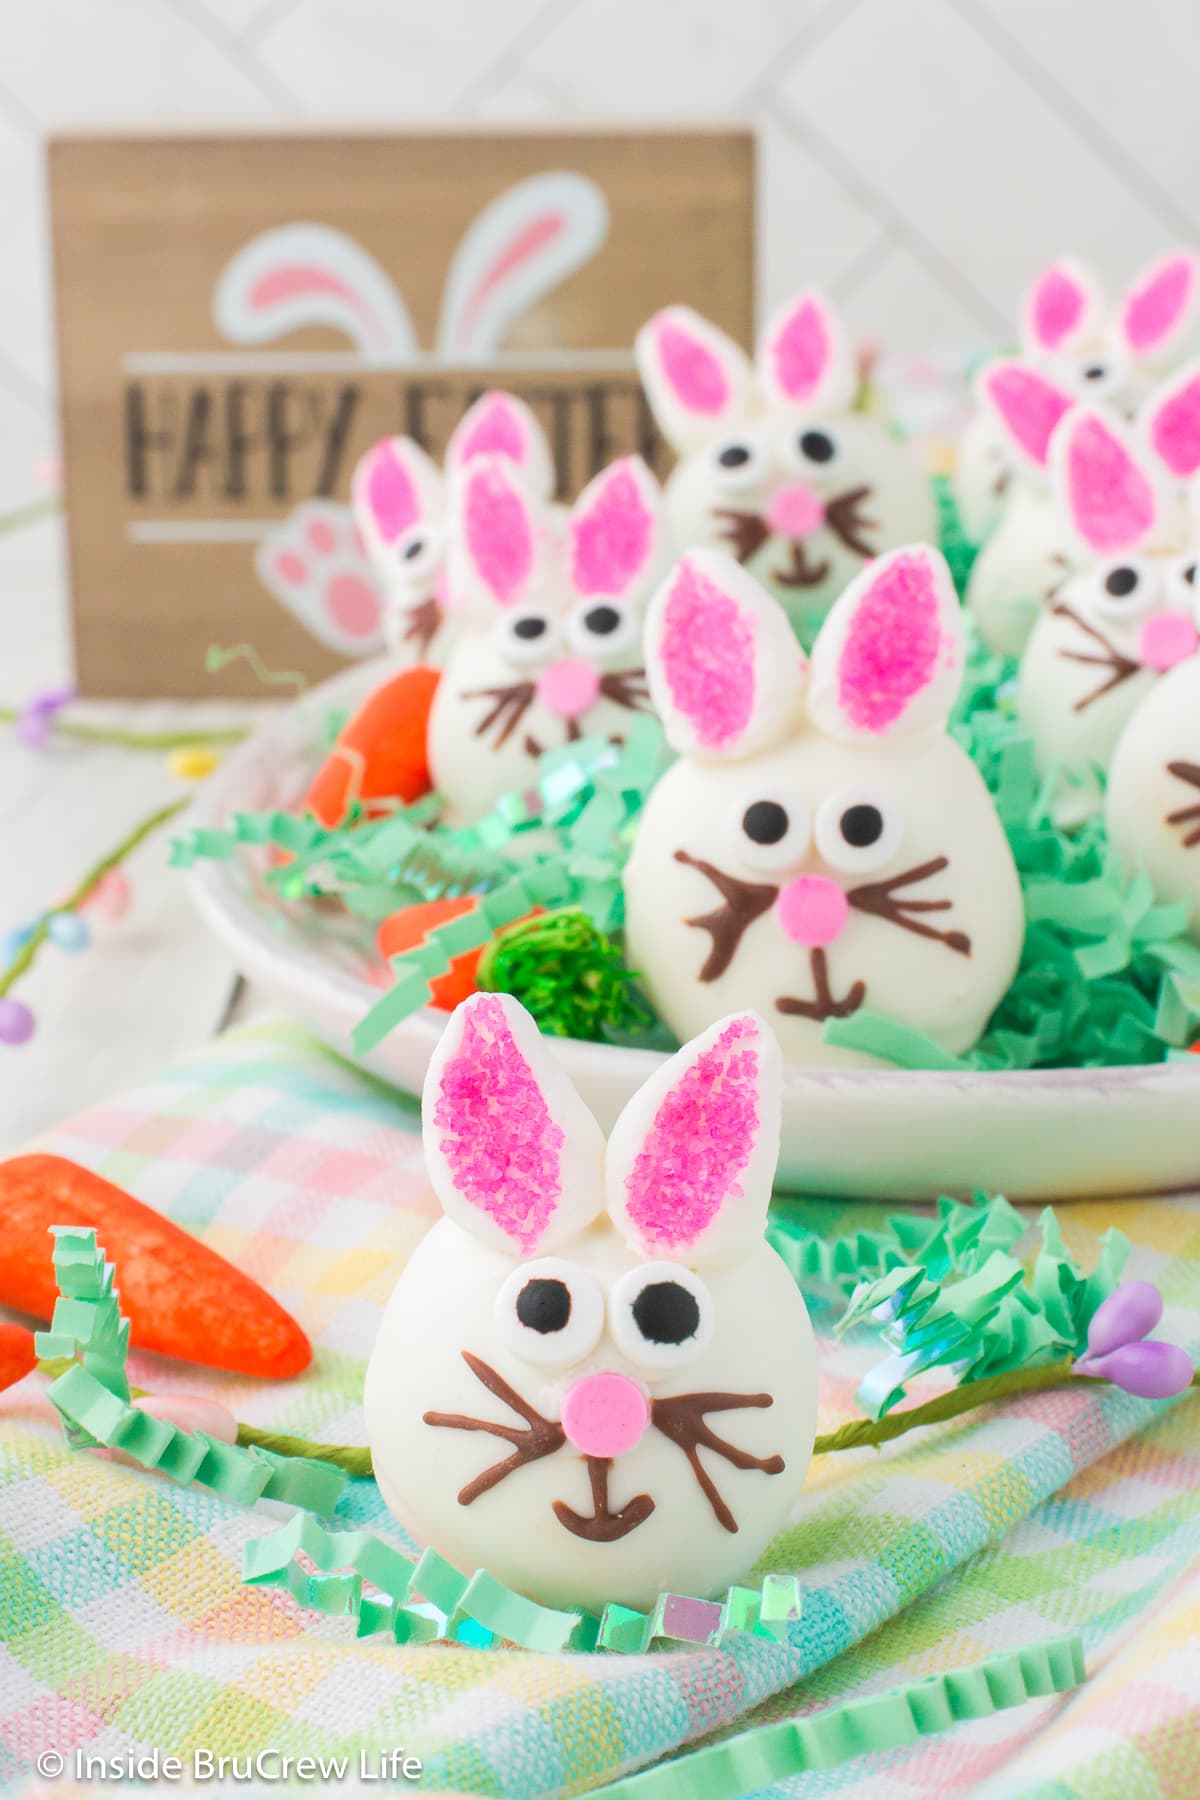
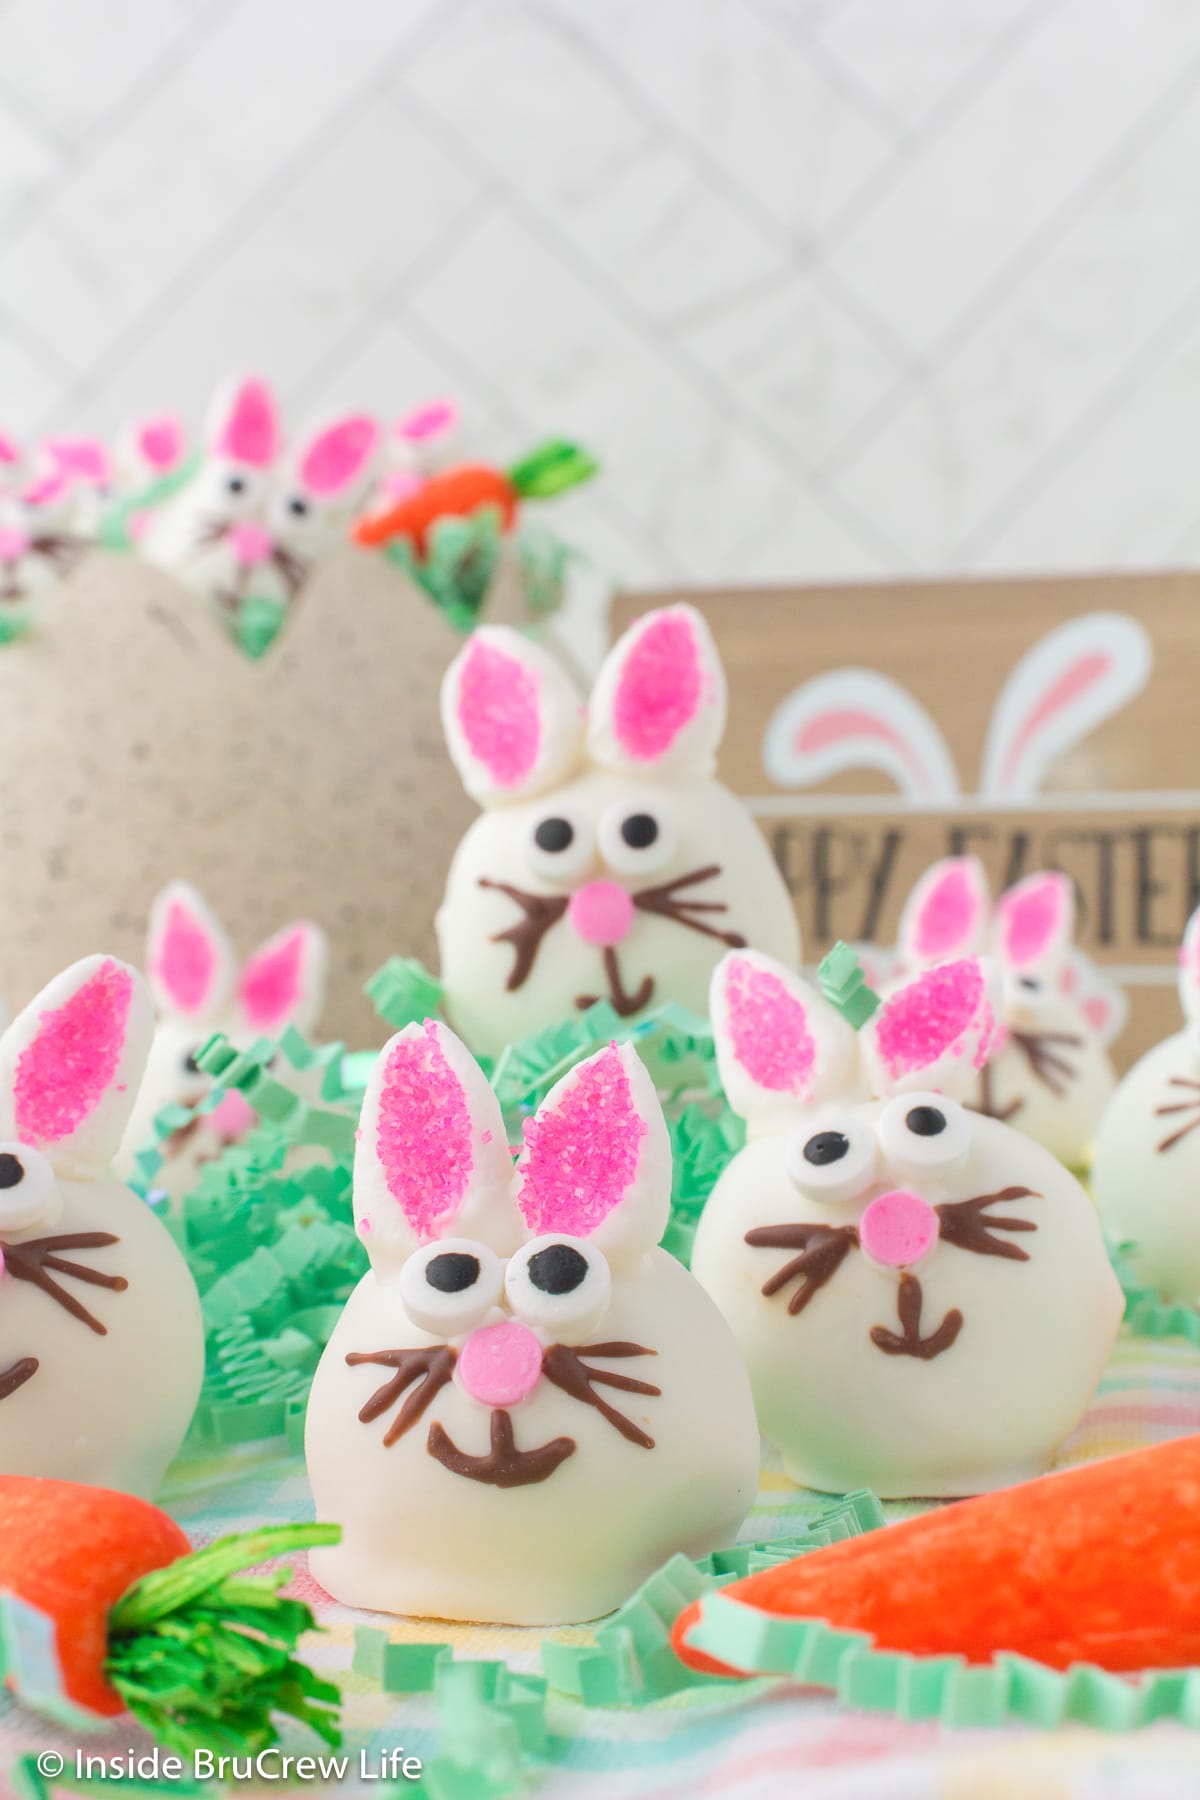
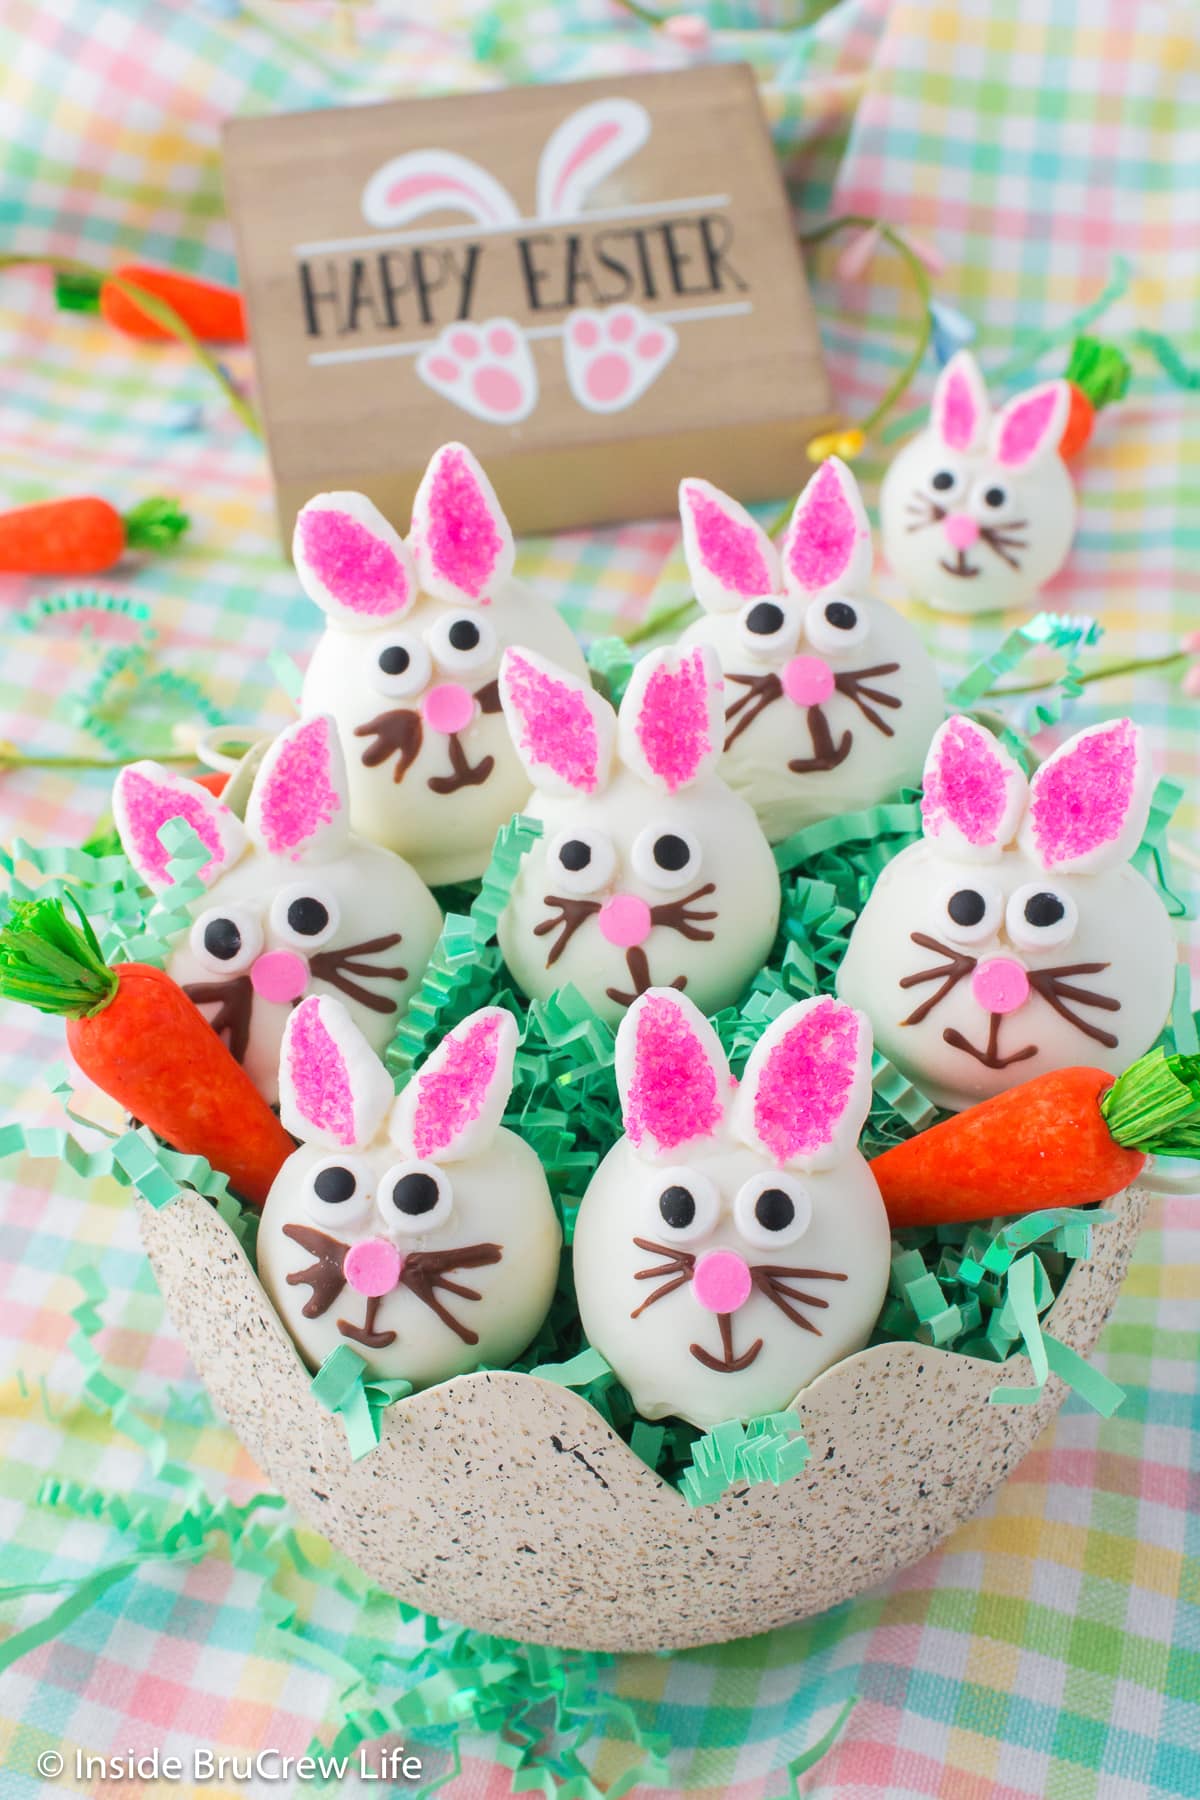
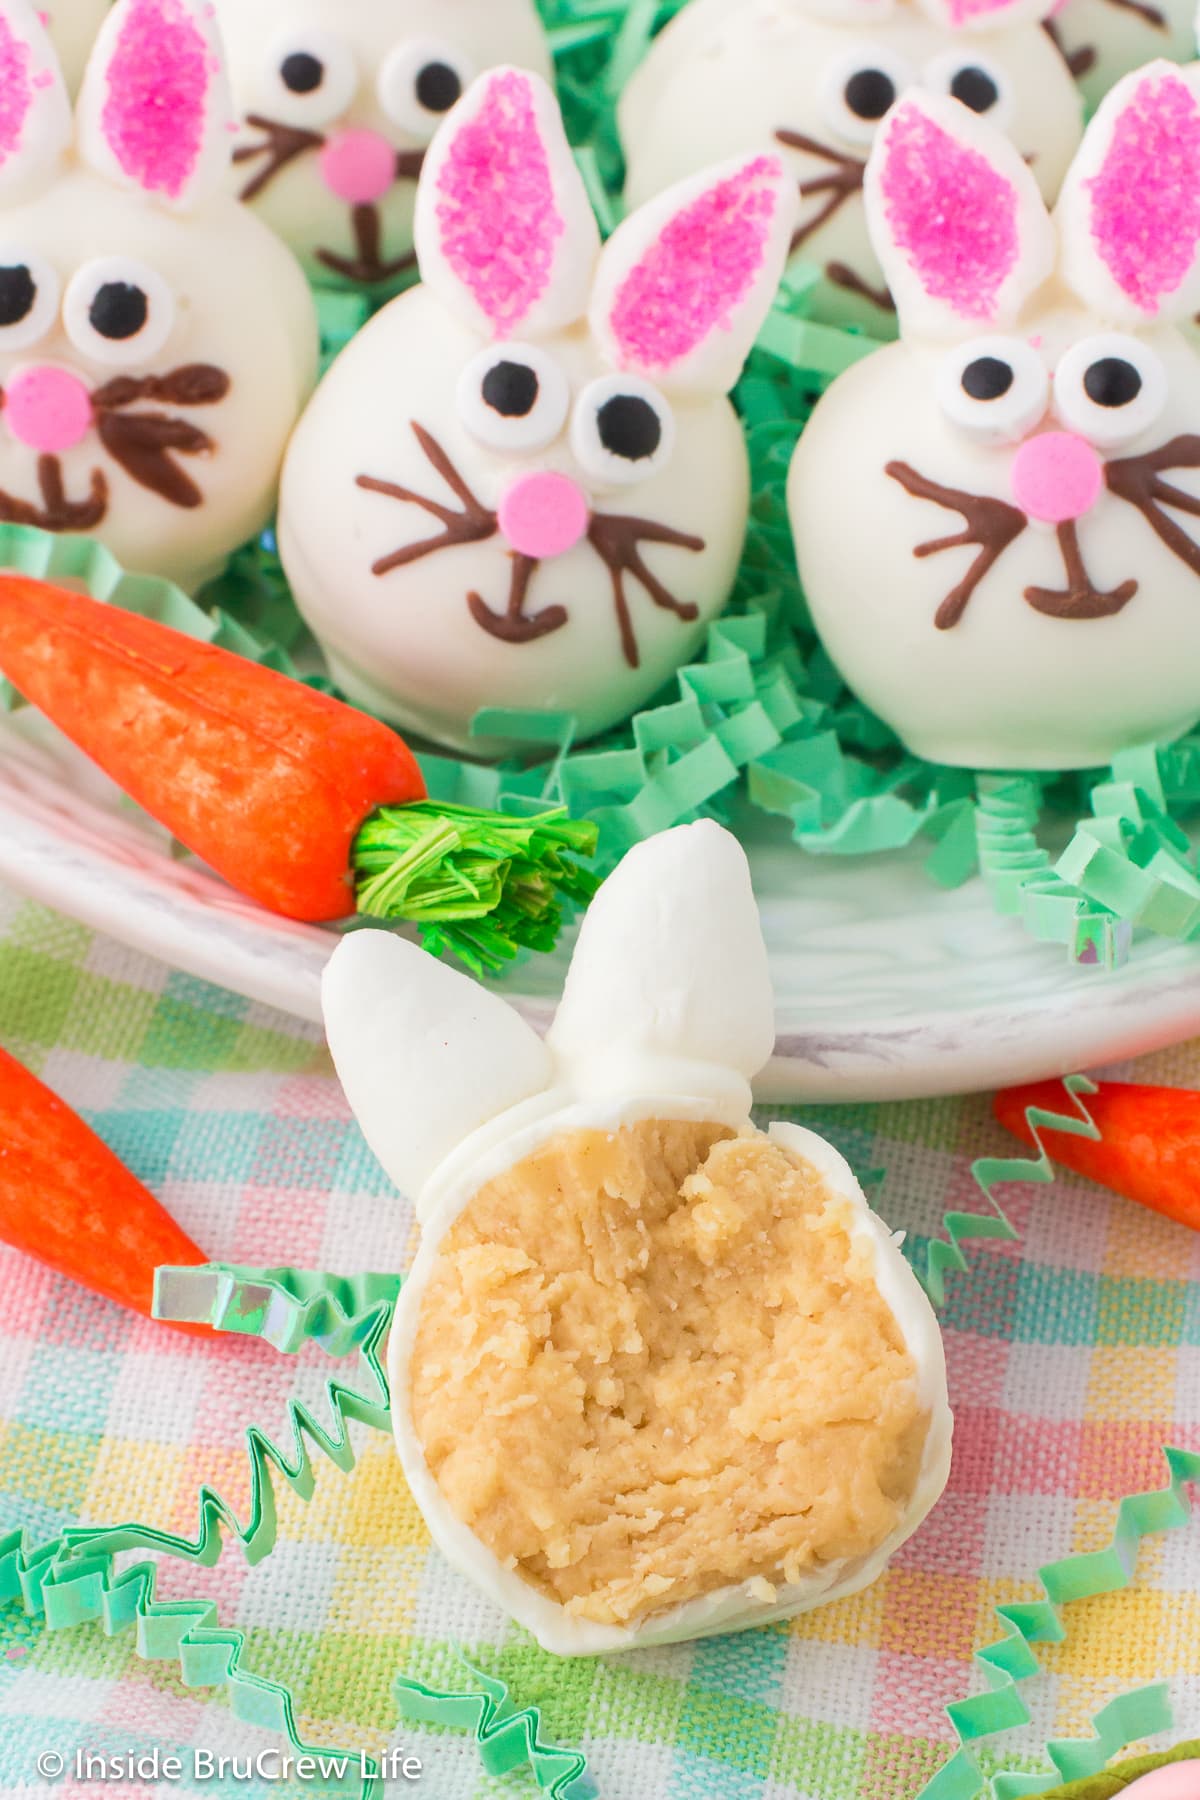
Make this Easter extra special with these adorable Peanut Butter Bunnies! A creamy peanut butter center dipped in white chocolate makes this sweet bunny dessert melt in your mouth.
Jump to:
Peanut Butter Bunnies
This time of year brings back happy memories of our annual Easter egg hunt at my grandparents' house. The best part was finding giant peanut butter eggs with our names on them!
I continued the tradition of decorating eggs and having a fun egg hunt with our children. Every Easter, I create a new special treat and have come up with many cute recipes, such as bunny butt Rice Krispie treats and Oreo bunnies. This year, I was inspired to create more adorable bunny candies.
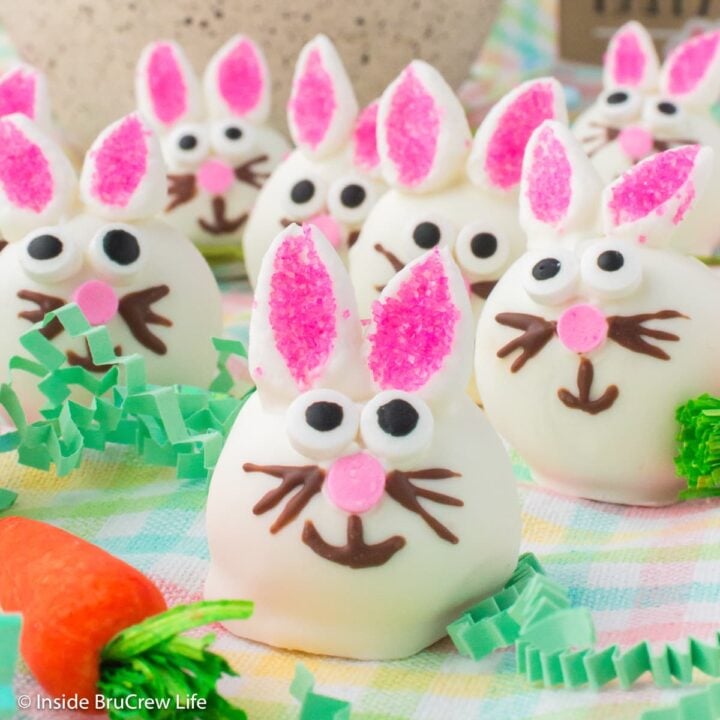
These peanut butter balls can be customized for any occasion. This Easter, I gave them a new look by adding pink sugar, marshmallow ears, and edible googly eyes. The eyes truly highlight their playful personality!
Why Make Homemade Easter Bunnies
- They're easy to make. No baking is required, and they taste incredibly delicious! Kids of all ages will love adding ears and faces to the peanut butter bunnies.
- Adorable bunny-shaped candies. Pink ears and googly eyes transform the traditional treat into the cutest Easter treat.
- Great for any occasion. These sweet candies are perfect for parties, Easter baskets, or a delightful addition to the holiday dinner table. They will be gone in no time!
Main Ingredients
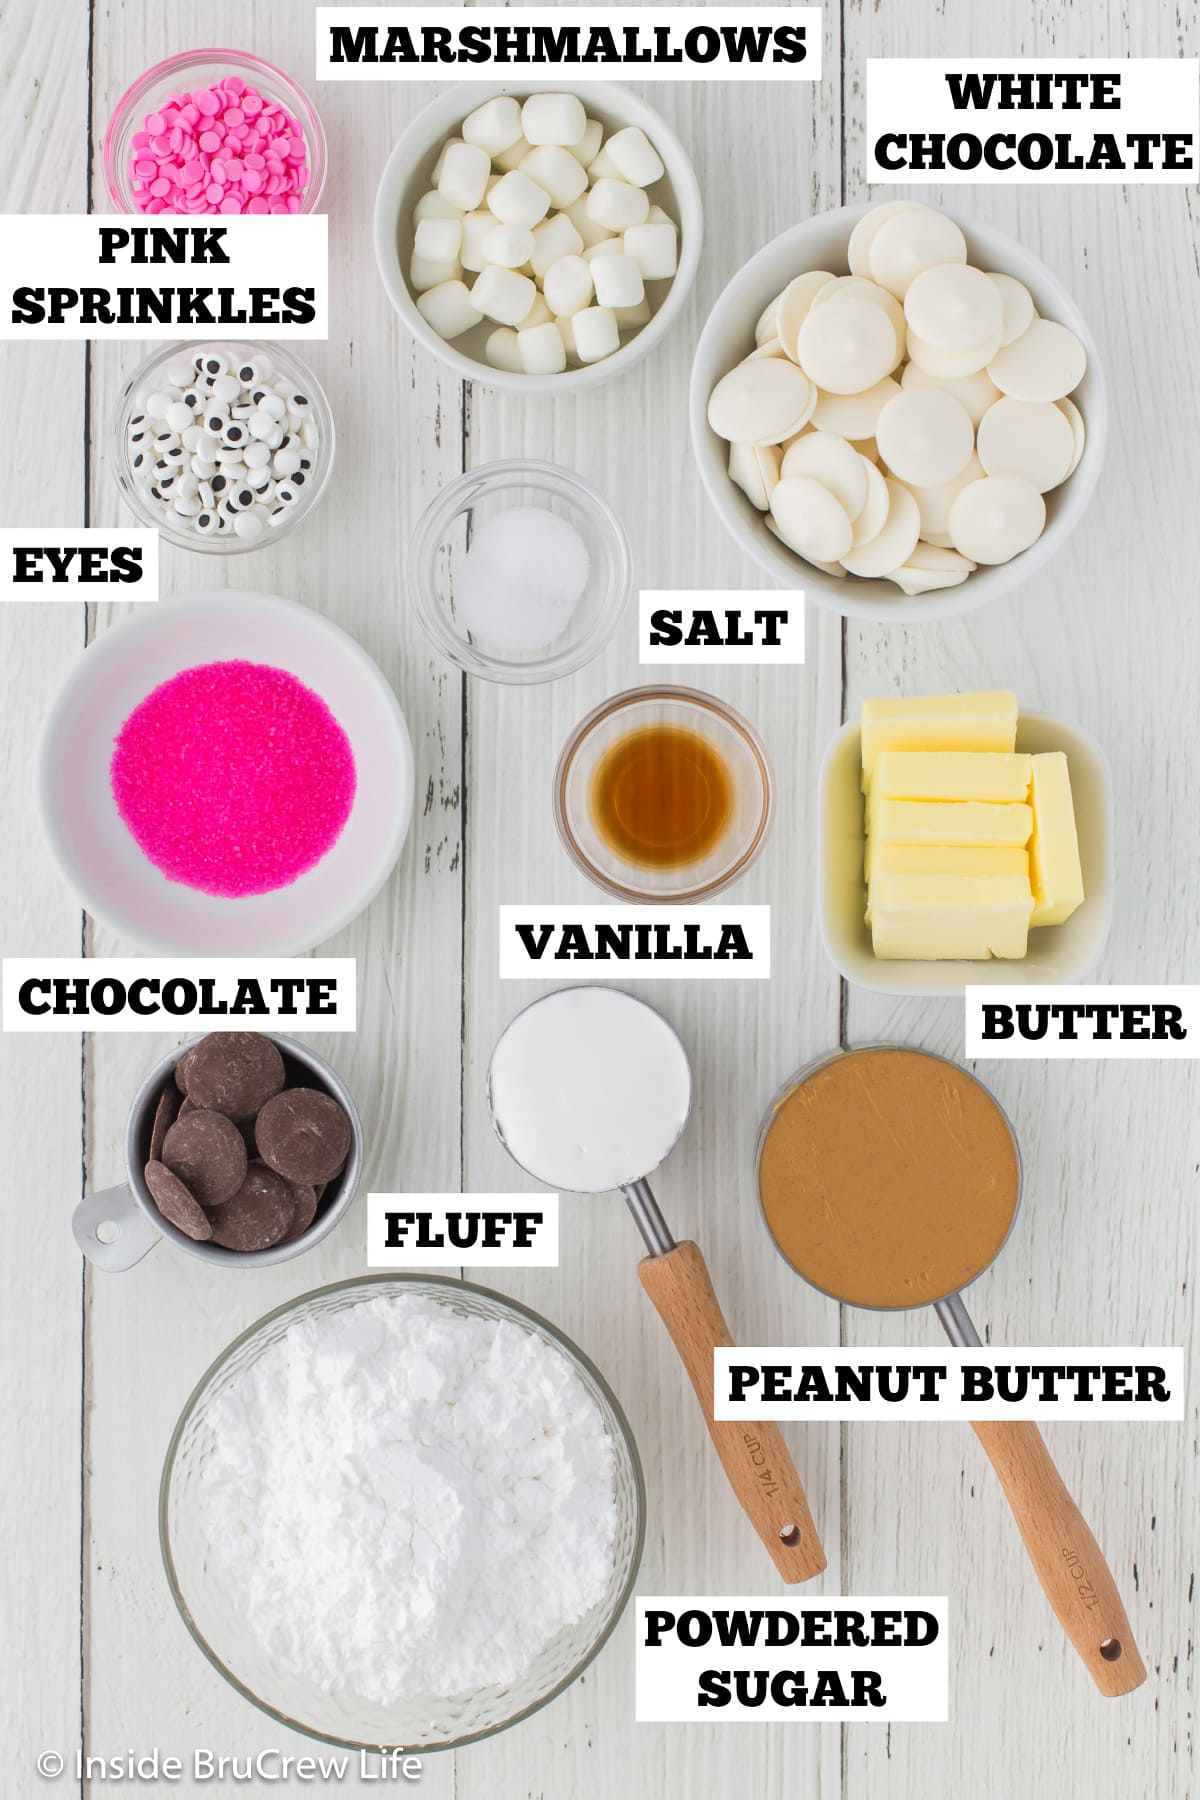
You need only a few simple ingredients and your favorite dipping chocolate to make these classic holiday treats.
- Unsalted Butter - Set it out beforehand so it has time to soften.
- Creamy Peanut Butter - I recommend using no-stir peanut butter for a firm filling. Feel free to use crunchy peanut butter if you want a crunch in your truffles. Natural peanut butter is not recommended because it is too runny.
- Marshmallow Cream - My secret ingredient is to give the dough a fluffier consistency. It is also known as fluff and can be found in most grocery stores in the baking aisle.
- Powdered Sugar - Provides sweetness and thickness in the dough.
- Chocolate Melting Wafers - I used white wafers to keep the bunnies light and bright for Easter. Feel free to use semi-sweet or dark chocolate if you want brown bunnies. You will also need semi-sweet or dark chocolate wafers for the whiskers.
- Bunny Faces - Mini marshmallows for ears, pink sanding sugar for the inside ear, candy eyeballs, and pink round sprinkles for noses.
How To Make Peanut Butter Bunnies
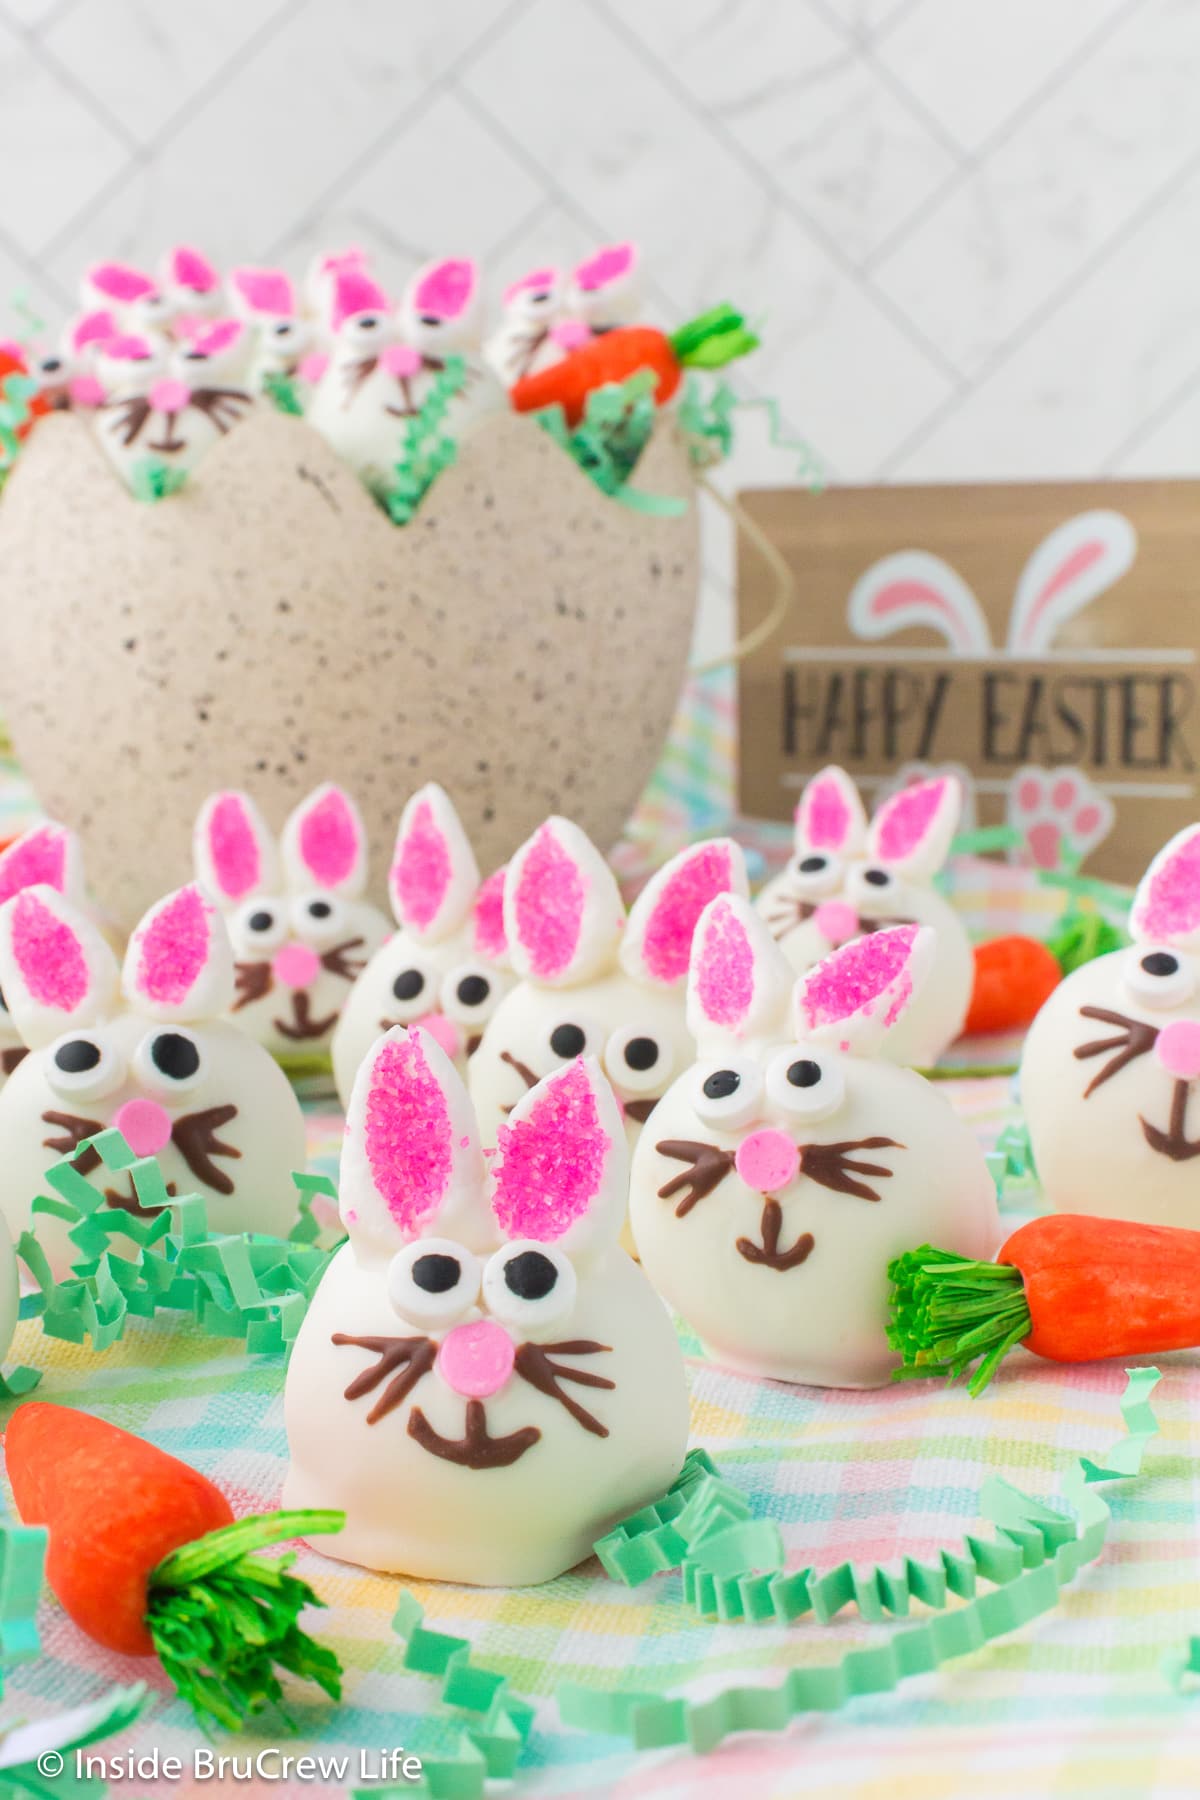
We simplified the peanut butter ball recipe with easy-to-follow instructions for making this seasonal bunny shape. You can quickly have these no-bake treats chilling on your counter!
Assemble the Ears
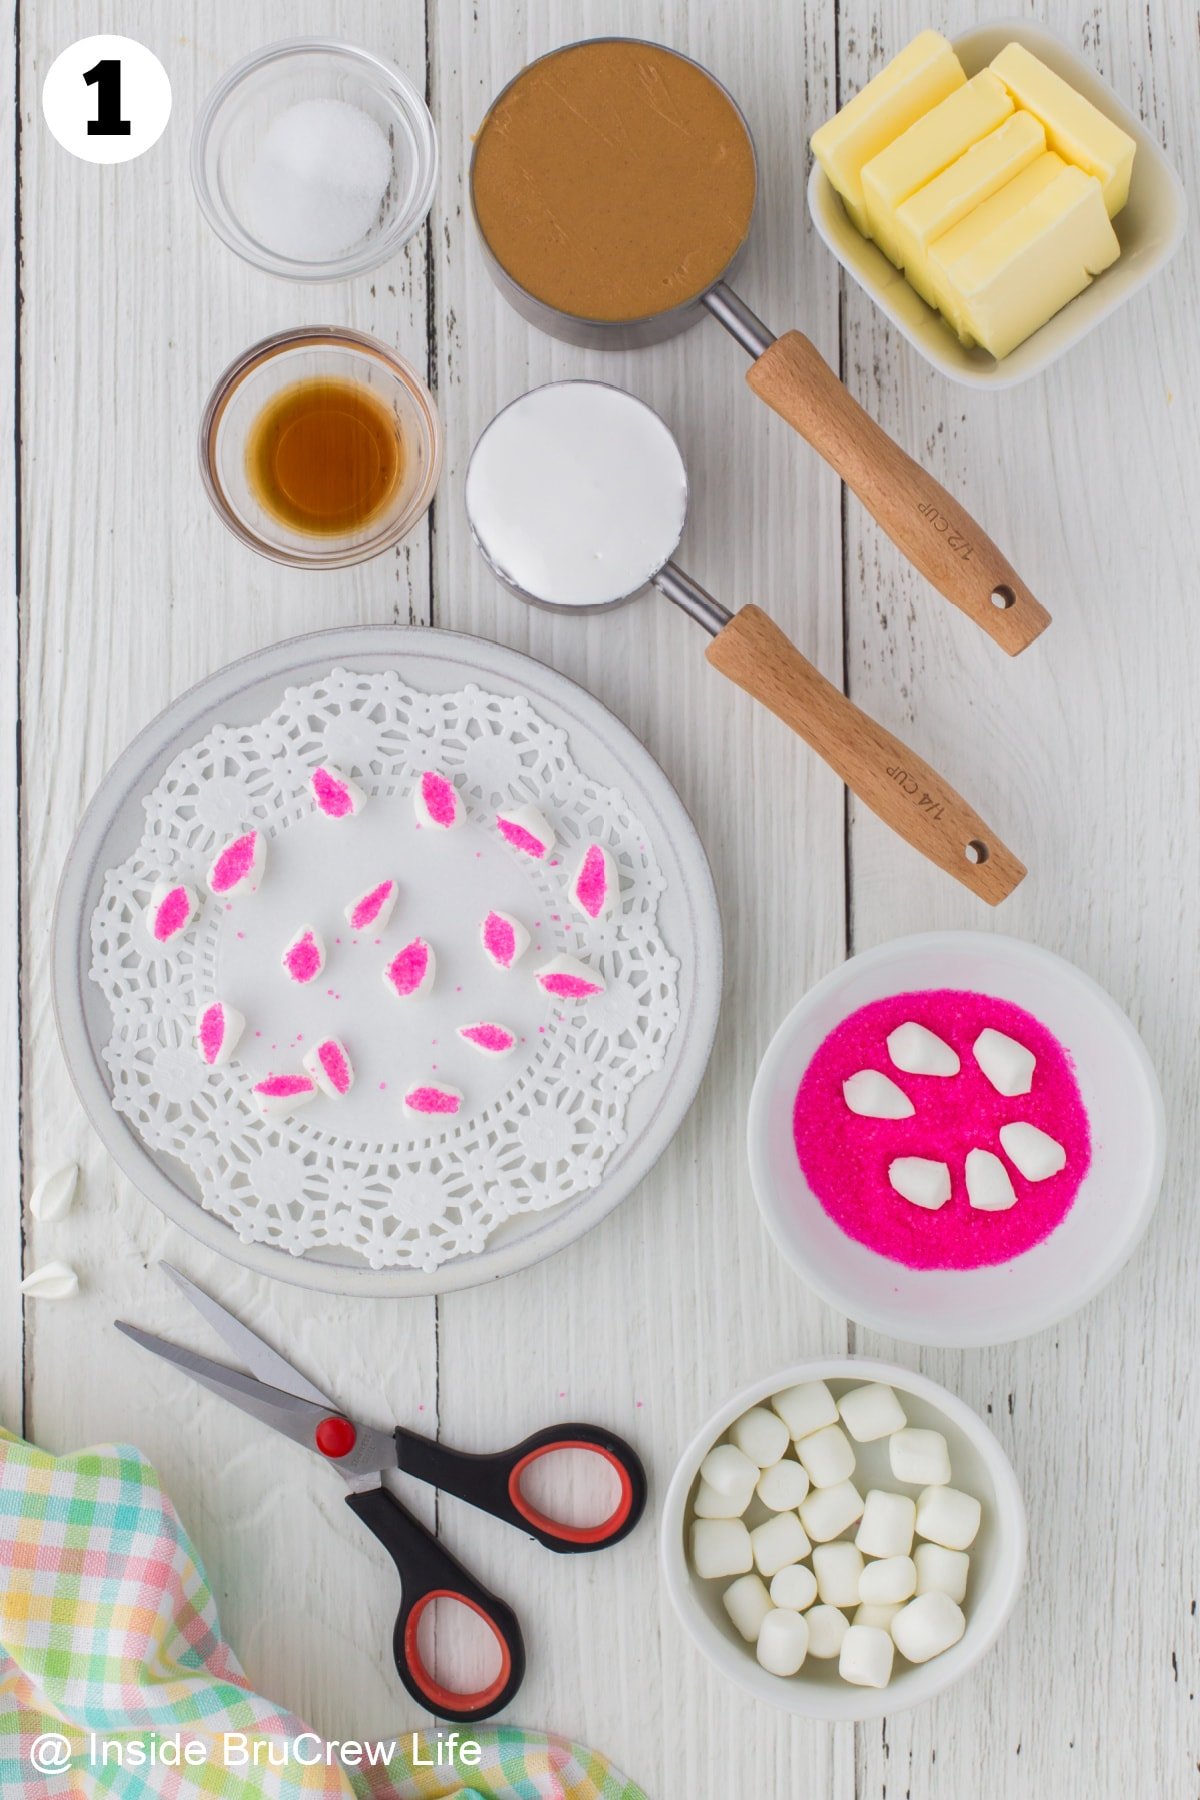
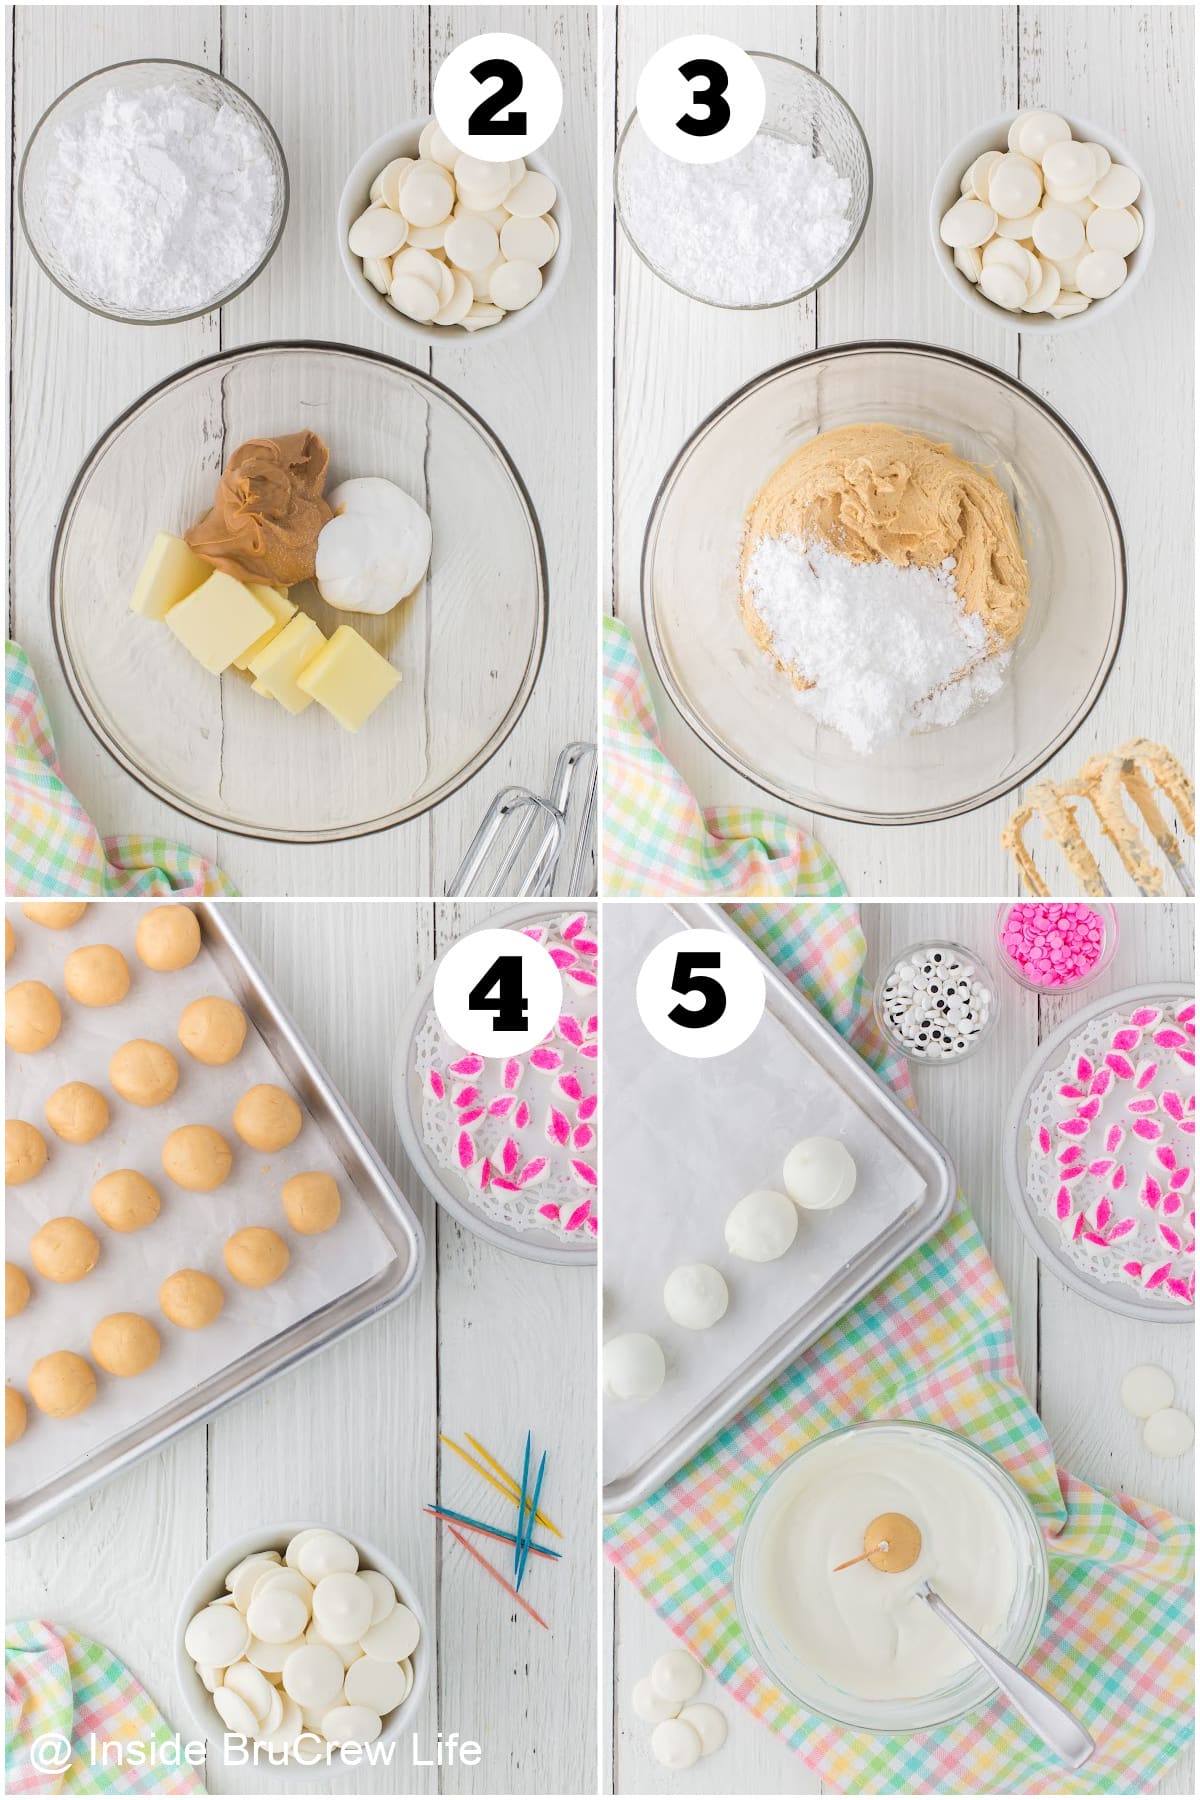
Diagonally cut the mini marshmallows in half, then dip the sticky side in pink sanding sugar. Set aside.
Make The Dough
Beat the softened butter, peanut butter, vanilla, salt, and marshmallow cream in a large mixing bowl until creamy. Slowly add the powdered sugar and mix until a soft dough forms. Scrape the sides of the bowl often.
Roll the mixture into 36 even balls and then place on a pan lined with parchment or wax paper. Use a 1-tablespoon scoop to keep everything even. Refrigerate the balls for at least 30 minutes.
Dip in Chocolate
Melt the chocolate wafers in the microwave using 50% power to prevent overheating and burning. Follow the package instructions for melting the wafers.
Use a toothpick to dip each candy into the chocolate, tap off excess chocolate, place it on a tray, and then twist out the toothpick.
Add Faces
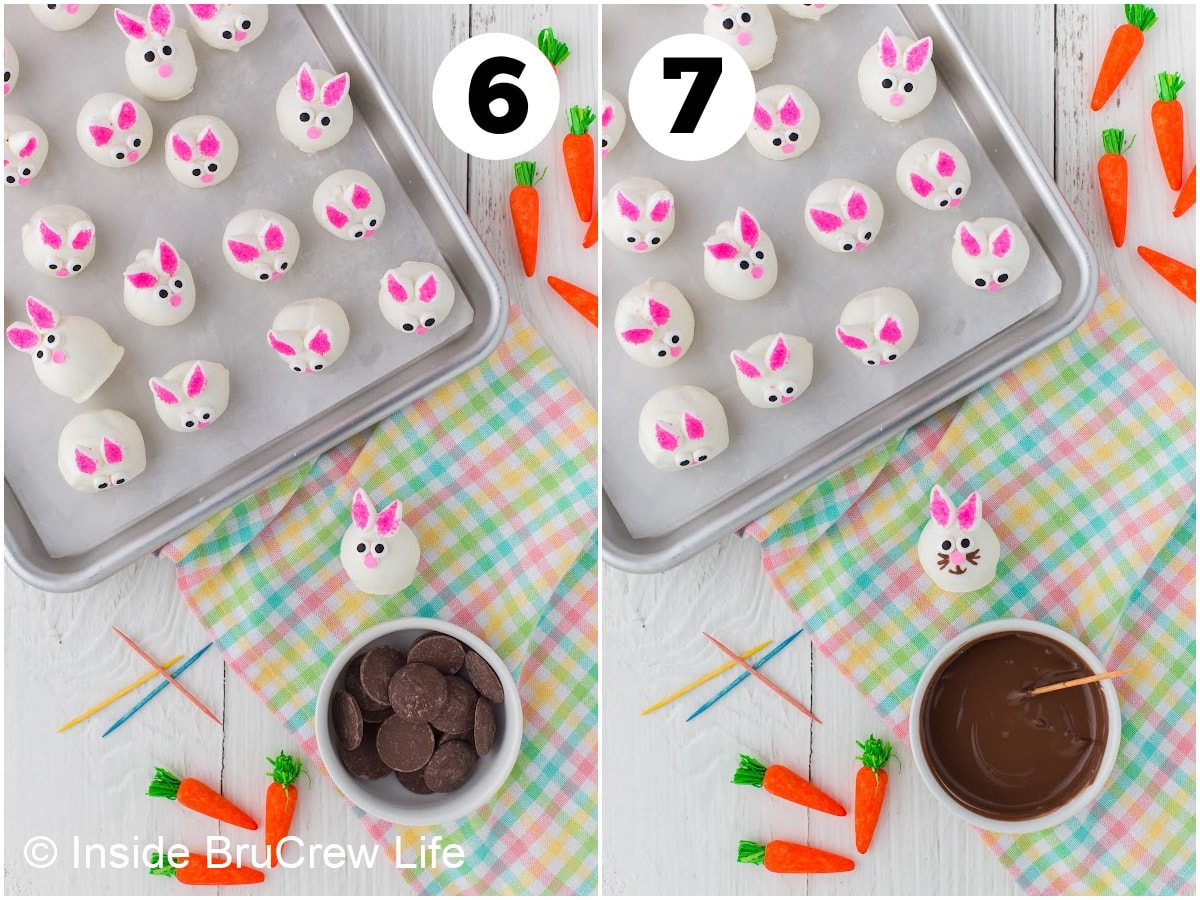
Dip the bottoms of the marshmallows in melted white chocolate. Add two to each ball.
Add chocolate to the back of two eyes and one sprinkle with a toothpick. Place it on the front of the ball for the Easter bunny face, then repeat this with all the balls.
Melt the dark chocolate in the microwave. Dip a toothpick in the melted chocolate and draw whiskers on the bunny faces.
Storage Recommendations
On the Counter: Keep the chocolate peanut butter bunnies in an airtight container lined with paper towels for 2-3 days.
In the Refrigerator: You can store these in an airtight container in the fridge for a week.
Serving Ideas
- Fill Easter eggs. Place a few bunnies inside plastic eggs and then place them in your loved one's baskets.
- Give out treat bags. Place them in a clear treat bag with Easter grass. Tie the top closed with ribbons and add a gift tag.
- Make an Easter charcuterie board. Add the bunnies, birds nest cookies, Oreo chicks, Cadbury chocolate chip cookies, and your favorite holiday candies to an egg-shaped board.
Tips and Tricks
- If the dough is too crumbly, add a bit more peanut butter. If it is too sticky, add more powdered sugar until it resembles a dough. You should be able to roll the dough without it sticking to your hands or falling apart.
- Refrigerate the peanut butter candies for at least 30 minutes or longer. Only remove a few at a time to dip because they get soft. They stay on the toothpicks better when they are cold. Do NOT freeze them because the frozen ball and the warm chocolate react and cause cracks in the chocolate.
- Warm chocolate coats the truffles best. Keep the chocolate in microwave-safe bowls and reheat it for 20 seconds at a time when it starts to cool.
- When adding the faces, use plastic gloves to prevent fingerprints and melting.
- When drawing the whiskers, place a small chocolate drip from the toothpick where you want to begin, then let it fall into place like a tip on an icing bag.
- You can also use the filling in a plastic bunny candy mold. This one reminds me of the little chocolate bunnies my mom would make when I was little.
FAQs
Melt the chocolate in a double boiler over boiling water. Do not get water in the melted chocolate; it will seize and clump.
You can also melt the chocolate in a bowl in the microwave. Heat at 50% power for 45 seconds, then stir and repeat. Do not overheat the chocolate because it will burn.
Place the chocolate-dipped candies in a single layer on a baking sheet and freeze for at least 30 minutes.
Transfer the frozen candies to a freezer-safe bag and then freeze for up to 3 months. Thaw overnight in the refrigerator before adding the bunny ears and faces.
More Easy Easter Treats
- Easter Bark
- Coconut Easter Eggs
- Easter Rice Krispie Treats
- Chocolate Covered Marshmallow Bunnies
- Cadbury Chocolate Chip Cookies
Do you love a recipe you tried from Inside BruCrew Life?
Please leave a 5-star ⭐️ rating and a review in the comments section below.
Recipe
Peanut Butter Bunnies
Make these Peanut Butter Easter Bunnies with a homemade peanut butter cream filling. These are so fun to fill Easter baskets with.
Ingredients
- 36 miniature marshmallows
- 2 tablespoons hot pink sanding sugar
- 6 tablespoons butter, softened
- ½ cup creamy peanut butter
- ¼ cup marshmallow cream
- 2 cups powdered sugar
- ½ teaspoon vanilla extract
- pinch of table salt
- 1 - 10 ounce bag white chocolate melting wafers
- 72 mini candy eyes
- 36 flat round pink sprinkles
- 2 tablespoons dark chocolate melting wafers
Instructions
- Cut the mini marshmallows in half diagonally to make bunny ears. Dip the sticky side in the pink sugar. Set aside.
- Beat the butter, peanut butter, marshmallow cream, vanilla, and salt until creamy.
- Slowly add the powdered sugar until a soft dough forms.
- Roll the dough into 36 even balls. Refrigerate for 30 minutes.
- Melt the white chocolate according to the package directions.
- Remove a few peanut butter balls at a time from the refrigerator. Use a toothpick and spoon to dip the balls in the melted chocolate.
- Place the peanut butter balls on a tray lined with parchment paper. Remove the toothpick and top each ball with two marshmallow ears. Let them set up on a parchment paper lined tray on the counter. Repeat with the remaining balls.
- Use a toothpick to add some melted white chocolate to the back of two eyes, and one heart sprinkle. Place on the front of the ball for the bunny face, then repeat with all the balls.
- Melt the dark chocolate in the microwave. Dip a toothpick in the melted chocolate and draw whiskers on the bunny faces. Place in a paper towel-lined container on the counter for 2-3 days or in a tightly sealed container in the fridge for up to a week.
Notes
- If the dough is too crumbly, add a bit more peanut butter. If it is too sticky, add more powdered sugar until it resembles a dough. You should be able to roll the dough without it sticking to your hands or falling apart.
- Refrigerate the peanut butter candies for at least 30 minutes or longer. Only remove a few at a time to dip. They stay on the toothpicks better when they are cold. Do NOT freeze them because the frozen ball and the warm chocolate react and cause cracks in the chocolate.
- Warm chocolate coats the truffles best. Keep the chocolate in microwave-safe bowls and reheat it for 20 seconds at a time when it starts to cool.
- When adding the faces, use plastic gloves to prevent fingerprints and melting.
- When drawing the whiskers, place a small chocolate drip from the toothpick where you want to begin, then let it fall into place like a tip on an icing bag.
- You can also use the filling in a plastic bunny candy mold. This one reminds me of the little chocolate bunnies my mom would make when I was little.
Nutrition Information:
Yield: 36 Serving Size: 1Amount Per Serving: Calories: 191Total Fat: 7gSaturated Fat: 3gTrans Fat: 0gUnsaturated Fat: 3gCholesterol: 7mgSodium: 61mgCarbohydrates: 32gFiber: 0gSugar: 24gProtein: 2g
Nutrition facts are an estimate and are not guaranteed to be accurate. If you need special diet advice, please see a registered dietician.
This post was first published in April 2011. It was updated and then republished in March 2024.
We participate in the Amazon Services LLC Program, an affiliate program designed to earn fees by linking to Amazon.com.


Carole from Carole's Chatter says
Fab, this would be a great contribution to Food on Friday: Easter Foods over at Carole's Chatter. Please do bring it over. Cheers
Allie says
Those are great! And too funny the giant bunnies! I agree with you! That and different landmarks seemed to take hours and hours to get to but now as an adult I can't figure why I thought that 15 minute trip took hours and hours...
Thanks for linkg up to Making It With Allie!
Alliemakes.blogspot.com
Holly says
Peanut butter...I will make these even if it is not easter! It reminds me of my grandparents and growing up too!
Jenn Erickson says
They not only sound delicious, but they're beautifully, done Jocelyn. I do some chocolatiering every year for Easter, but didn't make any candies with centers this year. Next year, however, your bunnies are on my "must-make" list. I've been looking for a good PB filling recipe and yours looks like the ultimate!
Thanks for keeping up the inspiration on "A Little Birdie Told Me..." at Rook No. 17!
Jenn
SusieQTpies says
Yum yum!!! Just saw you on the It's a Keeper Thur. Hop! Stop on over at my blog and link up this tasty recipe in my Easter/Spring Recipe/Idea Hop! If you have others, feel free to link up! I'll keep it going for a few months so you should get some visits from it!!!<br
Allison {A Glimpse Inside} says
Wow! I always love to see what you come up with! These look fabulous and my hubby would LOVE then. Thanks for linking up! I'll be featuring these tomorrow.
Cindy says
I would love to try this recipe, it looks great. However it will have to wait now until I lose some weight. 🙂 Hubby and I just started a diet...not fun!
Thanks for sharing.
Tina says
Yum! I love peanut butter and chocolate! I don't have a bunny mold, but I'll have to make this recipe anyway! How about an Easter Choo choo train? 🙂
itsybitsybrianna says
hi there!Stopping by from Trendy Treehouse!Please stop by and say hi!
DeanO says
Peanut butter @ chocolate bunnies. A recipe straight from Heaven I'm sure! My grandparents owned Aleyeska Candy Kitchen in Anchorage, AK for many years and they had a mold for solid chocolate Easter Bunnies that was so big you couldn't begin to finish the bunny in - even a week!
Tina @ MOMS CRAZY COOKING says
Your bunnies are adorable!!!!! We'd love for you to come link them up.And a perfect treat for Easter. Myself and two other wonderful bloggers are hosting THIS WEEK'S CRAVINGS "Easter Cookies & Treats". We would love for you to com link up your recipe! Hope to see you there!<br