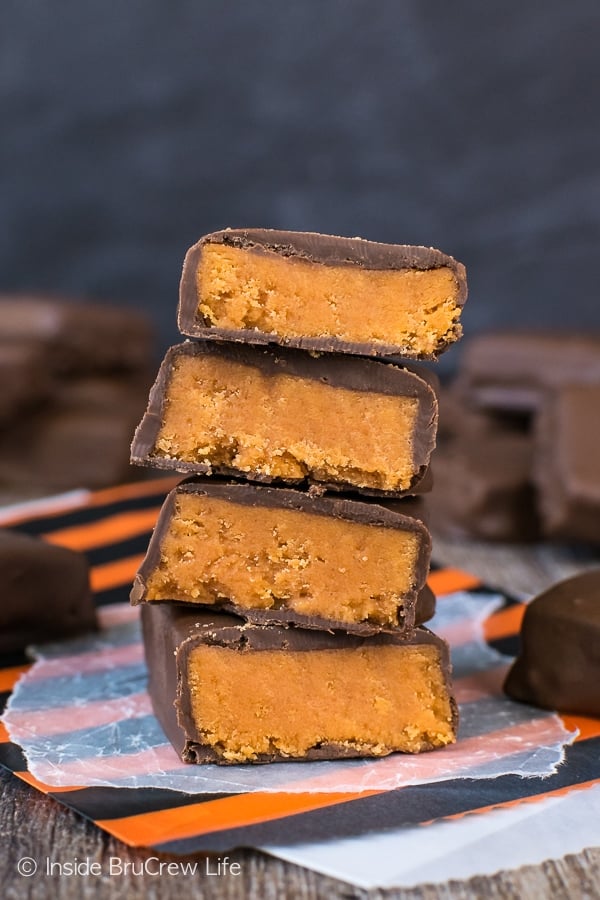
You can make Homemade Butterfingers with just three ingredients! Candy corn, peanut butter, and chocolate give these homemade candy bars their delicious taste. Get ready to create this easy and delicious Butterfinger recipe in your own kitchen.
Did you know that you can do more with candy corn other than just eat it? I mean we all know candy corn is delicious in things like this candy corn popcorn or this candy pizza. And it's also perfect for decorating things like a Reese's turkey.
But did you know that you can turn candy corn into a copycat Butterfinger bar??? I was so excited when I found out you could turn candy corn into this delicious three ingredient dessert.
Why we Love these Candy Bars
We always have a few leftover bags of candy corn after fall is over, so this butterfinger recipe is the perfect way to turn them into a unique and delicious treat.
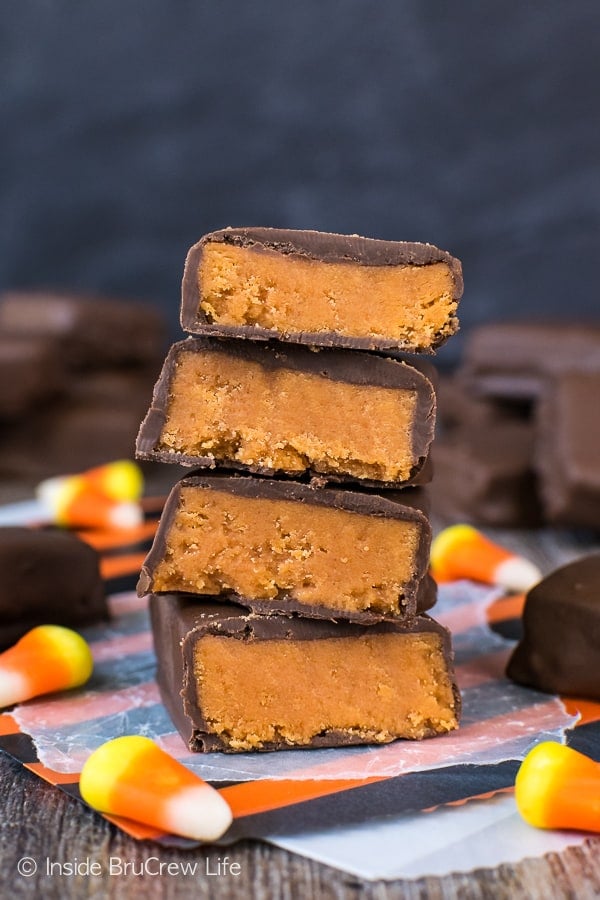
And yes, they actually do taste just like a Butterfinger candy bar! They have a slight crunchy texture, and the flavor is spot on. In fact, we brought a batch of these Butterfinger candy bars to our small group last weekend, and everyone was raving over them!
What are Butterfingers?
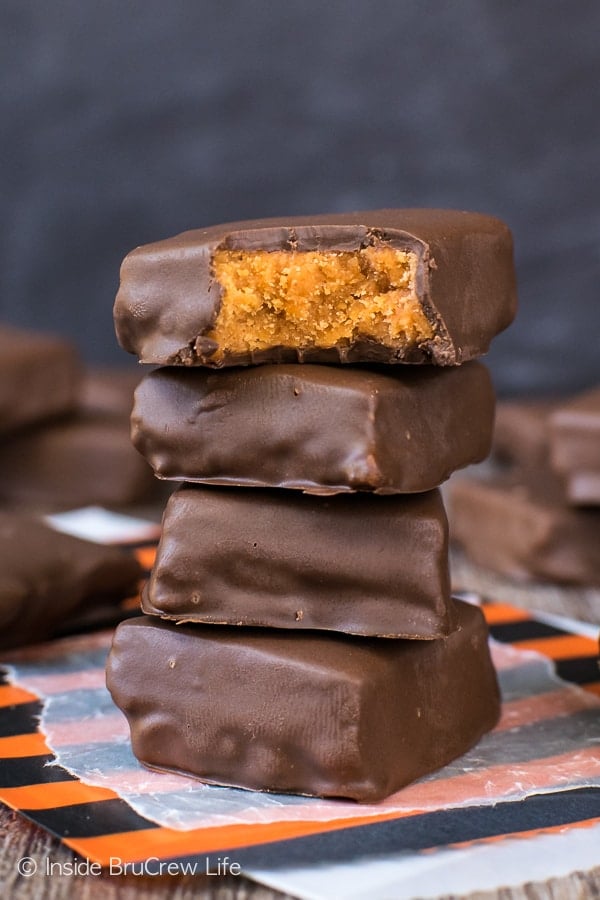
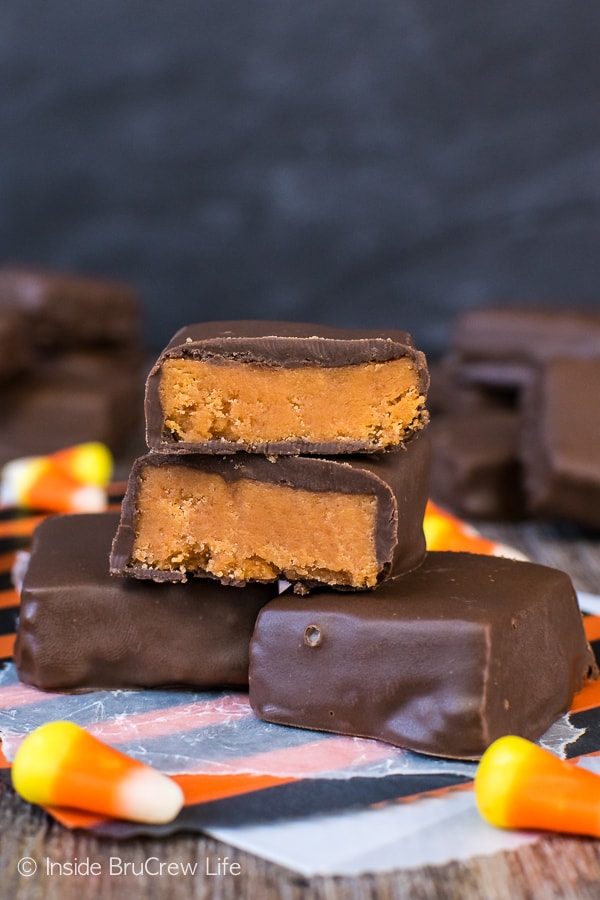
Butterfinger candy bars has been around since the 1920's. These candy bars have a crispy, peanut butter layer that is covered in chocolate.
The crunchy orange filling is made by combining a cooked hard candy with peanut butter.
Butterfinger Ingredients
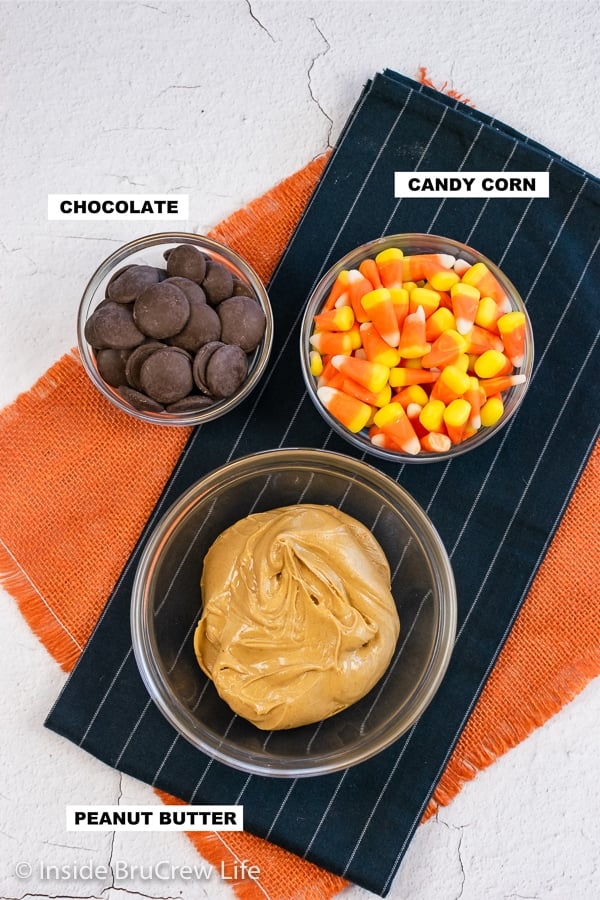
If you want to make Butterfingers at home, you will only need three ingredients. Mix these together to achieve the same texture and taste as the candy bars in the store.
- Candy Corn - Use traditional candy corn, not any of the flavored ones. Some grocery stores carry this candy year round.
- Peanut Butter - Creamy works best, but a crunchy peanut butter would give the candy bars a little bit more of a crunch.
- Chocolate Melting Wafers - Use a good quality of chocolate to coat these Butterfinger bites. Our favorite brand is Ghirardelli because they melt so smooth and taste delicious. Want to make white chocolate Butterfinger bars? Use white chocolate melting wafers.
How to make Homemade Butterfingers
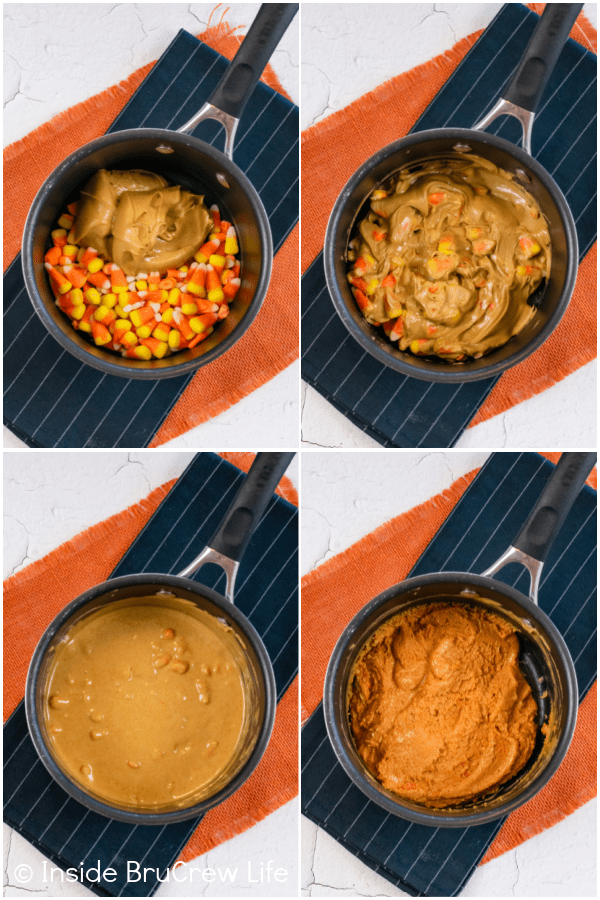
These homemade Butterfinger candy bars can be made and chilling on your counter in a matter of minutes. It's as simple as melting the two ingredients until creamy, then dipping the cooled mixture in chocolate.
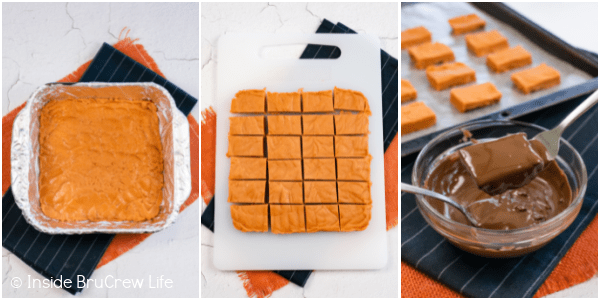
Step One: Melt
- Place one cup of candy corn and one cup of creamy peanut butter in a small saucepan.
- Stir over low-medium heat until it is melted and creamy.
Step Two: Cool
- Pour the hot candy into a foil lined 8x8 pan. Let it cool completely while sitting at room temperature.
- Lift the foil and candy out of the pan and pull the foil away from the edges.
- Use a sharp knife to cut the block into 24 mini bars.
Step Three: Dip
- Melt the chocolate melting wafers in the microwave according to the package directions.
- Dip each candy bar into the melted chocolate and tap off the excess before placing it on a piece of parchment paper on a baking sheet.
- Let the chocolate set before storing the homemade butterfinger bites in a container or bag.
Frequently Asked Questions
Can I make these candy bars peanut free?
You sure can. I have had readers successfully use cashew butter to make these homemade Butterfinger bites.
Can I make these into fun holiday shapes?
Definitely!!! You can press the Butterfinger mixture into candy molds before it is completely cooled. Some popular shapes are eggs for Easter, skulls for Halloween, and bells for Christmas.
- Paint the inside of a candy mold with different colored melted chocolate using a candy paint brush.
- Refrigerate the mold for 5 minutes.
- Brush a second coat of melted chocolate into the candy molds, so it has a thick layer. Set aside.
- Heat the candy corn and peanut butter until melted and creamy. Let the mixture cool, but DO NOT let it harden. It needs to be pliable, so you can press and shape it.
- Press small pieces of the Butterfinger candy into the painted candy mold.
- Cover the back with more melted chocolate and refrigerate for 5 minutes before popping them out of the mold.
How long do these homemade candy bars last?
I don't know. We actually eat them too quickly to find out. LOL! Actually, they should keep for 5-6 days in a sealed container on the counter or up to 2 weeks if refrigerated.
More Homemade Candy Recipes
- Peppermint Creams
- Peanut Butter Balls
- Cookie Dough Truffles
- Coconut Cream Eggs
- Take 5 Bar
- Mickey Mouse Cake Pops
- Reese's Truffle recipe
- Amish Peanut Butter Eggs
Love a recipe you tried from Inside BruCrew Life?
Please consider leaving a 5 star ⭐️ rating in the recipe card below and/or a review in the comments section further below.
Recipe
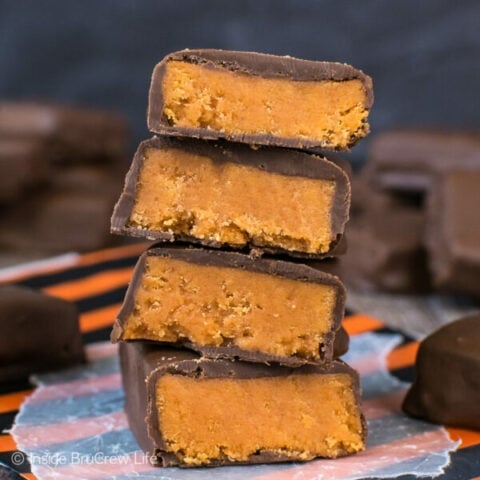
Homemade Butterfinger Recipe
You can make these Homemade Butterfingers with just three ingredients! Candy corn, peanut butter, and chocolate give these homemade candy bars their delicious taste. Get ready to create this easy and delicious Butterfinger recipe in your own kitchen.
Ingredients
- 1 cup candy corn
- 1 cup creamy peanut butter
- 1 cup chocolate melting wafers
Instructions
- Line an 8x8 pan with foil. Set aside.
- In a saucepan, heat the candy corn and peanut butter over low-medium heat until melted, stirring often.
- Pour into the prepared pan and let cool completely.
- Remove the foil and candy from the pan. Cut into 24 small bars using a long sharp knife.
- Melt the chocolate wafers according to the package directions.
- Dip the candy bars one at a time into the melted chocolate making sure to cover all sides.
- Lift out with a fork and gently tap the handle of the fork on the side of the bowl to remove the excess chocolate.
- Place the candy bars on parchment paper and let set.
Notes
- Need a peanut free candy? Use cashew butter in place of the peanut butter.
- Make the candy bars into fun shapes by paint the inside of candy molds with melted chocolate. Refrigerate for 5 minutes. Press the cooled Butterfinger mixture into the candy molds. (If the mixture is too hard, you can microwave it for a few seconds until pliable but not hot. Cover the tops with melted chocolate. Refrigerate 5 minutes before trying to remove from the candy molds.
Nutrition Information:
Yield: 24 Serving Size: 1Amount Per Serving: Calories: 132Total Fat: 7gSaturated Fat: 2gTrans Fat: 0gUnsaturated Fat: 4gCholesterol: 2mgSodium: 58mgCarbohydrates: 15gFiber: 1gSugar: 12gProtein: 3g
*The post and recipe for Homemade Butterfingers was originally posted on October 26, 2010. The pictures and post were updated and republished on October 23, 2018.


Joy says
How cute!! My daughter loves owls also! Iw ill have to give this a try! Happy iFellowship Day!
Love...Laughter...Life says
WOW...That is so Cute! I cannot wait to make these. Butterfingers are my favorite!!!
Penny says
Too cute! And shamefully I knew exactly what smizing was! I'm a reality show junkie. My husband HATES that show so I DVR it - and watch it when no one else is around! LOL!
Happy iFellowship Day!
I hope your Wednesday is filled with many smiles (from both your lips and your eyes!)
Sherry @ Lamp Unto My Feet says
Too cute! Never heard of "Smizing", but I can totally "see" that! 🙂
The Bonjour Four says
those are SOOO cute! great job! I LOVE butterfinger!
Tara says
Those are cute cupcakes. Thanks for linking up at Trendy Treehouse
carissa @ lowercase letters says
ha - smizing! never heard of it, but just tried it... it's tough! and kinda fun! : )
i love butterfingers! can't wait to make these!
p.s.- i need to email you back about the headband colors! haven't forgotten!!!
Kristan says
Thank you so much for the props!!
I hate to say it, but I really like you version much better than mine. So cute!!! 🙂
Kristan (Cookbook Queen)
Alissabeth says
So fun!
Following you from Tuesday Tag Along.
Creative Cupcake Recipes says
What a great recipe. I needed a new cupcake for my tate-testers at work. Thanks for sharing.
Shannon says
Those cupcakes are too darn cute! And I'm with you, I've never heard of smizing and think it'd be very hard to do!
Amanda says
Hello again!
I was sharing your blog with one of my friends so my copy 'n pastes were mixed up 🙂
Your blog is adorable!
Mindy says
Totally not going to judge.. that is the way that I roll most of the time around here.
Can't wait to see you smizing in your family pics! 😉
HoosierHomemade says
Those cupcakes are so fun! Thanks for sharing on Cupcake Tuesday!
~Liz
Jacqueline says
I hopped on over from Cupcake Tuesday. Love these, I thought they were fondant eyes. What a cute mold and the kiddies would love them, they make quite a conversation piece don't they!
The Answer Is Chocolate says
How cute are these?! I think I snize and not smize ( sneer with my eyes) but I swoon over these goodies!
Amy says
I'm going to have to adopt "smizing" into my vocab. =) I'm a new follower!
theultimate says
Such an easy recipe, but it sounds soooo delicious! Yes please! =]
Amber Zimmerman says
How fun! Love to see your baking goodies. . .now if I only had the time to try some out! So swamped with editing pics and some assignments. I always enjoy your recipes. Wish I lived closer so I could be your "taste tester". 😉 Can't wait to see your family pics! I'm sure they're gorgeous!
Katie says
I am so not judging you on the cake mix... in fact I cheered at my desk at work, because I would have time to make the cupcakes from the box! Super cute!